- Mix all ingredients except olive oil in a large bowl. Knead for 5-7 minutes until a soft dough forms.
- Add 1 tablespoon olive oil and knead until smooth and elastic. Adjust with flour/water if sticky/dry.
- Transfer dough to an oiled bowl, cover, and let rise in a warm place for 1-1.5 hours, or until doubled in size.
- Punch down dough and divide into 6 equal portions. Add 2-3 drops of food coloring to each and knead lightly for a marbled effect.
- Rest colored dough portions for 10 minutes. Roll each portion into long strips and stack them together.
- Roll stacked strips tightly into a log shape. Place in a greased loaf pan, cover, and let rise again for 30-60 minutes.
- Preheat oven to 180°C (350°F). Bake bread for 25-30 minutes, or until golden brown and sounds hollow when tapped.
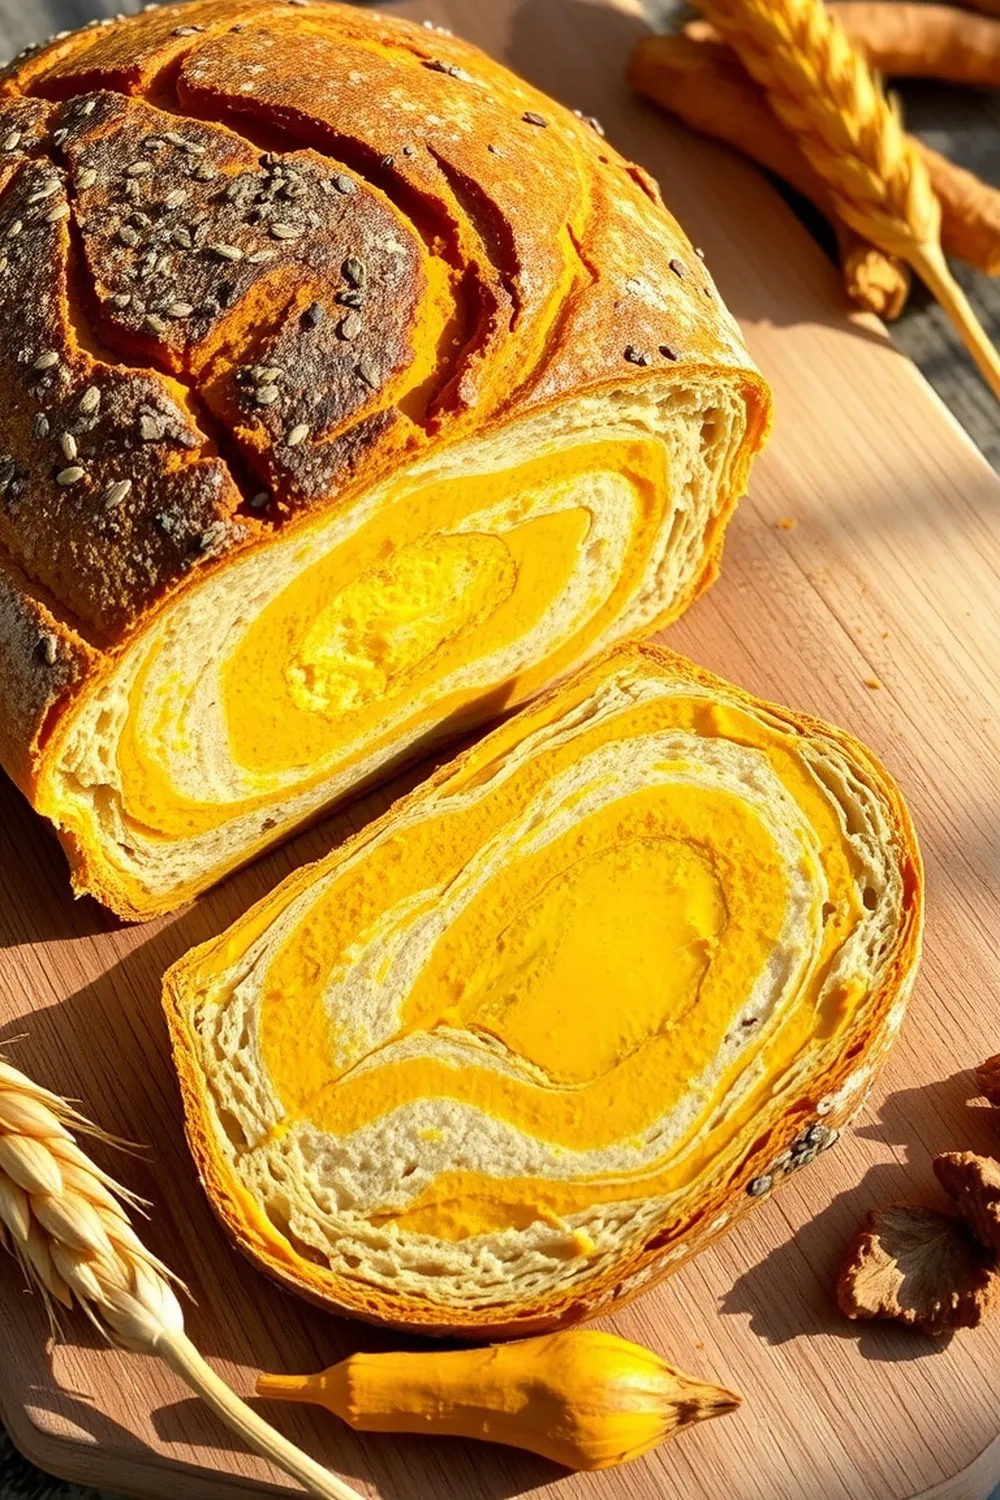
- Cool completely before slicing to reveal vibrant swirls.
- Calories:2500 kcal25%
- Energy:10460 kJ22%
- Protein:50 g28%
- Carbohydrates:450 mg40%
- Sugar:10 mg8%
- Salt:500 g25%
- Fat:8 g20%
Last Updated on 4 months by Neha Deshmukh
Marbled Bread Recipe – Easy Olive Oil & Yeast Swirl Bread
Introduction
Okay, let’s be real – is there anything more satisfying than slicing into a loaf of homemade bread and revealing a gorgeous swirl of color inside? I first stumbled upon marbled bread a few years ago and was instantly hooked. It looks incredibly impressive, but honestly? It’s surprisingly easy to make. This recipe uses simple ingredients and a little bit of patience, and the result is a stunning loaf that’s perfect for breakfast, brunch, or just a cozy afternoon treat. Get ready to wow your family and friends!
Why You’ll Love This Recipe
This isn’t just about looks, though the swirls are pretty spectacular. This bread is wonderfully soft, thanks to the olive oil, and has a lovely, subtle flavor. It’s a fun baking project that’s perfect for getting kids involved (who doesn’t love playing with food coloring?!). Plus, it’s a fantastic way to elevate your everyday bread game.
Ingredients
- 3 cups Plain Flour (about 375g)
- 1 cup Warm Water (240ml)
- 2 teaspoons Yeast (about 6g – I prefer instant yeast)
- 1 teaspoon Salt (5g)
- 2 tablespoons Sugar (25g)
- 2 tablespoons Olive Oil (30ml)
Ingredient Notes
Let’s talk ingredients for a sec! Using good quality olive oil really makes a difference in the texture and flavor of this bread. Don’t skimp – a fruity extra virgin olive oil is lovely.
I usually use instant yeast because it’s super convenient and doesn’t need to be proofed. If you’re using active dry yeast, you’ll want to dissolve it in the warm water with the sugar for about 5-10 minutes until it gets foamy.
As for flour, all-purpose flour works perfectly fine. I sometimes like to substitute about 1/2 cup with whole wheat flour for a slightly nuttier flavor, but it will make the bread a little denser.
Step-By-Step Instructions
- In a large bowl, combine the flour, warm water, yeast, salt, and sugar. Give it a good mix!
- Now, get your hands in there and knead the dough for about 5-7 minutes. You’re aiming for a soft, slightly sticky dough.
- Add 1 tablespoon of olive oil and continue kneading until the dough becomes smooth and springy. If it’s too sticky, add a little flour, one tablespoon at a time. If it’s too dry, add a tiny bit of water.
- Lightly oil a clean bowl. Place the dough in the bowl, turning to coat it with oil. Cover the bowl with plastic wrap or a clean kitchen towel and let it rise in a warm place for about an hour, or until doubled in size.
- Once the dough has risen, gently punch it down to release the air. Divide the dough into 6 equal portions.
- Here comes the fun part! Add 2-3 drops of food coloring to each portion of dough. I like to use gel food coloring because it’s more concentrated, but liquid works too. Gently knead each portion to distribute the color – don’t overdo it, you want a marbled effect, not a solid color!
- Let the colored dough rest for about 10 minutes. Then, roll each portion into a long strip. Stack the strips on top of each other.
- Carefully roll the stacked strips tightly into a log shape. Place the log into a greased loaf pan. Cover and let it rise again for another hour.
- Preheat your oven to 180°C (350°F). Bake the bread for 25-30 minutes, or until it’s golden brown and sounds hollow when tapped on the bottom.
- Let the bread cool completely in the pan before slicing. This is the hardest part, I know! But trust me, it’s worth the wait.
Expert Tips
- Don’t rush the rising process! A warm, draft-free spot is key.
- If you don’t have a kitchen towel, plastic wrap works just fine for covering the dough.
- To prevent the colors from blending too much, work quickly when stacking and rolling the dough.
- A slightly tacky dough is better than a dry dough.
Variations
- Cheese & Herb: My friend Priya loves adding grated cheddar and chopped rosemary to the dough for a savory twist.
- Chocolate Swirl: Swap the food coloring for cocoa powder and add a tablespoon of sugar for a chocolatey treat. My kids adore this one!
- Spiced Oil: Infuse the olive oil with garlic, chili flakes, or your favorite herbs for extra flavor.
Vegan Adaptation
To make this bread vegan, simply substitute the olive oil with a vegan butter alternative. Ensure your sugar is vegan-friendly (some refined sugars use bone char in processing).
Gluten-Free Adaptation (using gluten-free flour blend)
For a gluten-free version, use a good quality gluten-free all-purpose flour blend that contains xanthan gum. You may need to adjust the amount of water slightly, as gluten-free flours absorb liquid differently.
Spice Level (suggestions for adding flavored oils)
Experiment with flavored oils! A chili-infused olive oil adds a subtle kick, while a garlic-herb oil brings a savory depth.
Festival Adaptations (Navratri/Diwali – using natural food coloring)
For festive occasions, use natural food coloring! Beetroot powder for pink, turmeric for yellow, and spinach juice for green are all great options.
Serving Suggestions
This bread is delicious on its own, but it’s even better with a smear of butter, jam, or cream cheese. It’s also fantastic toasted and served with a fried egg for breakfast.
Storage Instructions
Store leftover bread in an airtight container at room temperature for up to 3 days. For longer storage, you can freeze it for up to 2 months.
FAQs
What type of flour is best for this marbled bread?
All-purpose flour works great! You can experiment with whole wheat flour for a nuttier flavor, but it will make the bread a bit denser.
Can I make this bread without using food coloring?
Absolutely! It will still taste delicious, just without the pretty swirls.
How can I tell if the dough has risen enough?
The dough should have doubled in size. Gently poke it with your finger – if the indentation remains, it’s ready to go.
Can I freeze the baked bread or the unbaked dough?
Yes to both! Baked bread can be frozen for up to 2 months. Unbaked dough can also be frozen after the first rise – just thaw it completely before continuing with the recipe.
What is the best way to prevent the colors from blending too much during marbling?
Work quickly when stacking and rolling the dough. Don’t over-knead the colored portions, and try not to press too hard when rolling the log.


Neha Deshmukh
Neha holds a B.A. in History with a focus on Indian and world history, including ancient, medieval, and modern periods. At RecipesOfIndia.org — the world’s largest database of Indian recipes — she combines her love for food and history by exploring how India’s past has shaped its culinary traditions.