- Rinse the poha (thick variety) in water and drain thoroughly using a strainer.
- Combine the drained poha with yogurt (curd) in a bowl, mix well, and let it rest, covered, for 15-20 minutes.
- Mash the soaked mixture into a slightly coarse paste using your hands or a spoon.
- Add ginger-green chili paste, chopped coriander, curry leaves, and grated carrots. Add finely chopped onions, if using.
- Mix in rice flour and salt. Add 1-2 tablespoons of water, if needed, to form a firm, non-sticky dough.
- Grease your palms with oil and shape the dough into small, flat vadais (patties).
- Heat oil in a kadhai (deep frying pan) over medium heat and fry the vadais until golden brown and crisp.
- Drain the fried vadais on paper towels to remove excess oil.
- Serve warm with chutney or sambar.
- Calories:220 kcal25%
- Energy:920 kJ22%
- Protein:5 g28%
- Carbohydrates:30 mg40%
- Sugar:2 mg8%
- Salt:250 g25%
- Fat:8 g20%
Last Updated on 6 months ago by Neha Deshmukh
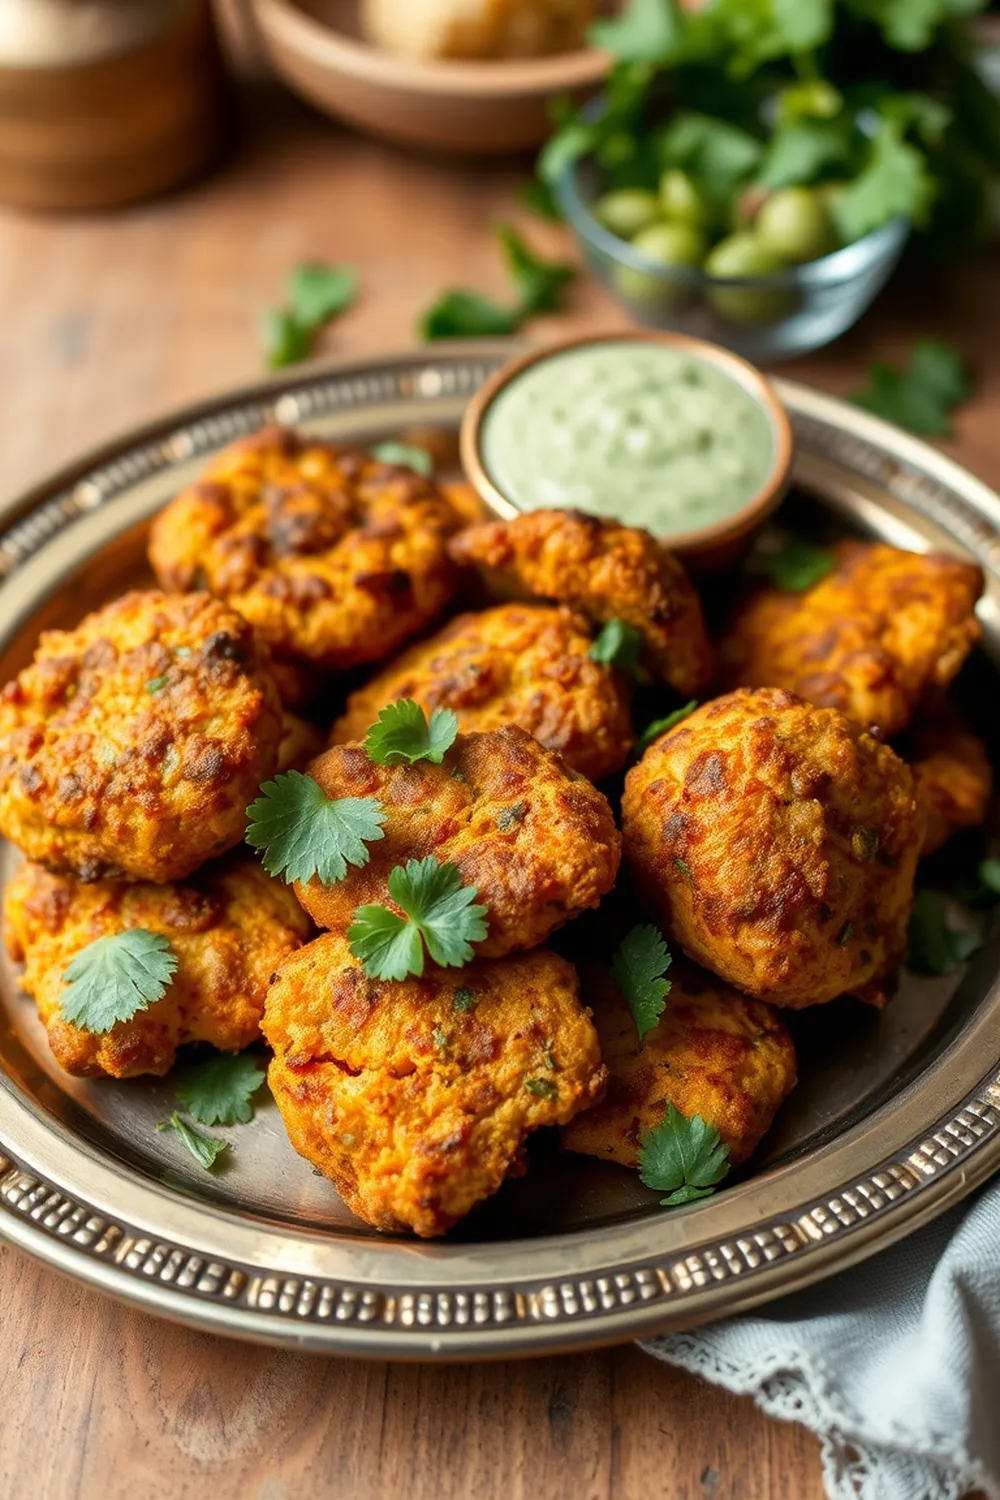
Authentic Poha Vada Recipe – Crispy Indian Snack with Carrots
Hey everyone! Today, I’m sharing a recipe that’s close to my heart – Poha Vada. These crispy, golden fritters are a staple in many Indian households, and honestly, nothing beats a warm Poha Vada with a cup of chai. I first made these when I was trying to recreate my grandmother’s version, and after a few attempts, I think I’ve finally nailed it! Let’s get cooking, shall we?
Why You’ll Love This Recipe
This Poha Vada recipe isn’t just about a delicious snack; it’s about comfort, tradition, and a little bit of crispy magic. It’s surprisingly easy to make, even if you’re new to Indian cooking. Plus, the addition of grated carrots adds a lovely sweetness and texture that takes it to the next level. You’ll love how satisfyingly crunchy these are!
Ingredients
Here’s what you’ll need to make these delightful Poha Vadas:
- 1 cup thick Poha (flattened rice)
- 1 cup Yogurt | Curd
- 2 Green Chili, finely chopped
- 1 small piece Ginger, grated
- 3 tbsp Rice Flour
- Few Curry Leaves, chopped
- Few Coriander Leaves, chopped
- ½ cup Grated Carrot
- Salt as needed
- Oil for deep frying
Ingredient Notes
Let’s talk ingredients! Getting these right makes all the difference.
- Thick Poha is Key: Don’t use the thin, delicate poha for this recipe. We need the thicker variety to hold its shape. If you can’t find thick poha, you can soak the regular poha for a shorter time.
- Curd/Yogurt Variations: Depending on where you are in India, you might use slightly different types of curd. Dahi (Indian yogurt) is ideal, but plain yogurt works beautifully too. Just make sure it’s not too sour!
- Carrot Addition: My personal touch! Adding grated carrots gives a subtle sweetness and a beautiful color. My kids absolutely love it, and it’s a sneaky way to get some veggies in. Feel free to adjust the amount to your liking.
Step-By-Step Instructions
Alright, let’s get down to making these beauties!
- First, rinse the thick poha in water and drain it thoroughly using a strainer. This gets rid of any excess starch.
- Now, combine the drained poha with the curd in a bowl. Mix well and let it rest, covered, for about 15 minutes. This allows the poha to soften and absorb the flavors.
- After 15 minutes, mash the soaked mixture into a coarse paste using a spoon. It shouldn’t be completely smooth – a little texture is good!
- Add the ginger-green chili paste, chopped coriander, curry leaves, and grated carrots to the mixture. If you’re using onions (see variations below!), add them now too.
- Mix in the rice flour and salt. If the mixture feels too dry, add 1-2 tablespoons of water to form a firm dough. It should hold its shape when you try to mold it.
- Grease your palms with a little oil. This prevents the dough from sticking. Shape the dough into small, flat vadais – about 2 inches in diameter.
- Heat oil in a kadhai (or deep frying pan) over medium heat. Carefully drop the vadais into the hot oil, a few at a time.
- Fry the vadais until they’re golden brown and crispy on both sides. This usually takes about 3-4 minutes per batch.
- Remove the fried vadais and drain them on paper towels to remove any excess oil.
And that’s it! Your Poha Vadas are ready to enjoy.
Expert Tips
- Oil Temperature: Maintaining the right oil temperature is crucial. If the oil is too hot, the vadais will burn on the outside and remain uncooked inside. If it’s too cold, they’ll absorb too much oil.
- Don’t Overcrowd: Fry the vadais in batches to avoid lowering the oil temperature.
- Taste Test: Before shaping all the vadais, fry one to check the seasoning and adjust salt if needed.
Variations
- With Onions: Add ½ cup of finely chopped onions to the mixture for extra flavor. My mom always adds onions!
- Spicier Vada: Increase the number of green chilies or add a pinch of red chili powder.
- Herbs Galore: Feel free to experiment with other herbs like mint or cilantro.
Vegan Adaptation
To make this recipe vegan, simply substitute the curd with plant-based yogurt. Coconut yogurt or soy yogurt work really well.
Gluten-Free Adaptation
This recipe is naturally gluten-free as long as you ensure your rice flour is certified gluten-free.
Spice Level Adjustment (Green Chili)
Adjust the amount of green chilies to your preference. Remove the seeds for a milder flavor. You can even substitute with a pinch of red chili powder if you prefer.
Festival Adaptations (Diwali, Ganesh Chaturthi)
Poha Vada is a popular snack during festivals like Diwali and Ganesh Chaturthi. It’s perfect for offering to guests or enjoying with family.
Serving Suggestions
Serve Poha Vada warm with your favorite chutney or sambar. Coconut chutney, mint-coriander chutney, or tomato chutney are all excellent choices. A cup of hot chai is the perfect accompaniment!
Storage Instructions
Poha Vadas are best enjoyed fresh. However, you can store leftovers in an airtight container at room temperature for up to 2 days. They will lose some of their crispness, but you can reheat them in a preheated oven or air fryer to restore some of the crunch.
FAQs
What is the best type of Poha to use for Vada?
Thick poha is the best! It holds its shape better during frying.
Can I make Poha Vada without onions?
Absolutely! This recipe works perfectly well without onions.
How do I get the Vadas to stay crisp for longer?
Make sure to drain them well on paper towels after frying and store them in an airtight container. Reheating in an oven or air fryer helps too.
Can I steam the Vadas instead of frying?
While you can steam them, the texture won’t be the same. Frying gives them that signature crispy exterior.
What chutneys or accompaniments pair best with Poha Vada?
Coconut chutney, mint-coriander chutney, and tomato chutney are all fantastic choices.
Enjoy making these delicious Poha Vadas! I hope this recipe brings a little bit of Indian sunshine to your kitchen. Let me know how they turn out in the comments below!


Neha Deshmukh
Neha holds a B.A. in History with a focus on Indian and world history, including ancient, medieval, and modern periods. At RecipesOfIndia.org — the world’s largest database of Indian recipes — she combines her love for food and history by exploring how India’s past has shaped its culinary traditions.


