- Rinse and soak parboiled rice for 2-3 hours. Grind with red chilies into a thick batter (add minimal water).
- Powder roasted gram dal finely and sieve to remove any coarse particles.
- Combine rice batter, butter, salt, cumin, ajwain, and gram dal powder. Mix into a non-sticky dough (add water if needed).
- Grease the murukku press with the thenkuzhal mold. Fill with dough and press spirals onto a ladle.
- Heat oil until a small piece of dough sizzles. Gently slide the pressed murukku into the hot oil.
- Fry until golden brown, regulating the heat to prevent burning. Drain on paper towels.
- Cool completely before storing in airtight containers.
- Calories:73 kcal25%
- Energy:305 kJ22%
- Protein:2 g28%
- Carbohydrates:14 mg40%
- Sugar:0.2 mg8%
- Salt:7 g25%
- Fat:1 g20%
Last Updated on 2 months by Neha Deshmukh
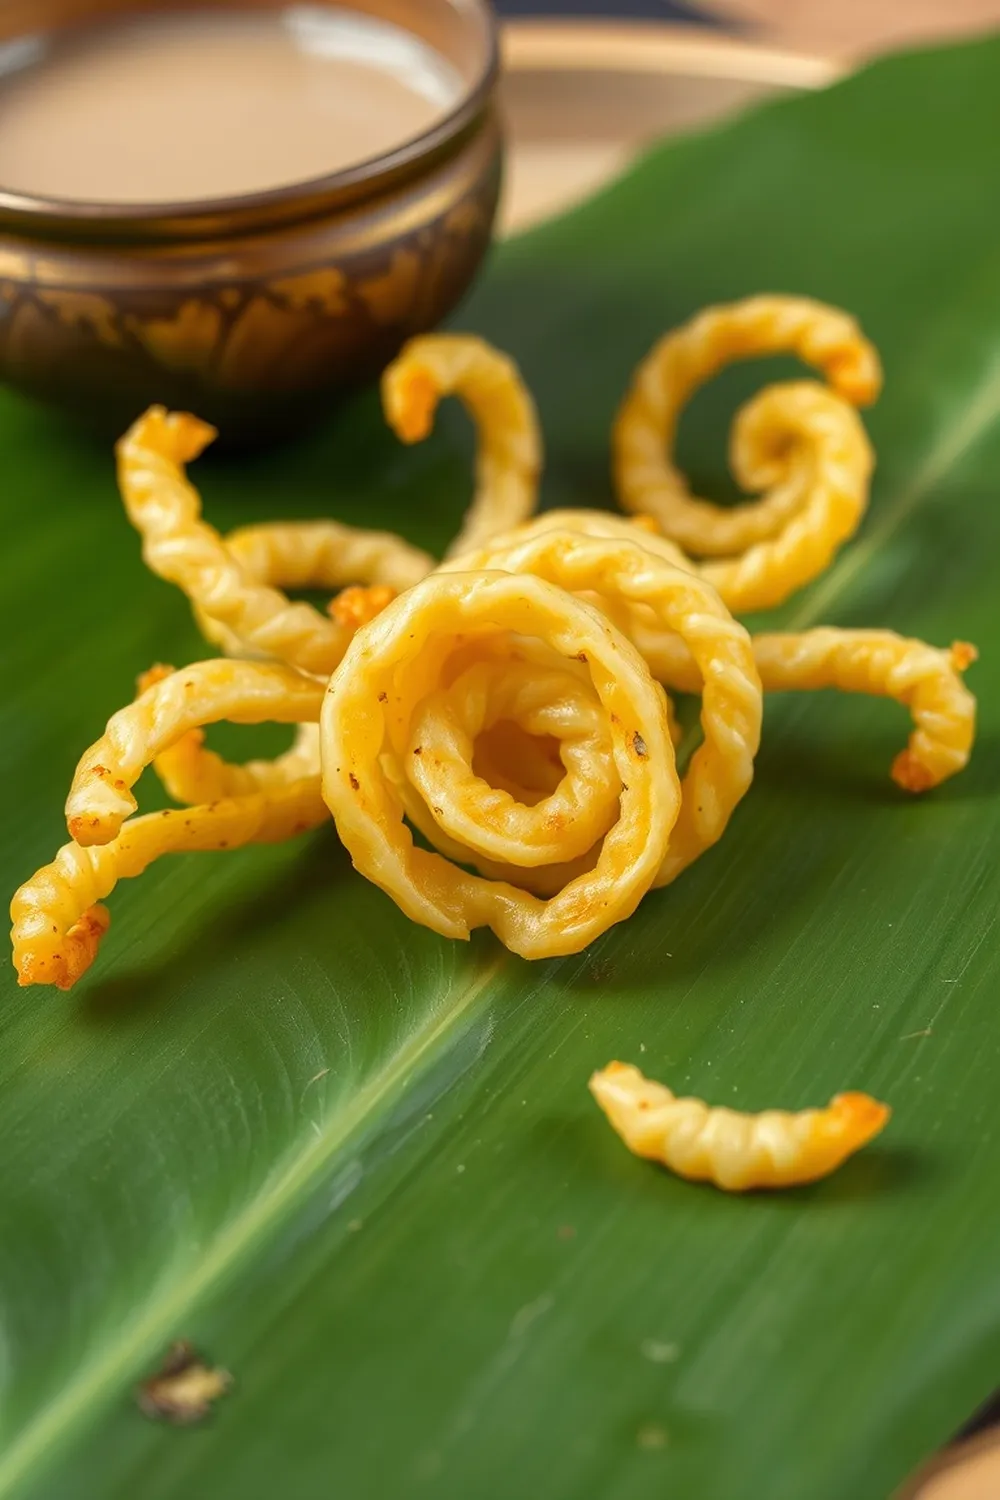
Authentic Murukku Recipe – Crispy Rice & Gram Dal Snack
Hey everyone! If you’ve ever wandered through Indian sweet and savoury shops, you’ve probably spotted those beautiful, spiraled snacks – Murukku! They’re seriously addictive, wonderfully crunchy, and surprisingly fun to make. I remember the first time I attempted these; it took a couple of tries to get the hang of the pressing, but the reward is so worth it. Today, I’m sharing my family’s recipe for perfectly crispy Murukku, guaranteed to disappear in minutes.
Why You’ll Love This Recipe
This Murukku recipe isn’t just about a delicious snack; it’s about tradition. It’s a staple in South Indian households, especially during festivals. It’s also surprisingly satisfying to make from scratch. The combination of rice and gram dal creates a unique texture – light, airy, and incredibly moreish. Plus, you can adjust the spice level to your liking!
Ingredients
Here’s what you’ll need to create these crispy delights:
- 1 cup parboiled rice
- ½ cup roasted gram dal (besan)
- 1 tablespoon butter
- 2 nos red chillies
- 1.2 teaspoon cumin seeds
- ½ teaspoon ajwain (carom seeds)
- Salt to taste
- Oil as needed (for deep frying)
Ingredient Notes
Let’s talk ingredients – a few little tips can make all the difference!
Parboiled Rice: The Key to Crispy Murukku
Using parboiled rice (also known as converted rice) is essential for that signature crunch. It has less starch than regular rice, which prevents the Murukku from becoming soggy. About 200g of parboiled rice works perfectly.
Roasted Gram Dal (Besan): Achieving the Right Texture
Roasted gram dal, or besan, adds a lovely nutty flavour and helps bind the Murukku together. Make sure it’s finely powdered and sieved to remove any coarse bits – this ensures a smooth dough. You’ll need around 100g.
Butter: For Richness and Flavour
A tablespoon of butter adds a subtle richness and helps create a tender crumb. You can use ghee for an even more authentic flavour, if you prefer!
Red Chillies: Adjusting the Spice Level
I use 2 red chillies for a mild kick, but feel free to add more or less depending on your spice preference. You can also use Kashmiri red chillies for a vibrant colour and milder heat.
Cumin and Ajwain: Aromatic Spice Blend
Cumin and ajwain are a classic combination in Indian snacks. Ajwain also aids digestion – a little bonus!
Step-By-Step Instructions
Alright, let’s get cooking!
- First, rinse the parboiled rice and soak it in water for at least 2 hours. This softens the rice, making it easier to grind.
- Next, grind the soaked rice along with the red chillies into a thick, smooth batter. Add minimal water – you want a fairly dry consistency.
- Powder the roasted gram dal finely. Sieve it to remove any coarse particles. This is important for a smooth Murukku!
- In a large bowl, combine the rice batter, butter, salt, cumin seeds, and ajwain. Add the gram dal powder.
- Now, the fun part! Mix everything together and gradually add water, if needed, to form a non-sticky dough. It should be pliable but not too soft.
- Heat oil in a deep frying pan or kadhai over medium heat. To test if it’s ready, drop a tiny piece of dough into the oil – it should sizzle and rise to the surface immediately.
- Grease the murukku press with a little oil. Fill it with the dough.
- Gently press the Murukku spirals directly into the hot oil. Be careful not to overcrowd the pan.
- Fry the Murukku until golden brown and crispy, regulating the heat to prevent burning. Flip them occasionally for even cooking.
- Remove the Murukku from the oil and drain them on paper towels.
- Let them cool completely before storing in airtight containers. Trust me, they’re hard to resist, but they’ll stay crisper if you let them cool fully!
Expert Tips
- Dough Consistency is Key: The dough shouldn’t be too wet or too dry. It should hold its shape when pressed.
- Oil Temperature: Maintaining the right oil temperature is crucial. Too low, and the Murukku will absorb too much oil. Too high, and they’ll burn.
- Pressing Technique: Apply even pressure when pressing the Murukku. This ensures uniform spirals.
Variations
Murukku is super versatile! Here are a few ways to switch things up:
- Vegan Murukku: Simply substitute the butter with a vegan butter alternative or a couple of tablespoons of oil. My friend, Priya, swears by using coconut oil for a subtle flavour.
- Gluten-Free Murukku: This recipe is naturally gluten-free, as long as your gram dal is certified gluten-free.
- Spice Level Adjustments: Add more red chillies, a pinch of cayenne pepper, or even a dash of black pepper for extra heat.
- Festival Adaptations (Diwali, Pongal): During Diwali, I sometimes add a pinch of hing (asafoetida) to the dough for a more festive aroma. For Pongal, a sprinkle of sesame seeds adds a lovely nutty flavour.
Serving Suggestions
Murukku is fantastic on its own with a cup of chai. It also pairs beautifully with sambar or chutney. It’s a perfect snack for tea time, picnics, or just a little something to munch on when those cravings hit!
Storage Instructions
Store cooled Murukku in airtight containers at room temperature. They’ll stay crispy for up to a week, but honestly, they rarely last that long in my house!
FAQs
What type of rice is best for making Murukku?
Parboiled rice (converted rice) is the best choice. It has less starch and results in a crispier Murukku.
Can I use a different type of dal instead of roasted gram dal?
While you can experiment, roasted gram dal provides the best texture and flavour. Other dals might result in a different consistency.
How do I know if the oil is hot enough for frying Murukku?
Drop a tiny piece of dough into the oil. If it sizzles and rises to the surface immediately, the oil is ready.
My Murukku is breaking while frying – what am I doing wrong?
The dough might be too dry. Add a little water, one teaspoon at a time, until it reaches the right consistency. Also, ensure the oil isn’t too hot.
How long does Murukku stay crispy once made?
If stored properly in an airtight container, Murukku will stay crispy for up to a week.
Enjoy making (and eating!) these delicious Murukku. Let me know how they turn out in the comments below!


Neha Deshmukh
Neha holds a B.A. in History with a focus on Indian and world history, including ancient, medieval, and modern periods. At RecipesOfIndia.org — the world’s largest database of Indian recipes — she combines her love for food and history by exploring how India’s past has shaped its culinary traditions.


