- Melt dark chocolate using a double boiler or microwave.
- In a bowl, combine whipped cream, vanilla extract, and room-temperature butter. Whisk until smooth.
- Gradually add melted chocolate to the cream mixture, whisking until glossy and well combined.
- Grease ramekins with butter or line them with plastic wrap, leaving an overhang for easy removal.
- Add a layer of chocolate mixture to each ramekin. Place a digestive biscuit on top and press gently to allow the chocolate to surround the edges.
- Repeat layering with chocolate mixture and biscuits, ending with a final chocolate layer. Tap ramekins gently to release air bubbles.
- Refrigerate for at least 6 hours, or until fully set.
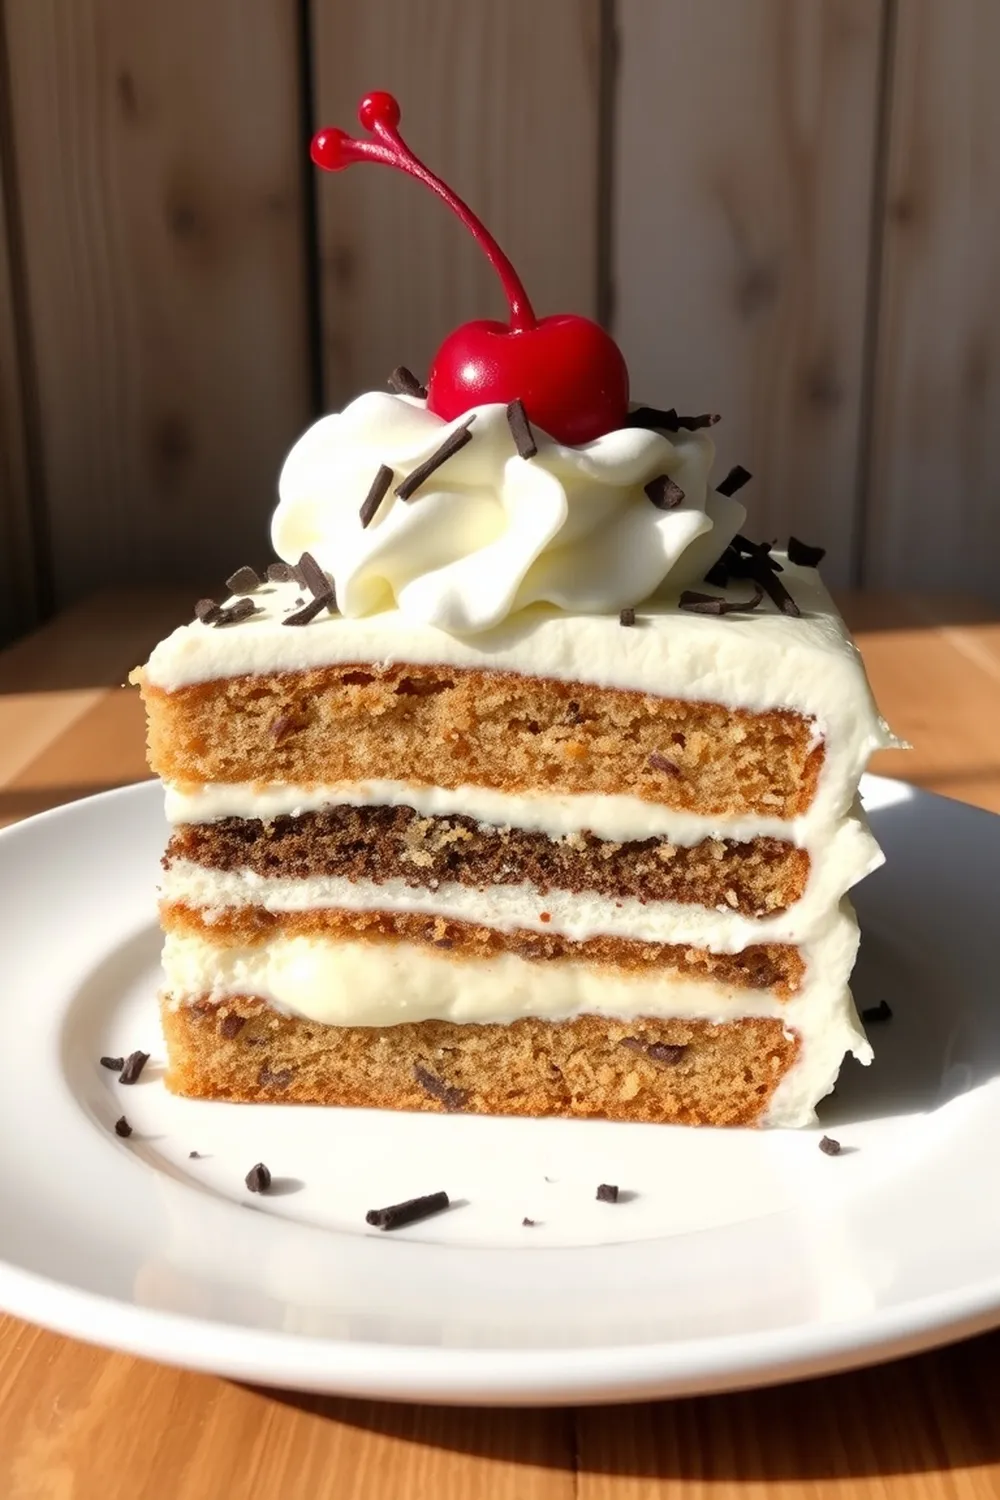
- Run a knife around the edges to loosen the cakes. Unmold onto serving plates and decorate with crushed biscuit, jimmies, or sprinkles.
- Calories:250 kcal25%
- Energy:1046 kJ22%
- Protein:3 g28%
- Carbohydrates:22 mg40%
- Sugar:12 mg8%
- Salt:85 g25%
- Fat:16 g20%
Last Updated on 2 months by Neha Deshmukh
Dark Chocolate Biscuit Pudding Recipe – Easy No-Bake Dessert
Okay, let’s be real. Sometimes you just need chocolate, and you need it fast. This Dark Chocolate Biscuit Pudding is my go-to when those cravings hit! It’s ridiculously easy, requires absolutely no baking, and is always a crowd-pleaser. I first made this for a friend’s birthday, and it disappeared within minutes – seriously! It’s the perfect little treat for any occasion, or honestly, just a Tuesday night.
Why You’ll Love This Recipe
This pudding is a dream for a few reasons. First, it’s incredibly simple – even if you’re not a confident baker, you can nail this. Second, it’s a no-bake dessert, which means no oven needed, especially handy during hot Indian summers! And finally, the combination of rich dark chocolate and the comforting crunch of digestive biscuits is just… chef’s kiss. It’s a delightful little indulgence.
Ingredients
Here’s what you’ll need to whip up this deliciousness:
- 200g Dark Chocolate
- 1 cup Whipped Cream
- 1 tbsp Butter
- 0.5 tbsp Vanilla Essence
- 6 Digestive Biscuits
- 1 tbsp Powdered Biscuit/Chocolate Jimmies/Color Sprinklers (for decorating)
Ingredient Notes
Let’s talk ingredients, because a few little things can make a big difference!
Dark Chocolate – Types & Quality
I prefer using a good quality dark chocolate with around 70% cocoa content. It gives the pudding a lovely intense flavour. You can use cooking chocolate, or a good quality eating chocolate bar. Around 200g is roughly 7 ounces.
Whipped Cream – Stabilized vs. Unstabilized
You can use either stabilized or unstabilized whipped cream. Stabilized will hold its shape a little better, which is great if you’re worried about the pudding being a bit wobbly. If using unstabilized, just make sure your fridge is nice and cold!
Digestive Biscuits – Regional Variations & Substitutions
Digestive biscuits are readily available in India, but if you can’t find them, Marie biscuits or even a plain sweet biscuit will work in a pinch. The key is a slightly firm biscuit that can hold its shape when soaked in the chocolate.
Butter – Salted vs. Unsalted
I usually use unsalted butter, as it gives me more control over the sweetness. But if you only have salted butter, that’s perfectly fine – just reduce the amount of salt you add (if any) later on.
Vanilla Essence – Real vs. Artificial
Real vanilla essence will always give the best flavour, but artificial vanilla essence works just fine if that’s what you have on hand. A little goes a long way!
Step-By-Step Instructions
Alright, let’s get cooking (well, chilling, actually!).
- First, melt your dark chocolate. You can do this using a double boiler, or in the microwave in 30-second intervals, stirring in between, until smooth. Be careful not to burn it!
- In a separate bowl, combine the whipped cream, butter, and vanilla essence. Whisk it all together until it’s nice and smooth.
- Now, slowly pour the melted chocolate into the cream mixture, whisking constantly until everything is beautifully combined and glossy.
- Grease six ramekins with butter, or line them with plastic wrap, leaving some overhang. This will make it super easy to unmold the puddings later.
- Spoon a layer of the chocolate mixture into each ramekin. Then, gently press a digestive biscuit on top. Press lightly so the chocolate can creep up the sides.
- Repeat the layering – chocolate, then biscuit – until you’ve used up all the ingredients, ending with a final layer of chocolate. Give the ramekins a little tap on the counter to get rid of any air bubbles.
- Cover the ramekins with cling film and refrigerate for at least 6 hours, or preferably overnight, until completely set. Patience is key here!
- Once set, run a knife around the edges of each pudding to loosen it. Invert onto serving plates, and decorate with powdered biscuit, chocolate jimmies, or colourful sprinkles.
Expert Tips
- Don’t skip the chilling time! It’s crucial for the pudding to set properly.
- For a richer flavour, use a higher percentage of cocoa in your dark chocolate.
- If you’re having trouble unmolding, dip the bottom of the ramekin in warm water for a few seconds.
Variations
This recipe is a great base for experimentation!
Vegan Adaptation
Swap the whipped cream for coconut cream (the thick part from a refrigerated can) and use a vegan butter substitute. Make sure your dark chocolate is also vegan-friendly! My friend Priya swears by this version.
Gluten-Free Adaptation (Biscuit Substitutions)
Use gluten-free biscuits! There are some great options available now. I’ve tried it with Schar digestive biscuits and they work wonderfully.
Spice Level (Adding Chili to Chocolate)
My brother loves a little kick, so I sometimes add a pinch of chili powder to the melted chocolate. It’s surprisingly delicious!
Festival Adaptations (Christmas/New Year Dessert)
During Christmas, I like to add a sprinkle of crushed candy canes on top. For New Year, a dusting of edible gold glitter makes it extra festive.
Serving Suggestions
These puddings are perfect on their own, but you can also serve them with a scoop of vanilla ice cream, a dollop of fresh cream, or a drizzle of chocolate sauce. A cup of hot chai alongside is always a good idea.
Storage Instructions
Store leftover puddings in an airtight container in the refrigerator for up to 3 days.
FAQs
Let’s answer some common questions!
Can I make this pudding ahead of time?
Absolutely! You can make it a day or two in advance. Just keep it covered in the fridge.
What’s the best way to melt the dark chocolate?
I find the microwave method easiest, but be careful not to overheat it. Short bursts and frequent stirring are key.
Can I use a different type of biscuit?
Yes, you can! Marie biscuits, or any plain sweet biscuit will work.
How do I prevent the pudding from cracking?
Chilling slowly helps prevent cracking. Also, don’t overfill the ramekins.
What’s the shelf life of this pudding?
It’s best enjoyed within 3 days, stored in the refrigerator.


Neha Deshmukh
Neha holds a B.A. in History with a focus on Indian and world history, including ancient, medieval, and modern periods. At RecipesOfIndia.org — the world’s largest database of Indian recipes — she combines her love for food and history by exploring how India’s past has shaped its culinary traditions.