- Marinate chicken with biryani masala, yogurt, ginger-garlic paste, green chilies, mint, and coriander leaves. Let sit for at least 1 hour.
- Soak basmati rice for 30 minutes, then parboil in salted water until 70-80% cooked. Drain and set aside.
- Heat oil in a heavy-bottomed pan, add sliced onions, and cook covered until golden brown and caramelized, stirring occasionally.
- Add marinated chicken and 1-1.5 cups of water. Cook covered for 20-25 minutes, or until the chicken is tender and a gravy forms.
- Layer partially cooked rice over the chicken mixture. Sprinkle with saffron water (optional). Cover tightly with a lid and cook on low heat (dum) for 15-20 minutes.
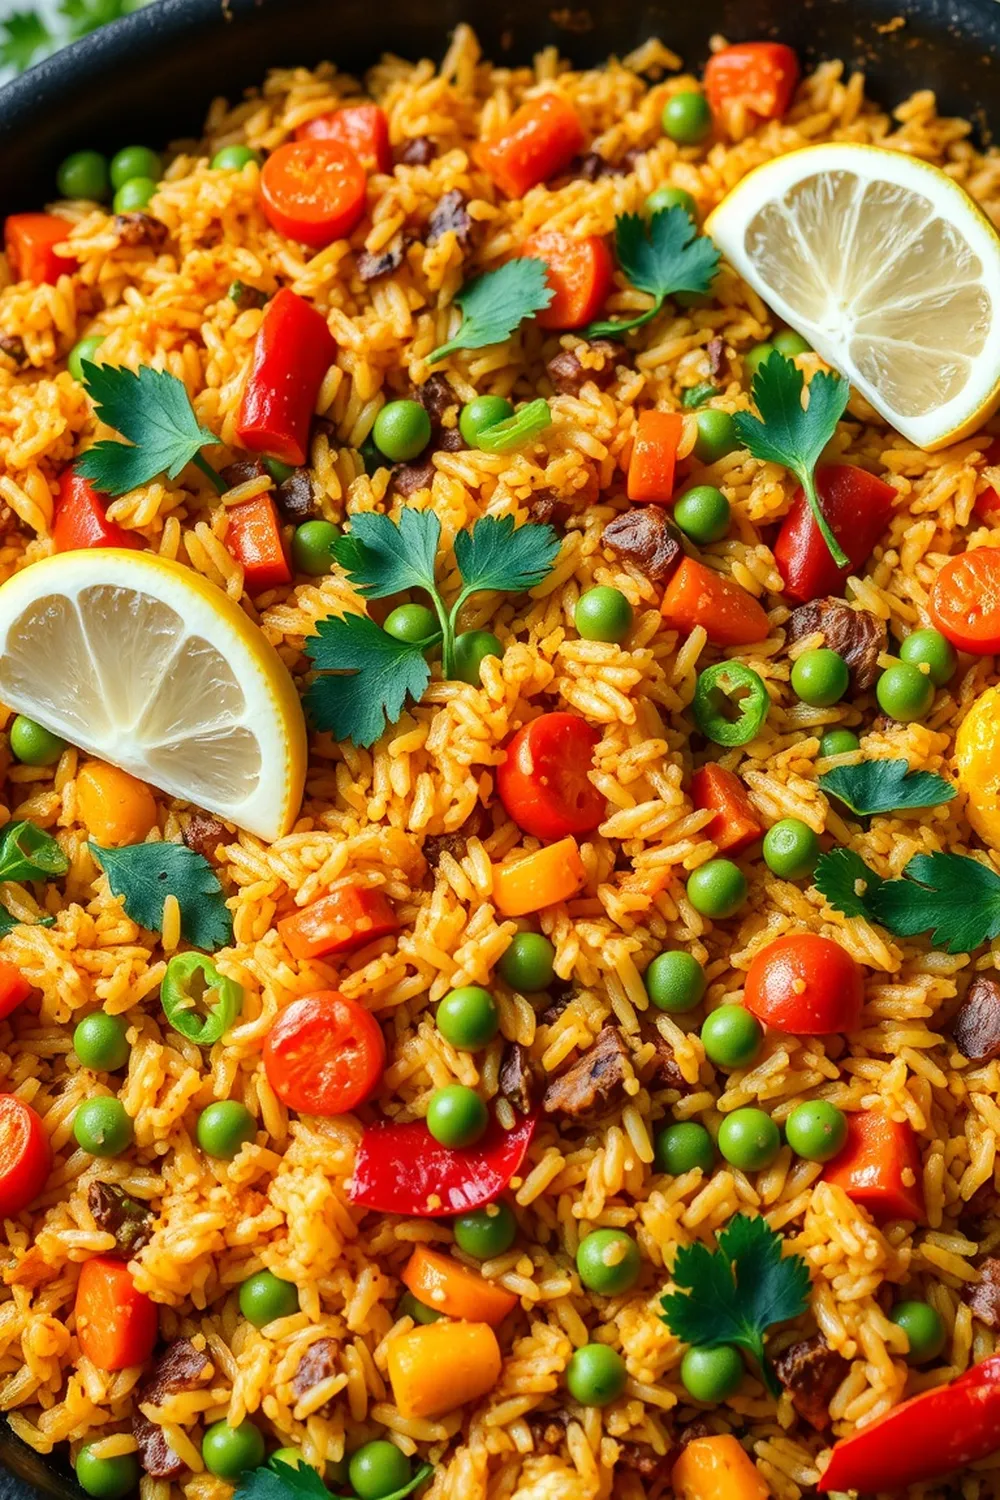
- Fluff the biryani gently with a fork and serve hot with raita.
- Calories:450 kcal25%
- Energy:1882 kJ22%
- Protein:25 g28%
- Carbohydrates:50 mg40%
- Sugar:5 mg8%
- Salt:400 g25%
- Fat:20 g20%
Last Updated on 4 months by Neha Deshmukh
Authentic Chicken Biryani Recipe – Easy Dum Style Indian Rice Dish
Hey everyone! If you’ve ever craved that incredibly flavorful, aromatic Chicken Biryani you get at your favorite Indian restaurant, you’re in the right place. I remember the first time I tried to make biryani – it was a bit of a disaster! But trust me, with this recipe, you’ll be enjoying a truly authentic dum-style biryani in no time. It takes a little patience, but the results are SO worth it.
Why You’ll Love This Recipe
This isn’t just a biryani recipe, it’s the biryani recipe I’ve perfected over the years. It’s packed with tender, juicy chicken, fragrant rice, and a beautiful blend of spices. Plus, the “dum” cooking method locks in all those amazing flavors. It’s perfect for a weekend feast, special occasions, or when you just want to treat yourself to something truly delicious.
Ingredients
Here’s what you’ll need to create this masterpiece:
- 1 kg Chicken (with bone)
- 3 tablespoons readymade biryani masala
- 1/3 cup yogurt
- 2 tablespoons ginger garlic paste
- 4 green chillies, chopped
- 5 sprigs mint leaves
- 5 sprigs coriander leaves
- 2 cups Basmati Rice
- 1 tablespoon salt
- 4 tablespoons vegetable / sunflower oil
- 3 onions, sliced
Ingredient Notes
Let’s talk ingredients! A few little things can make a big difference.
Biryani Masala – Exploring Regional Variations
Biryani masala blends vary so much across India! I love using a good quality readymade one to start, but feel free to experiment with adding a pinch of garam masala, or even a little saffron for extra fragrance. Some blends are hotter than others, so taste as you go.
Basmati Rice – Choosing the Right Grain
Basmati rice is key for that fluffy, separate grain texture. Look for aged basmati – it tends to be longer and less likely to become mushy. I usually get the Daawat or India Gate brands.
Oil – Selecting the Best Oil for Authentic Flavor
Traditionally, ghee (clarified butter) is used, which adds a wonderful richness. But vegetable or sunflower oil work perfectly well too, and are more readily available. Don’t use olive oil – the flavor isn’t quite right for biryani.
Yogurt – Full Fat vs. Low Fat & Marination Impact
Full-fat yogurt works best for marinating, as it helps tenderize the chicken beautifully. If you’re using low-fat yogurt, you might want to add a tablespoon of oil to the marinade. The yogurt is crucial for that tender, flavorful chicken!
Step-By-Step Instructions
Alright, let’s get cooking!
- Marinate the Chicken: In a large bowl, combine the chicken with the biryani masala, yogurt, ginger garlic paste, green chillies, mint leaves, and coriander leaves. Give it a good mix, ensuring the chicken is well coated. Cover and let it sit for at least an hour – longer is even better!
- Soak and Parboil the Rice: While the chicken marinates, soak the basmati rice in water for an hour. This helps it cook evenly. After soaking, drain the rice and parboil it in salted water for about 5-7 minutes, until it’s about 80% cooked. It should still have a slight bite to it. Drain well and set aside.
- Caramelize the Onions: Heat the oil in a large, heavy-bottomed pan (a Dutch oven works great!). Add the sliced onions and cook them over medium heat, covered, stirring occasionally. This takes patience! You want them to become deeply golden brown and caramelized – about 20-25 minutes.
- Cook the Chicken: Add the marinated chicken to the pan with the caramelized onions. Add ¾ cup of water. Cover and cook for about 20 minutes, or until the chicken is tender and a lovely gravy has formed.
- Layer and Dum Cook: Now for the magic! Gently layer the partially cooked rice over the chicken mixture. Don’t stir! Cover the pan tightly with a lid. You can even seal the edges with dough to create a really tight seal for the “dum” effect. Cook on very low heat for 15 minutes.
- Fluff and Serve: Turn off the heat and let the biryani rest for another 5-10 minutes before fluffing it gently with a fork. Serve hot with raita (yogurt dip) – it’s the perfect cooling accompaniment!
Expert Tips
- Don’t overcook the rice! It will continue to cook during the dum process.
- A heavy-bottomed pan is essential to prevent the biryani from sticking and burning.
- Low and slow is the key to perfect dum cooking.
Variations
- Vegan Chicken Biryani Adaptation: Swap the chicken for chickpeas or paneer (Indian cheese). Use vegetable broth instead of water.
- Gluten-Free Considerations: This recipe is naturally gluten-free, but always double-check the ingredients in your biryani masala to be sure.
- Spice Level Adjustment – Mild, Medium, Hot: Adjust the number of green chillies and the amount of biryani masala to control the spice level. My family prefers a medium spice level, so I usually stick to 4 chillies.
- Festival Adaptations – Biryani for Eid, Diwali, or Weddings: Biryani is a staple at Indian celebrations! For Eid, it’s often served with sheer khurma (a vermicelli pudding). For weddings, it’s a grand centerpiece dish.
Serving Suggestions
Biryani is a complete meal in itself, but it’s lovely served with:
- Raita (yogurt dip)
- Salan (a spicy curry)
- A simple onion and tomato salad
Storage Instructions
Leftover biryani can be stored in an airtight container in the refrigerator for up to 3 days. Reheat gently in the microwave or on the stovetop.
FAQs
What is the best way to achieve ‘dum’ cooking at home?
The goal is to trap steam inside the pot. A tight-fitting lid is crucial. Sealing the edges with dough is the most authentic method, but a heavy lid and low heat will also work.
Can I use a different type of rice for biryani?
While basmati is traditional, you could use long-grain rice in a pinch. But the texture won’t be quite the same.
How can I adjust the spice level of this biryani?
Reduce the number of green chillies and the amount of biryani masala. You can also add a pinch of sugar to balance the heat.
What is the significance of marinating the chicken?
Marinating tenderizes the chicken and infuses it with flavor. It’s a crucial step for a truly delicious biryani.
Can I make biryani ahead of time?
You can prepare the chicken marinade and parboil the rice ahead of time. But it’s best to assemble and cook the biryani just before serving for the best flavor and texture.


Neha Deshmukh
Neha holds a B.A. in History with a focus on Indian and world history, including ancient, medieval, and modern periods. At RecipesOfIndia.org — the world’s largest database of Indian recipes — she combines her love for food and history by exploring how India’s past has shaped its culinary traditions.