- Rinse finger millet, idli rice, urad dal, and fenugreek seeds 3-4 times until the water runs clear. Soak for 6-8 hours.
- Add flattened rice flakes (poha) to the soaked ingredients, soak for 30 minutes, then drain.
- Grind the soaked ingredients into a smooth batter using a mixer or grinder, adding water gradually as needed.
- Mix the batter well with your hands to incorporate air, cover, and let ferment for 8-12 hours in a warm place.
- Grease idli plates with oil or cooking spray, pour batter into the molds, and steam for 10-15 minutes.
- Check doneness by inserting a toothpick; it should come out clean. Remove idlis using a wet spoon and serve hot.
- Calories:120 kcal25%
- Energy:502 kJ22%
- Protein:4 g28%
- Carbohydrates:25 mg40%
- Sugar:0.5 mg8%
- Salt:150 g25%
- Fat:1 g20%
Last Updated on 4 months by Neha Deshmukh
Authentic Finger Millet Idli Recipe – Gluten-Free & Easy
Hey everyone! If you’re anything like me, you’re always on the lookout for healthy and delicious breakfast options. And honestly, nothing beats a fluffy, warm idli! I’m so excited to share my take on this classic South Indian staple – a Finger Millet Idli recipe that’s not only incredibly tasty but also packed with goodness. It’s a little different from your usual idli, but trust me, you’ll love it!
Why You’ll Love This Recipe
This recipe brings together the traditional goodness of idli with the nutritional power of finger millet (ragi). It’s naturally gluten-free, super easy to make (though it does require some planning!), and perfect for a healthy start to your day. Plus, the slight nutty flavor of the ragi adds a lovely depth to the idlis.
Ingredients
Here’s what you’ll need to whip up a batch of these delightful idlis:
- 1.5 cup finger millet (ragi)
- 0.5 cup idli rice
- 0.5 cup whole urad dal
- 1 teaspoon fenugreek seeds (methi)
- 0.5 cup flattened rice flakes (poha)
- Salt to taste
Ingredient Notes
Let’s talk ingredients! Getting these right makes all the difference.
Finger Millet (Ragi): Health Benefits & Flavor Profile
Finger millet, or ragi, is a nutritional powerhouse! It’s rich in calcium, iron, and fiber. It has a slightly earthy, nutty flavor that complements the other ingredients beautifully. You can usually find it at Indian grocery stores or online.
Idli Rice: The Perfect Grain for Soft Idlis
Idli rice is a short-grain rice specifically used for making idlis and dosas. It gives the idlis that signature soft and fluffy texture. Don’t substitute with regular rice – it just won’t be the same!
Urad Dal: Importance of Whole vs. Split
We’re using whole urad dal here. While split urad dal is also available, whole urad dal contributes to a better fermentation and a slightly more flavorful idli. It’s worth seeking out!
Fenugreek Seeds (Methi): Role in Fermentation & Taste
Don’t skip the fenugreek seeds! They play a crucial role in the fermentation process, helping the batter rise nicely. They also add a subtle, slightly bitter flavor that balances the other ingredients.
Flattened Rice Flakes (Poha): Texture & Binding
Flattened rice flakes, or poha, help to create a lighter, fluffier texture and act as a binding agent. A little goes a long way!
Step-By-Step Instructions
Alright, let’s get cooking!
- First, give the finger millet, idli rice, urad dal, and fenugreek seeds a good rinse – about 3-4 times – until the water runs clear. This removes excess starch. Then, soak them together in plenty of water for at least 6 hours.
- After 6 hours, add the flattened rice flakes (poha) to the soaked mixture. Let it soak for another 10 minutes, then drain all the water completely.
- Now, it’s time to grind! Add the soaked and drained ingredients to a mixer or grinder, adding water gradually as needed, and grind into a smooth batter. The consistency should be similar to pancake batter.
- This is where a little elbow grease comes in handy. Mix the batter really well with your hands. This helps with fermentation. Cover the batter and let it ferment in a warm place for 8-10 hours, or even overnight. You’ll know it’s ready when it’s bubbly and has increased in volume.
- Grease your idli plates with a little oil. Pour the fermented batter into the molds, leaving a little space for the idlis to rise.
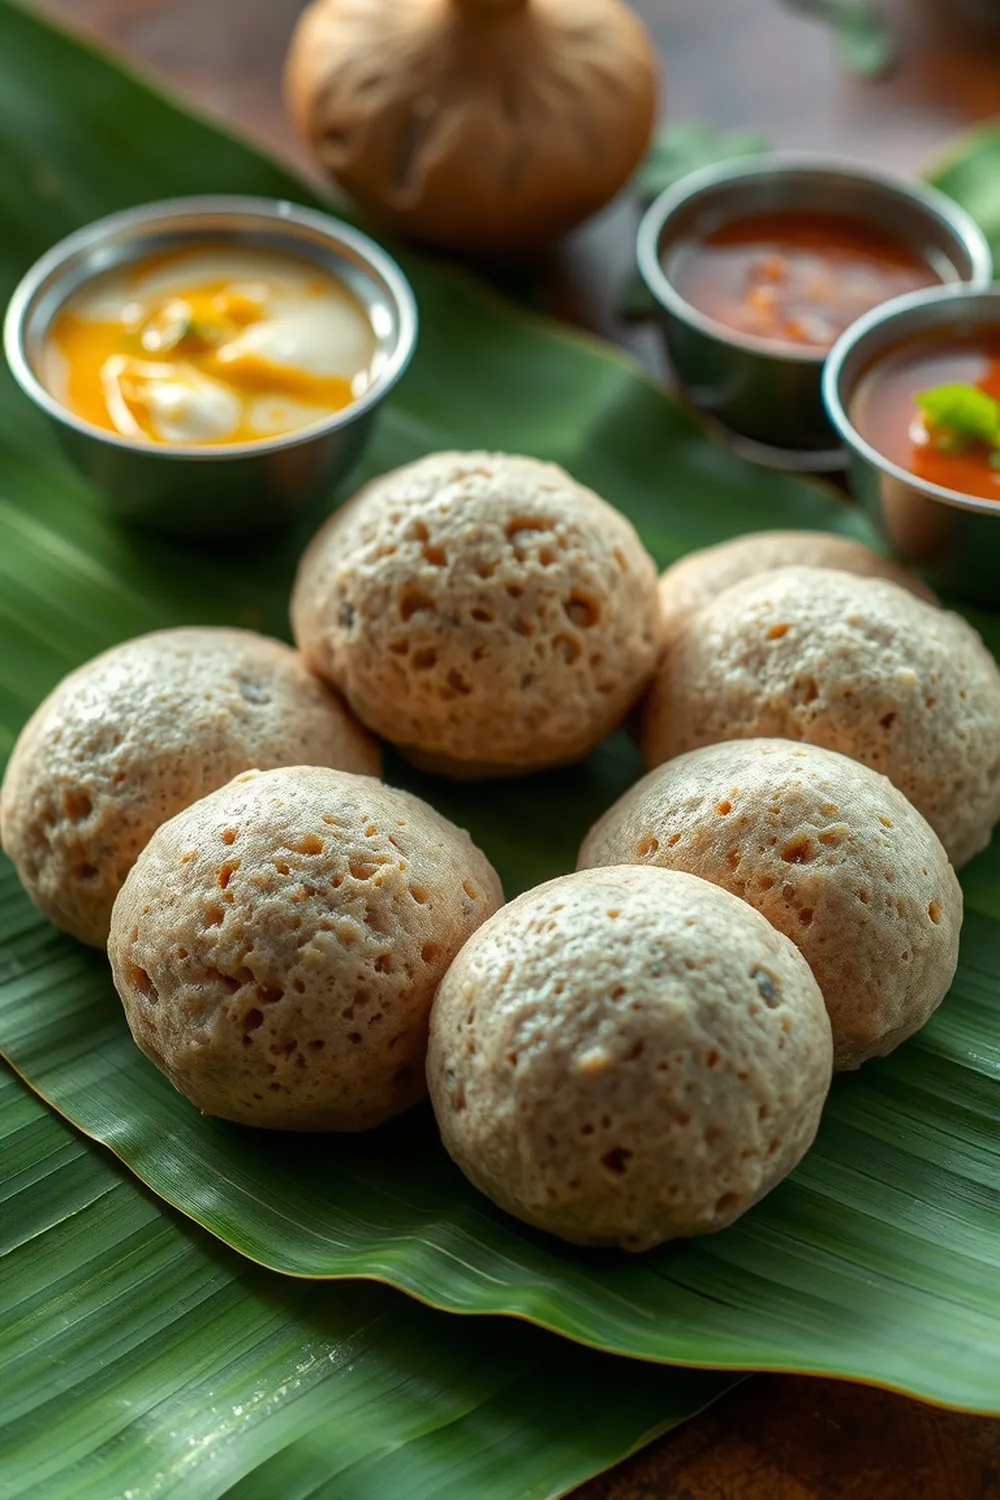
- Steam the idlis for 10-12 minutes. A good test? Stick a toothpick into an idli – if it comes out clean, they’re done! Gently remove the idlis with a wet spoon and serve hot.
Expert Tips
- Warmth is Key: Fermentation happens best in a warm environment. In colder months, you can place the batter near a warm stove or in a preheated (then turned off!) oven.
- Don’t Overgrind: Overgrinding can make the batter too sticky.
- Salt Timing: Add salt after fermentation. Salt can sometimes inhibit the fermentation process.
Variations
- Vegan Adaptation: This recipe is naturally vegan! Just ensure the oil you use for greasing the plates is plant-based.
- Gluten-Free Confirmation: This recipe is naturally gluten-free, as long as your poha is certified gluten-free.
- Spice Level Adjustment (Optional): My family loves a little kick! You can add a finely chopped green chili to the batter for a subtle spice.
- Regional Variations – South Indian States: In some regions, a small amount of grated coconut is added to the batter for extra flavor.
Festival Adaptations – Makar Sankranti/Pongal
Idlis are a popular dish during Makar Sankranti and Pongal! They’re often served with sambar and chutney as part of the festive spread.
Serving Suggestions
Idlis are incredibly versatile! Serve them with:
- Sambar (a lentil-based vegetable stew)
- Coconut chutney
- Tomato chutney
- A sprinkle of podi (spice powder)
Storage Instructions
You can store the fermented batter in the refrigerator for up to 3 days. It might lose a little of its fluffiness, but it will still be delicious. You can also freeze the steamed idlis for later – just reheat them in a steamer or microwave.
FAQs
What is the ideal consistency of the idli batter?
The batter should be smooth and pourable, similar to pancake batter. If it’s too thick, add a little water.
Can I use a different type of rice instead of idli rice?
While you can experiment, idli rice really is the best for achieving that perfect texture.
How do I know if the idlis are fermented enough?
The batter will be bubbly and have increased in volume. It should also have a slightly sour aroma.
What if I don’t have a steamer? Can I cook idlis in a pot?
You can! Place a metal stand in a pot with a couple of inches of water. Arrange the idli molds on the stand, cover the pot, and steam for about 15-20 minutes.
Can I make the batter ahead of time and store it?
Yes, you can! Just remember to add the salt after fermentation.


Neha Deshmukh
Neha holds a B.A. in History with a focus on Indian and world history, including ancient, medieval, and modern periods. At RecipesOfIndia.org — the world’s largest database of Indian recipes — she combines her love for food and history by exploring how India’s past has shaped its culinary traditions.


