- Soften unsalted butter to room temperature.
- Melt butter in a heavy-bottomed pan over low heat. Continue cooking until the milk solids separate and turn golden brown.
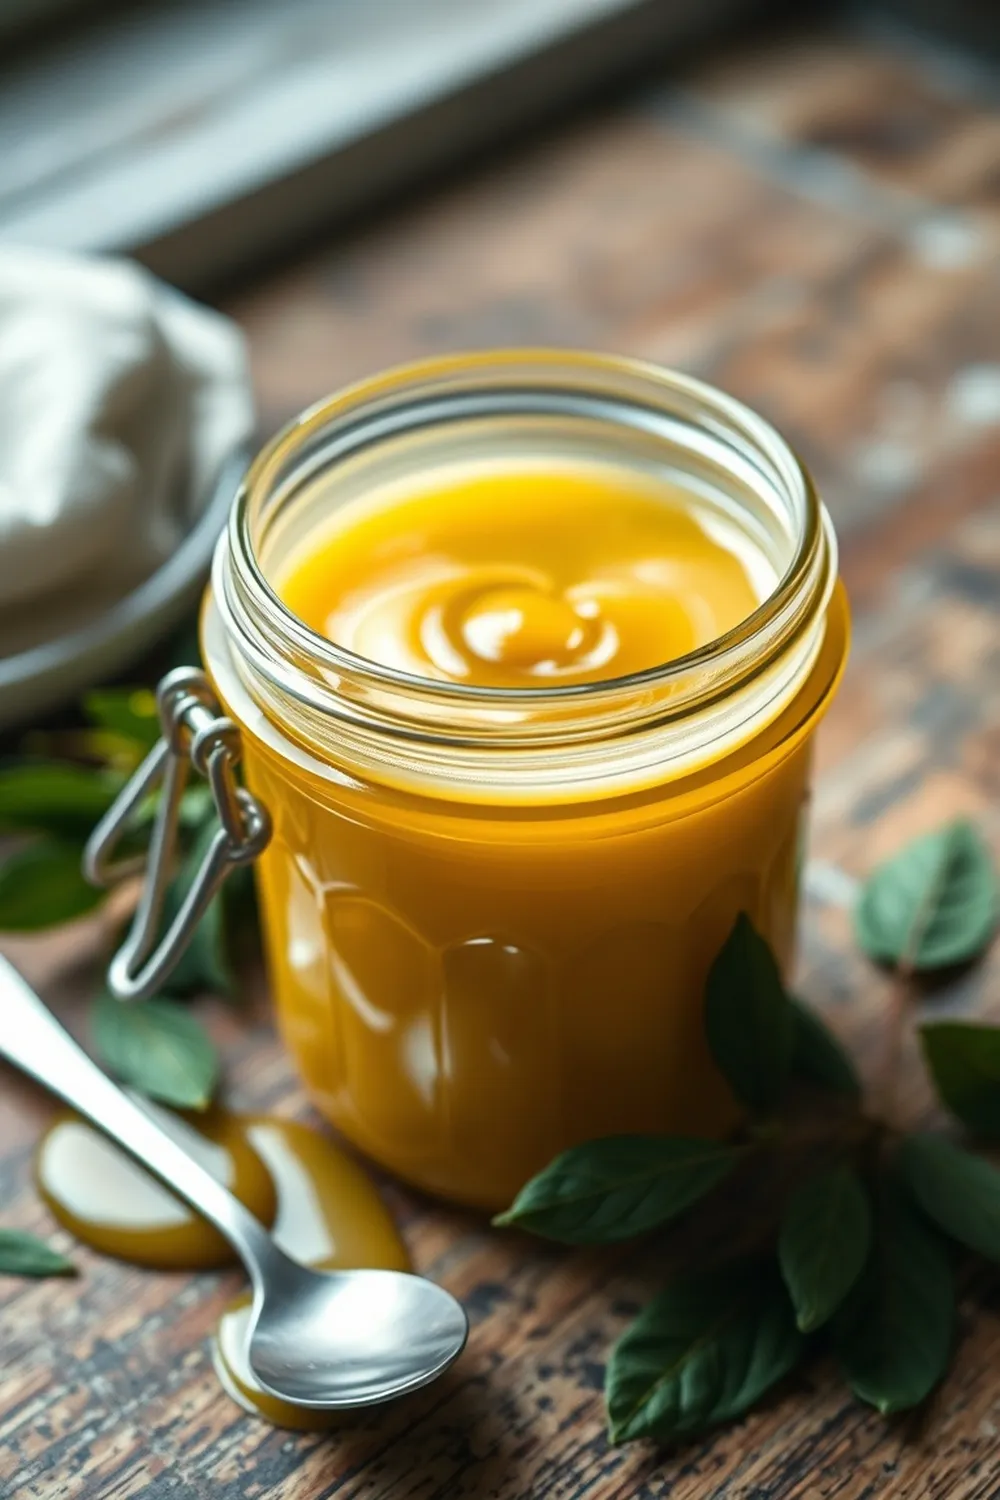
- Add curry leaves (if using) and cook for 30-60 seconds. Remove from heat immediately.
- Strain warm ghee into a clean glass jar. Cool completely and store at room temperature or refrigerate.
- Calories:810 kcal25%
- Energy:3389 kJ22%
- Protein:g28%
- Carbohydrates:mg40%
- Sugar:mg8%
- Salt:g25%
- Fat:90 g20%
Last Updated on 4 months by Neha Deshmukh
Authentic Ghee Recipe – Brown Butter with Curry Leaves
Hey everyone! Today, I’m sharing a recipe that’s incredibly close to my heart – homemade ghee. It’s more than just cooking fat; it’s a taste of tradition, a little bit of comfort, and honestly, makes everything taste better. I first made this when I moved away from home and missed the aroma of my grandmother’s kitchen. It instantly transported me back! Let’s get cooking, shall we?
Why You’ll Love This Recipe
This isn’t just any ghee recipe. We’re making a beautifully browned ghee, infused with the subtle, fragrant notes of curry leaves. It’s a little extra effort, but trust me, the flavour is phenomenal. You’ll love it because it’s surprisingly easy, uses just one ingredient (plus optional curry leaves!), and unlocks a depth of flavour you won’t find in store-bought versions. Plus, the aroma while it’s simmering is just heavenly!
Ingredients
Here’s what you’ll need:
- 200 gm (about ¾ cup) good quality, unsalted butter
- 1 strand of curry leaves (optional)
Ingredient Notes
Let’s talk ingredients! A few things make all the difference:
- Quality of Butter: Seriously, this is key. Use the best quality, unsalted butter you can find. The flavour of the ghee will directly reflect the flavour of the butter. I prefer butter with a higher fat content – it yields more ghee!
- Regional Variations in Curry Leaf Use: Curry leaves aren’t traditionally used in all ghee recipes, but it’s a South Indian touch my family always loved. They add a beautiful fragrance and subtle flavour. Feel free to skip them if you prefer a more classic ghee.
- Benefits of Ghee: Beyond the amazing taste, ghee is packed with goodness! It’s a source of healthy fats, has a high smoke point (perfect for frying!), and is often easier to digest than butter for those with sensitivities.
Step-By-Step Instructions
Alright, let’s make some ghee! It’s a pretty hands-off process, which is a bonus.
- First, soften your unsalted butter to room temperature. This helps it melt evenly.
- Place the softened butter in a heavy-bottomed pan. A heavy bottom prevents scorching. Melt it over low heat. Seriously, low heat is your friend here.
- Now, just let it simmer. Don’t stir! You’ll notice the butter starts to foam, then the foam will subside. Keep going – this is where the magic happens.
- Continue simmering until the butter turns a beautiful golden brown colour. You’ll see crusty, golden solids forming at the bottom of the pan. That’s what we want!
- If you’re using curry leaves, add them now and cook for 1-2 minutes, until they become crispy.
- Remove the pan from the heat immediately.
- Carefully strain the warm ghee through a fine-mesh sieve lined with cheesecloth (optional, but it removes any remaining solids) into a clean, dry glass jar.
- Let it cool completely at room temperature before storing.
Expert Tips
A few things I’ve learned over the years:
- Recognizing Ghee Readiness: The colour is your best indicator. It should be a golden brown, and the bubbling will have almost stopped. The aroma will also change – it’ll smell nutty and fragrant.
- Preventing Burning: Low and slow is the key! Keep the heat low and be patient. If you smell a burnt aroma, remove the pan from the heat immediately.
- Optimal Butter Choice: As mentioned before, higher fat content butter yields more ghee. European-style butter is a great option.
Variations
Want to switch things up? Here are a few ideas:
- Clarified Butter without Browning: If you prefer a milder flavour, simply melt the butter and skim off the foam as it rises. Strain and store – that’s clarified butter! My friend, Priya, always makes this for her kids.
- Different Infusion Options: Get creative! Try infusing your ghee with spices like cardamom, cinnamon, or cloves. A sprig of rosemary or thyme also works beautifully. I’ve even experimented with a little chili flake for a spicy kick!
Serving Suggestions
Ghee is incredibly versatile!
- Traditional Uses in Indian Cooking: It’s used in everything from dal and sabzis to rotis and sweets. It’s essential for many Indian festivals and ceremonies.
- Western Applications: Use it for sautéing vegetables, roasting potatoes, or even baking! It adds a lovely richness to anything you make. I love using it instead of butter on toast.
Storage Instructions
Store your homemade ghee in an airtight glass jar at room temperature for up to 3 months. You can also refrigerate it for up to 6 months. It will solidify in the fridge, but just warm it slightly to return it to a liquid state.
FAQs
Let’s answer some common questions:
- What is the shelf life of homemade ghee? Properly stored, it can last up to 3 months at room temperature and 6 months in the refrigerator.
- Can I use salted butter to make ghee? You can, but it will affect the flavour and shelf life. Unsalted butter is highly recommended.
- What is the difference between ghee and clarified butter? Ghee is browned, giving it a nuttier flavour. Clarified butter is simply melted butter with the milk solids removed.
- How can I tell if my ghee is burnt? If it smells burnt or has a dark, almost black colour, it’s likely burnt. Unfortunately, you’ll have to start over.
- Can I reuse the milk solids left after making ghee? Absolutely! They’re delicious sprinkled on rice or roasted vegetables.


Neha Deshmukh
Neha holds a B.A. in History with a focus on Indian and world history, including ancient, medieval, and modern periods. At RecipesOfIndia.org — the world’s largest database of Indian recipes — she combines her love for food and history by exploring how India’s past has shaped its culinary traditions.


