
- Soak raw rice, parboiled rice, and urad dal separately in water for at least 4-6 hours.
- Drain the rice and urad dal separately. Grind the rice into a slightly grainy paste and the urad dal into a smooth batter. Combine both batters and mix well.
- Allow the batter to ferment in a warm place for 8-12 hours, or until it has doubled in volume.
- Add salt to the fermented batter and mix gently.
- Grease idli molds with oil or cooking spray. Pour batter into each mold, filling about ¾ full.
- Steam for 10-12 minutes. Check for doneness by inserting a toothpick; it should come out clean.
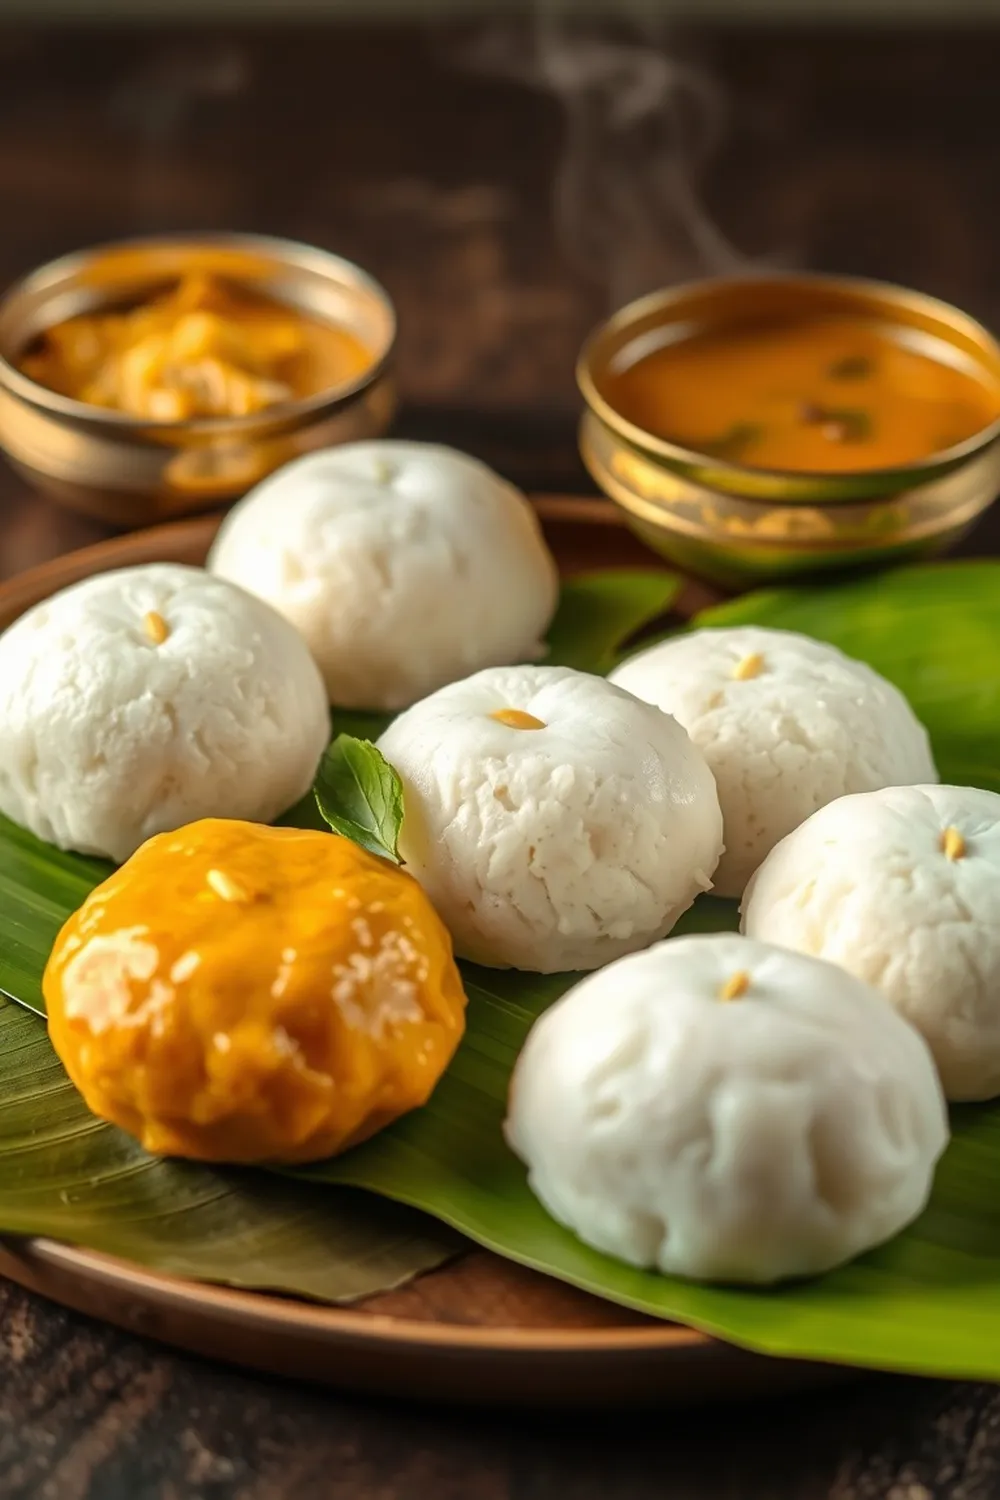
- Carefully remove the idlis from the molds using a spoon or a dedicated idli scraper. Serve warm with chutney or sambar.
- Calories:238 kcal25%
- Energy:995 kJ22%
- Protein:8 g28%
- Carbohydrates:49 mg40%
- Sugar:1 mg8%
- Salt:520 g25%
- Fat:1 g20%
Last Updated on 6 months ago by Neha Deshmukh
Authentic Idli Recipe – South Indian Breakfast with Rice & Dal
Hey everyone! If you’ve ever dreamt of waking up to a fluffy, steaming plate of idlis with a side of sambar and chutney, you’re in the right place. This recipe is a little piece of my childhood – I remember my amma (mom) making these every Sunday, and the whole house would smell incredible. It takes a little patience, but trust me, the reward is so worth it. Let’s get started!
Why You’ll Love This Recipe
Idlis are more than just breakfast; they’re a comforting hug in food form. They’re light, healthy, easily digestible, and incredibly versatile. Plus, they’re naturally gluten-free! This recipe walks you through making perfectly soft and fluffy idlis, just like the ones you’d get in a South Indian home. It’s a bit of a process, but I’ll share all my tips and tricks to make it a breeze.
Ingredients
Here’s what you’ll need to make these delightful idlis:
- 2 cups raw rice (approximately 300g)
- 1 cup parboiled rice (approximately 150g)
- 1 cup skinless split urad dal (approximately 180g)
- 2 teaspoons salt (approximately 10g)
- Water (for soaking and grinding)
- Oil (for greasing the molds)
Ingredient Notes
Choosing the right ingredients makes all the difference! Let’s talk about them:
- Raw Rice vs. Parboiled Rice: Using a combination is key. Raw rice gives the idlis a nice soft texture, while parboiled rice (also known as converted rice) adds a bit of binding and helps with fermentation. You can experiment with the ratio, but I find this 2:1 blend works beautifully.
- Urad Dal – The Star! This lentil is what gives idlis their fluffiness. Make sure you use good quality, skinless split urad dal. Older dal might not ferment as well. I always check the expiry date!
- Regional Variations: You’ll find that rice and dal ratios vary across South India. Some regions prefer a 3:1 rice-to-dal ratio, while others lean towards 2:1. Feel free to adjust to your liking after a few tries.
Step-By-Step Instructions
Alright, let’s get cooking!
- Soak it Up: Start by soaking the raw rice, parboiled rice, and urad dal separately in plenty of water for at least 8 hours, or even overnight. This is crucial for softening them up for grinding.
- Grind Time: Drain the water from each grain/dal. First, grind the rice into a slightly grainy paste. Don’t add too much water – you want it thick enough to hold its shape. Then, grind the urad dal into a very smooth, fluffy batter. Again, use water sparingly.
- Combine & Mix: In a large bowl, combine the ground rice and urad dal batter. Mix well with your hand (it’s the best way to get everything incorporated!).
- Fermentation Magic: This is where the patience comes in. Cover the batter and let it ferment in a warm place for 6-8 hours, or until it has doubled in volume. The warmer the environment, the faster it will ferment. I usually leave it near the stove after cooking.
- Salt & Stir: Once fermented, gently add the salt and mix it in. Be careful not to overmix, as you don’t want to deflate the batter.
- Steam Away: Grease your idli molds generously with oil. Pour the batter into each mold, filling them about ¾ full.
- The Final Touch: Steam the idlis for 12-15 minutes. A toothpick inserted into the center should come out clean.
- Serve & Enjoy: Carefully remove the idlis using a spoon. Serve them warm with your favorite chutney and sambar!
Expert Tips
Want to make sure your idlis are perfect every time? Here are a few of my go-to tips:
- Fermentation is Key: The temperature plays a huge role in fermentation. In colder climates, you might need to place the batter in a slightly warmed oven (turned off, of course!) or near a radiator.
- Batter Not Rising? If your batter isn’t rising, it could be due to cold temperatures, old urad dal, or not enough moisture. Try adding a tablespoon of warm water and giving it a little more time.
- Soft Idlis Every Time: Don’t overcook the idlis! Oversteaming will make them hard and rubbery.
Variations
- Rava Idli: Add ½ cup of semolina (rava) to the rice mixture for a slightly different texture. My friend Lakshmi swears by this!
- Thattai Idli: Flatten the idlis slightly before steaming for a crispy edge.
- Kanchipuram Idli: Add a teaspoon of cumin seeds and a pinch of black pepper to the batter for a flavorful twist.
Vegan Adaptation
Idli is naturally vegan! Just ensure the oil you use for greasing the molds is plant-based.
Gluten-Free (Naturally Gluten-Free)
Good news! Idli is naturally gluten-free, making it a great option for those with gluten sensitivities.
Spice Level (Mild – adaptable with chutney/sambar)
Idlis themselves are very mild in spice. The heat comes from the chutneys and sambar you serve alongside.
Festival Adaptations
Idlis are a staple during many South Indian festivals, especially during breakfast. They’re often made during Ganesh Chaturthi and Pongal.
Serving Suggestions
Idlis are best enjoyed with:
- Sambar (a lentil-based vegetable stew)
- Coconut Chutney (a classic accompaniment)
- Tomato Chutney (tangy and flavorful)
- Podi (a dry spice mix)
Storage Instructions
Leftover idlis can be stored in the refrigerator for up to 3 days. Reheat them by steaming for a few minutes or microwaving with a splash of water.
FAQs
1. What is the ideal consistency of the idli batter?
The batter should be thick enough to coat the back of a spoon, but still pourable. It shouldn’t be too runny or too thick.
2. Why is fermentation important for idlis, and how can I ensure it happens properly?
Fermentation creates the light and fluffy texture of idlis. Ensure a warm environment and use good quality urad dal.
3. Can I use a different type of dal instead of urad dal?
While urad dal is traditional, you could experiment with moong dal, but the texture won’t be quite the same.
4. How do I prevent idlis from sticking to the molds?
Grease the molds very well with oil before pouring in the batter. You can also line the molds with banana leaves for extra insurance.
5. What is the best way to reheat leftover idlis?
Steaming is the best way to reheat idlis and maintain their softness.
6. Can I make idli batter in advance and store it?
Yes, you can! You can store the fermented batter in the refrigerator for up to 2 days. You might need to give it a quick stir before using.
Enjoy making these delicious idlis! I hope this recipe brings a little bit of South Indian sunshine to your kitchen. Let me know how they turn out in the comments below!

Neha Deshmukh
Neha holds a B.A. in History with a focus on Indian and world history, including ancient, medieval, and modern periods. At RecipesOfIndia.org — the world’s largest database of Indian recipes — she combines her love for food and history by exploring how India’s past has shaped its culinary traditions.


