- Knead maida with salt, 2-3 tablespoons ghee, and water to form a pliable dough. Shape into small balls, cover, and let rest for 30 minutes.
- Roast grated coconut in 1 tablespoon ghee for 3-4 minutes. Set aside.
- In the same pan, roast semolina (rava) in 1 tablespoon ghee until light pink (7-8 minutes). Cool and mix with coconut, powdered sugar, cardamom, and cashews.
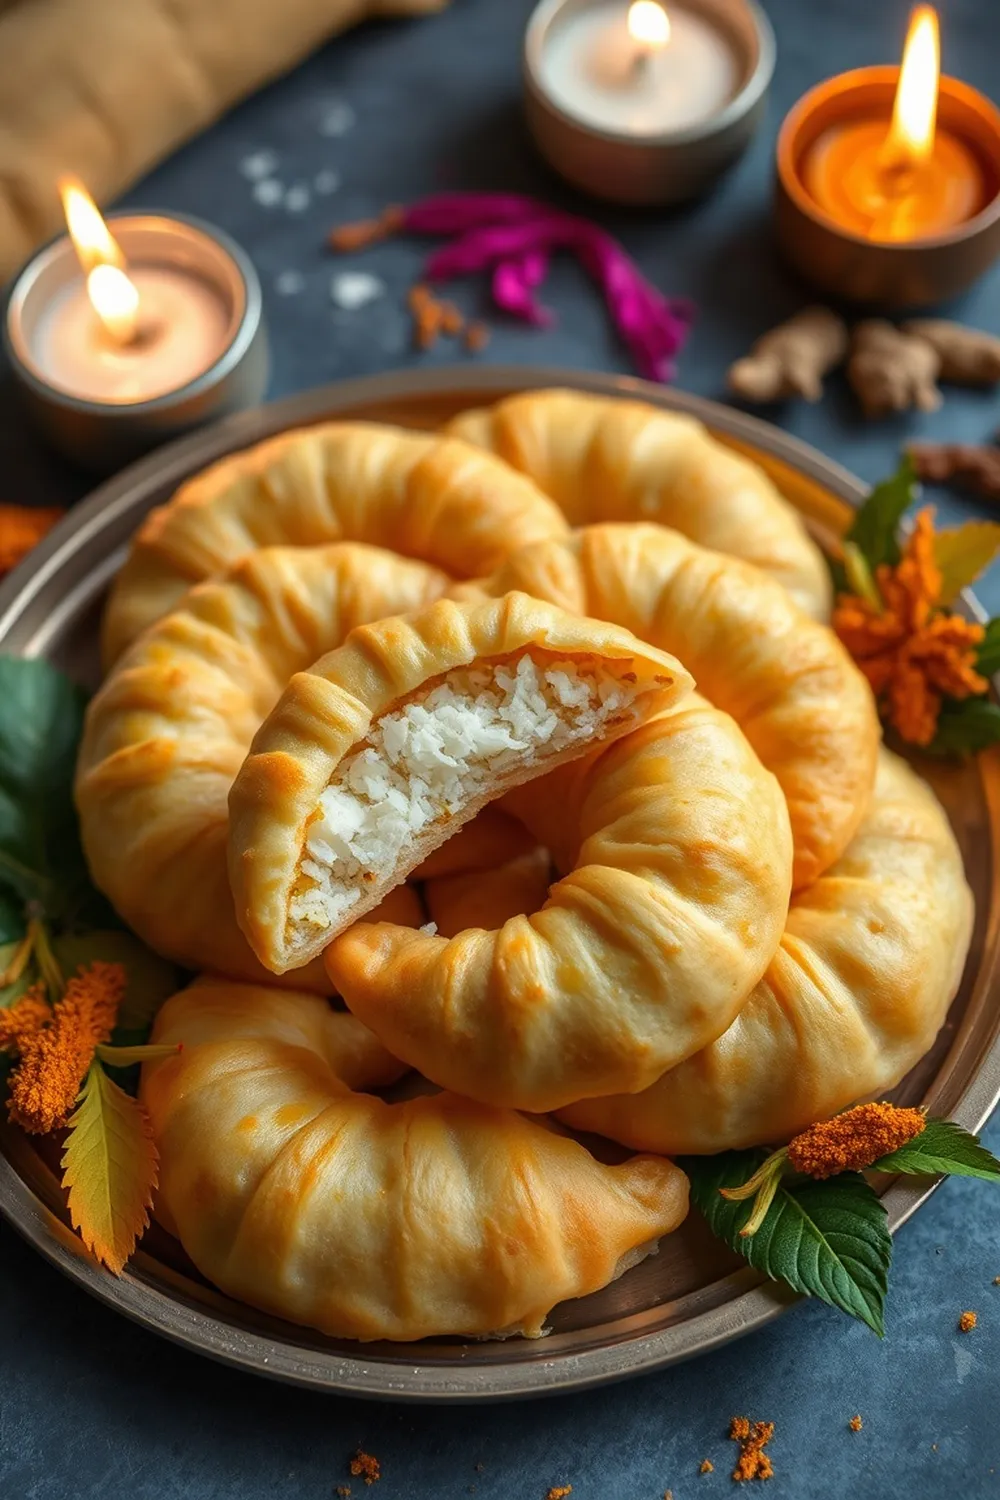
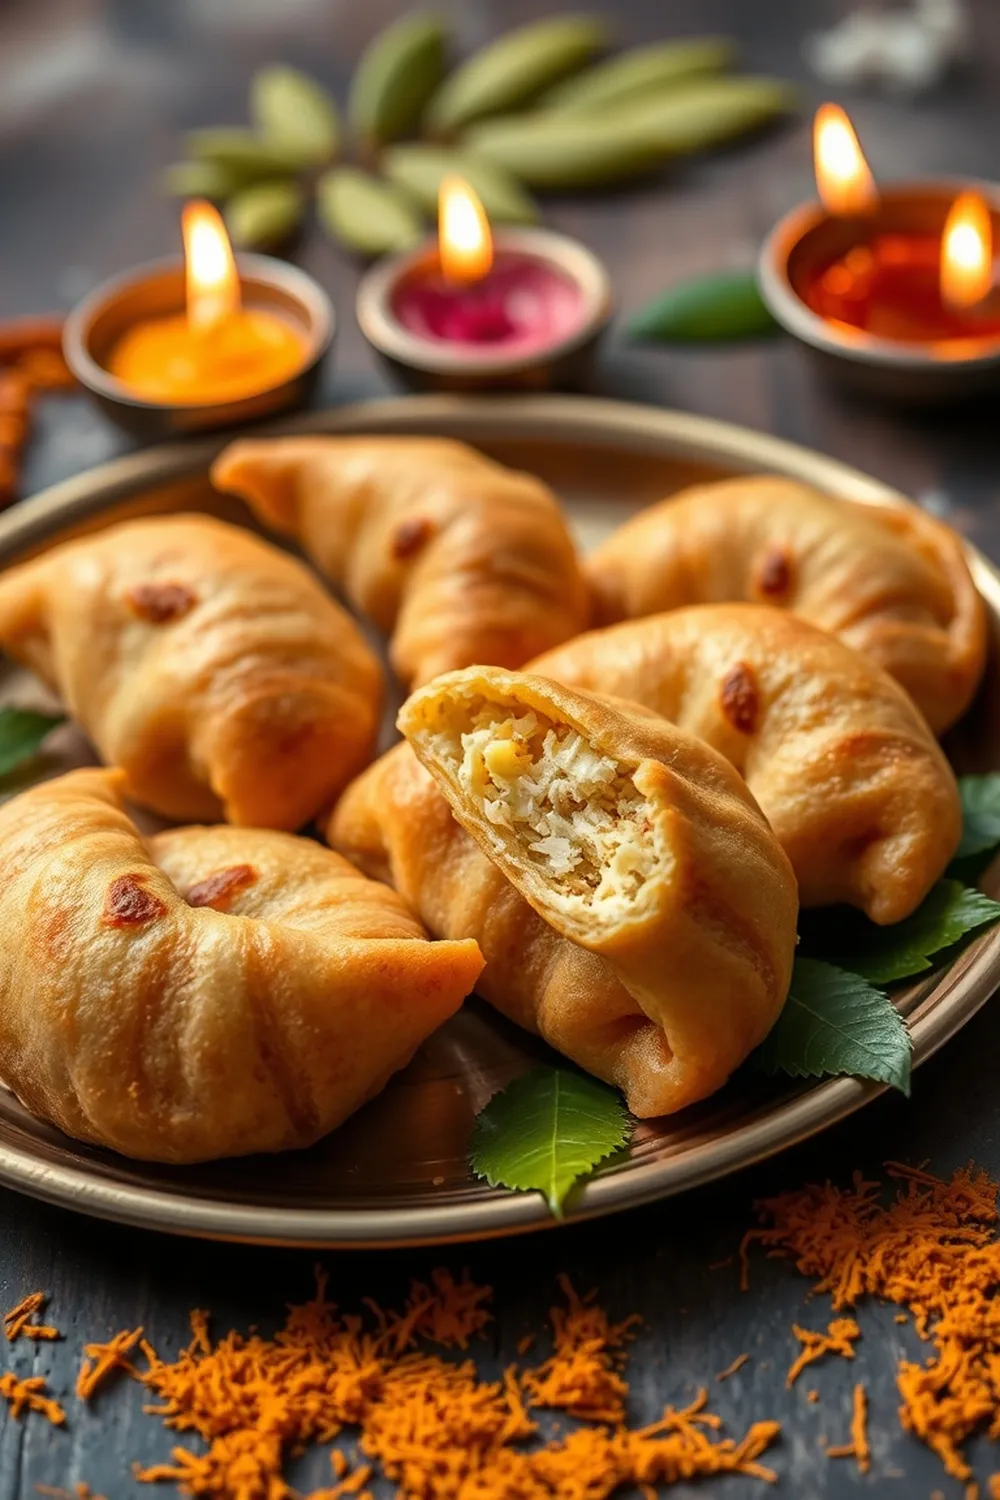
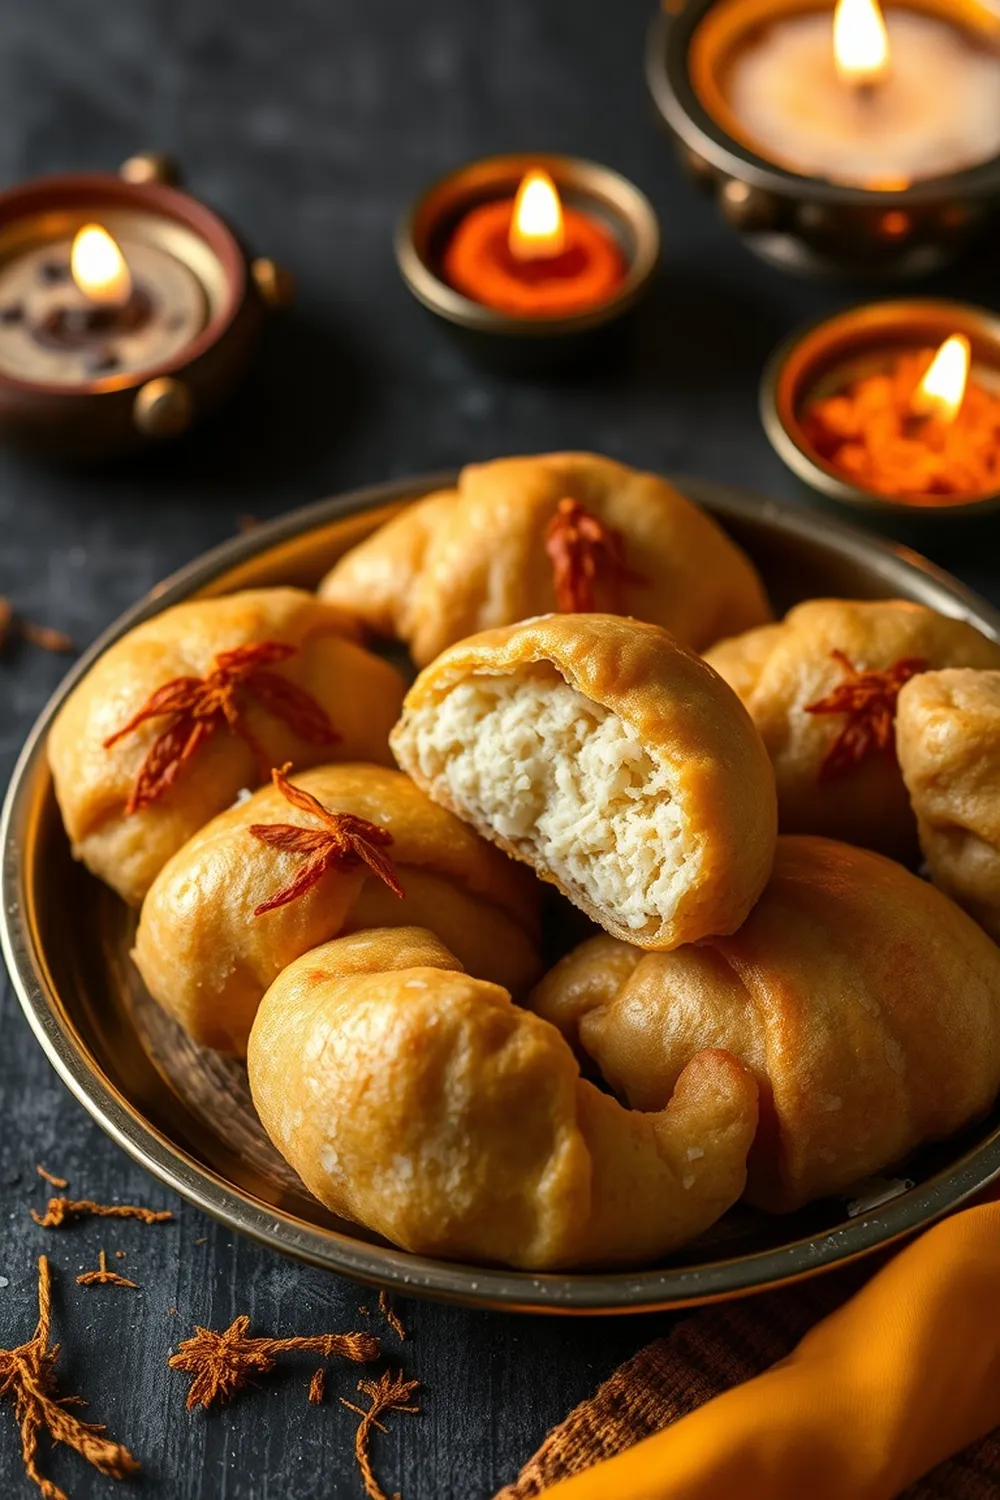
- Roll each dough ball into a thin puri. Place filling on one half, wet the edges, fold into a semi-circle, and seal tightly with twisted edges.
- Heat oil in a deep pan. Fry 3-4 kajjikayalu at a time on medium heat until golden brown, turning occasionally.
- Cool completely and store in airtight containers for up to 3-4 weeks.
- Calories:200 kcal25%
- Energy:836 kJ22%
- Protein:3 g28%
- Carbohydrates:25 mg40%
- Sugar:10 mg8%
- Salt:150 g25%
- Fat:10 g20%
Last Updated on 6 months ago by Neha Deshmukh
Authentic Kajjikayalu Recipe – Semolina & Coconut Sweet Fried Pastries
Hey everyone! If you’ve ever been to a South Indian festival or celebration, chances are you’ve spotted these delightful little crescent-shaped treats. Kajjikayalu (pronounced kaj-jee-ka-ya-loo) are a traditional sweet, and honestly, they’re a little piece of edible happiness. I remember my grandmother making these every Sankranti – the whole house would smell of ghee and cardamom! They take a little patience, but trust me, the result is so worth it. Let’s get baking (or frying, rather!).
Why You’ll Love This Recipe
These aren’t just any sweets. Kajjikayalu are crispy, flaky on the outside, and filled with a sweet, nutty, and incredibly fragrant coconut-semolina mixture. They’re perfect for gifting, offering during pujas, or just enjoying with a cup of chai. Plus, they stay fresh for ages, making them ideal for prepping ahead. You’ll be making batches of these for every festive occasion!
Ingredients
Here’s what you’ll need to create these little gems:
- 500 g maida (all-purpose flour)
- 4-5 tbsp ghee
- As needed water
- To taste salt
- As needed oil (for frying)
- 1/4 cup dry coconut (finely grated)
- 1 cup sooji/semolina
- 1 cup sugar
- 1 tsp cardamom powder
- 3 tbsp cashewnuts (finely chopped)
Ingredient Notes
Let’s talk ingredients – a few little things can make a big difference!
Maida (All-Purpose Flour) – Choosing the Right Type
Using good quality maida is key for that perfect flaky texture. I usually go for a brand that’s finely milled.
Ghee – The Importance of Clarified Butter in Indian Sweets
Ghee is essential for that authentic flavor. It adds a richness you just can’t get with oil. Don’t skimp on the ghee! About 4-5 tablespoons (60-75ml) should do the trick.
Sooji/Semolina – Fine vs. Coarse Varieties
I prefer using fine sooji for kajjikayalu. It gives a smoother texture to the filling. If you only have coarse, you can pulse it a few times in a blender.
Dry Coconut – Regional Variations & Freshness
Freshly grated coconut is amazing if you can get it, but good quality dry coconut works beautifully too. Make sure it smells fragrant – that’s how you know it’s fresh!
Cardamom – Aromatic Spice & Quality Considerations
Use good quality cardamom powder for the best aroma. If you’re using pods, lightly crush them and grind them yourself for maximum flavor.
Step-By-Step Instructions
Alright, let’s get cooking!
- First, let’s make the dough. In a large bowl, knead the maida with salt, 2-3 tablespoons of ghee, and enough water to form a pliable dough. It shouldn’t be too sticky or too hard.
- Shape the dough into a small ball, cover it with a damp cloth, and let it rest for at least 30 minutes. This allows the gluten to relax, making the puris easier to roll.
- While the dough rests, let’s prepare the filling. Roast the grated coconut in 1 tablespoon of ghee (about 15ml) in a pan for 3-4 minutes, until lightly golden. Set aside to cool.
- In the same pan, roast the semolina in 1 tablespoon of ghee until it turns light pink and fragrant – this takes about 7-8 minutes. Be careful not to burn it!
- Once the semolina cools, mix it with the roasted coconut, powdered sugar, cardamom powder, and finely chopped cashews. Give it a good mix – that’s your delicious filling!
- Now, roll each dough ball into a thin, circular puri (about 3-4 inches in diameter).
- Place a spoonful of the filling on one half of the puri. Wet the edges with a little water.
-
Fold the puri in half to form a semi-circle and seal the edges tightly. This is important! You can twist the edges to create a decorative pattern and ensure it doesn’t open during frying.
-
Heat oil in a deep pan over medium heat. The oil should be hot enough to fry, but not smoking.
- Fry 3-4 kajjikayalu at a time, turning occasionally, until they turn golden brown and crispy.
- Remove the fried kajjikayalu with a slotted spoon and place them on a paper towel to drain excess oil.
- Let them cool completely before storing.
Expert Tips
A few little secrets to kajjikayalu success!
Achieving the Perfect Dough Consistency
The dough should be soft and pliable, like playdough. If it’s too dry, add a little more water, a teaspoon at a time.
Roasting Semolina to Golden Perfection
Roasting the semolina is crucial for that nutty flavor and crispy texture. Keep stirring constantly to prevent burning.
Sealing the Kajjikayalu – Preventing Bursting During Frying
Make sure the edges are really well sealed. A good twist and a little water are your best friends here.
Frying Temperature – Ensuring Even Cooking
If the oil is too hot, the kajjikayalu will brown quickly on the outside but remain uncooked inside. If it’s too cold, they’ll absorb too much oil. Medium heat is the sweet spot.
Variations
Want to switch things up? Here are a few ideas:
Vegan Kajjikayalu – Plant-Based Ghee & Dough Options
Use plant-based ghee instead of regular ghee. You can also use a vegan butter substitute in the dough.
Gluten-Free Kajjikayalu – Alternative Flour Blends
Experiment with gluten-free flour blends. A mix of rice flour, sorghum flour, and tapioca starch can work well.
Spice Level – Adjusting Cardamom Intensity
If you love cardamom, feel free to add a little more! You can also add a pinch of nutmeg or cloves for extra warmth.
Festival Adaptations – Special Occasion Variations (Diwali, Sankranti)
My aunt always adds a few strands of saffron to the filling during Diwali for a touch of luxury.
Serving Suggestions
Kajjikayalu are delicious on their own, but they also pair beautifully with a glass of warm milk or a cup of chai. They’re a staple during festivals and celebrations, but honestly, they’re good any time!
Storage Instructions
Store cooled kajjikayalu in airtight containers at room temperature for up to 3-4 weeks. They actually get better with time!
FAQs
Got questions? I’ve got answers!
What is the origin of Kajjikayalu?
Kajjikayalu have a rich history in Andhra Pradesh and Telangana, dating back generations. They were traditionally made during festivals and special occasions.
Can I make the dough ahead of time?
Yes, you can! Just wrap it tightly in plastic wrap and refrigerate for up to 2 days. Bring it to room temperature before rolling.
How do I prevent the filling from leaking out while frying?
Ensure the edges are sealed very tightly. A good twist and a little water are key.
What’s the best way to grind the cashews for the filling?
You can use a food processor or a sharp knife to finely chop the cashews. Be careful not to over-process them into a paste.
Can I use coconut milk instead of grated coconut?
While you can use coconut milk, it will change the texture of the filling. It will be softer and less crispy.
How can I tell when the oil is hot enough for frying?
Drop a tiny piece of dough into the oil. If it sizzles and rises to the surface immediately, the oil is ready.
Neha Deshmukh
Neha holds a B.A. in History with a focus on Indian and world history, including ancient, medieval, and modern periods. At RecipesOfIndia.org — the world’s largest database of Indian recipes — she combines her love for food and history by exploring how India’s past has shaped its culinary traditions.


