- Roast rice in ghee over medium heat until fragrant, then grind into a coarse powder.
- Grease a pressure cooker with ghee to prevent sticking.
- Bring milk to a boil in the cooker, add the powdered rice, and pressure cook for 1 whistle.
- Reduce flame to low after the first whistle and simmer for 10 minutes.
- Open the cooker, add sugar, and simmer for another 10 minutes, stirring constantly, until thickened.
- Optionally garnish with saffron, cardamom powder, or nuts before serving.
- Calories:320 kcal25%
- Energy:1338 kJ22%
- Protein:8 g28%
- Carbohydrates:55 mg40%
- Sugar:35 mg8%
- Salt:120 g25%
- Fat:8 g20%
Last Updated on 2 months by Neha Deshmukh
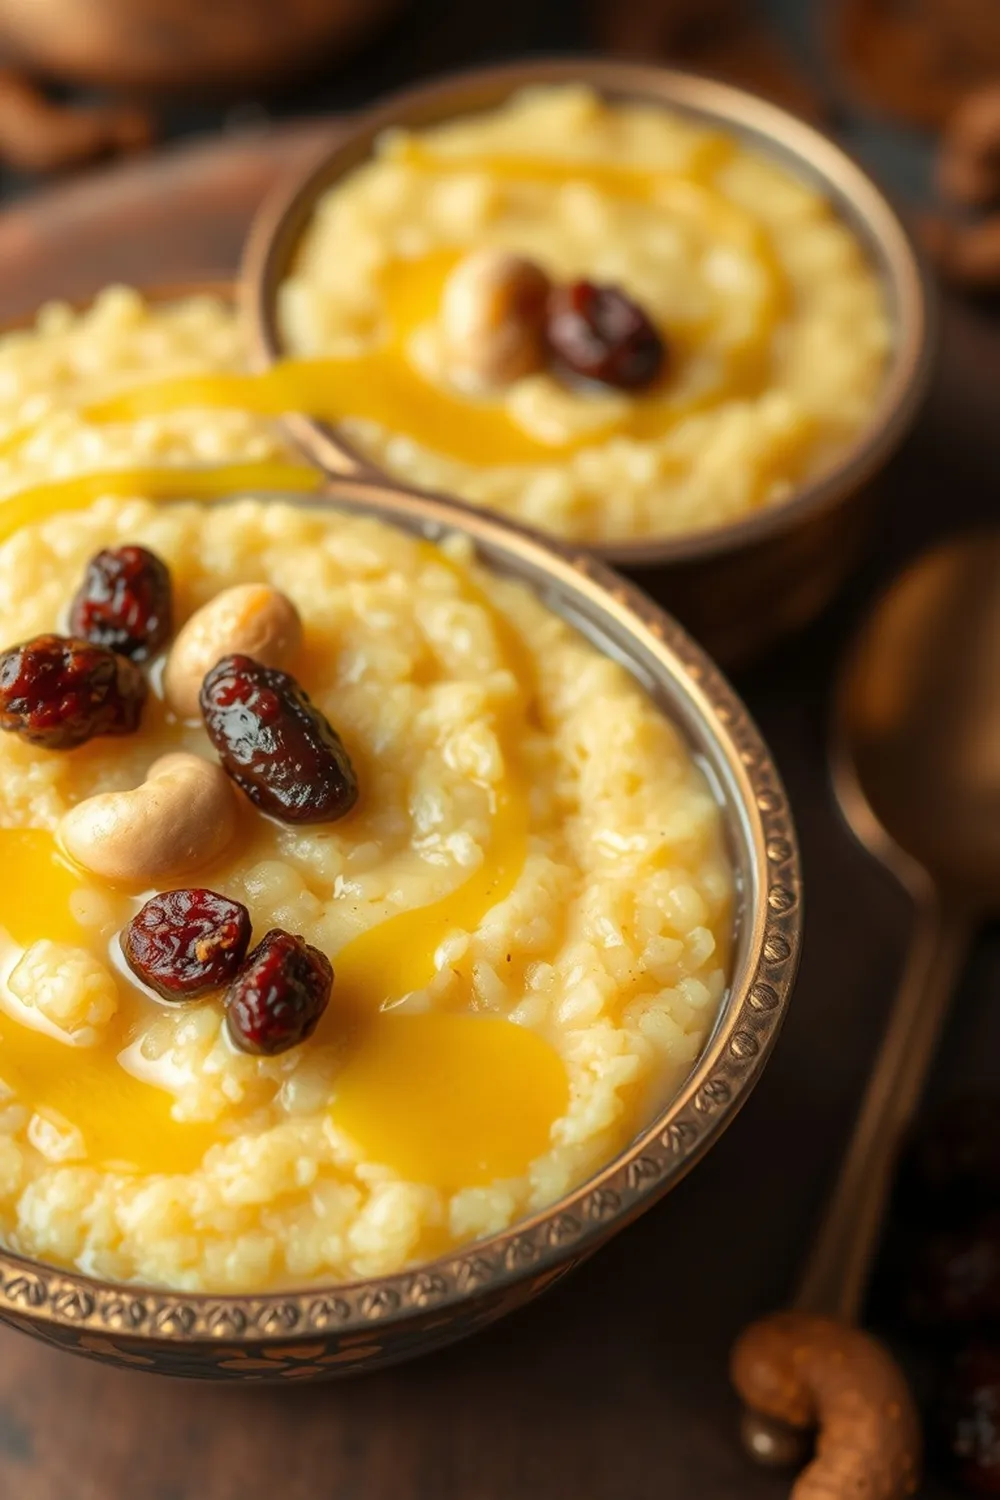
Authentic Kheer Recipe – Rice Pudding with Ghee & Saffron
Introduction
Oh, Kheer! Is there anything more comforting? This creamy, dreamy rice pudding is a staple in Indian households, and honestly, it’s the first dessert I learned to make properly. I remember being so proud when I finally got the consistency just right – it’s a bit of an art, but trust me, it’s totally achievable! This recipe is my go-to, passed down with a few tweaks from my grandmother, and it’s guaranteed to be a hit. Let’s dive in and make some magic!
Why You’ll Love This Recipe
This Kheer isn’t just a dessert; it’s a hug in a bowl. It’s incredibly easy to make, requires minimal ingredients, and is perfect for celebrations or just a cozy night in. The subtle sweetness, the fragrant rice, and that touch of ghee… it’s simply divine. Plus, it’s naturally gluten-free!
Ingredients
Here’s what you’ll need to create this classic Kheer:
- 4 cups Milk (approximately 960ml)
- 2 tablespoons Rice (approximately 30g)
- 1 teaspoon Ghee (approximately 5ml)
- 0.5 cup Sugar (approximately 100g)
Ingredient Notes
Let’s talk ingredients! Using good quality ingredients really makes a difference.
- Milk: Full-fat milk gives the richest, creamiest result. But we’ll chat about alternatives later!
- Rice: We’re using small-grain rice here. More on that in the next section.
- Ghee: Don’t skimp on the ghee! It adds a beautiful flavour that you just can’t replicate.
- Sugar: Adjust to your sweetness preference. I like it subtly sweet, but feel free to add a little more if you have a sweet tooth.
Rice Varieties for Kheer
Choosing the right rice is key. Traditionally, we use short-grain, starchy rice. Here are a few good options:
- Basmati Rice: While known for biryani, a good quality Basmati works well, giving a lovely aroma.
- Sona Masoori: This is a popular choice in South India and cooks up beautifully creamy.
- Pachari Paal: A specific variety often used in Kerala, known for its creamy texture.
Avoid long-grain rice like Jasmine, as it doesn’t break down enough to create that signature Kheer consistency.
The Importance of Ghee in Traditional Kheer
Ghee isn’t just a fat; it’s flavour! It adds a richness and aroma that’s essential to authentic Kheer. It also helps prevent the rice from sticking and gives it a beautiful golden hue. My grandmother always said a little ghee is good for the soul!
Regional Variations in Kheer – From North to South
Kheer isn’t one-size-fits-all! Across India, you’ll find delightful variations:
- North India: Often features saffron and cardamom, and is typically thicker.
- South India (Payasam): Uses more jaggery and often includes coconut milk.
- Bengal: Known for its Mishti Doi Kheer, incorporating fermented sweet yogurt.
- Gujarat: Shrikhand Kheer blends the creamy goodness of shrikhand with rice.
Saffron – The Royal Touch
Saffron isn’t just for colour; it adds a delicate floral aroma and a touch of luxury. A few strands go a long way! If you’re feeling fancy, soak the saffron in a tablespoon of warm milk for about 15-20 minutes before adding it to the Kheer.
Step-By-Step Instructions
Alright, let’s get cooking!
- Roast the Rice: First, take your 2 tablespoons of rice and roast them in 1 teaspoon of ghee over medium heat. Keep stirring! You want them fragrant and lightly golden, about 5-7 minutes. Then, grind them into a coarse powder. Don’t make it too fine.
- Grease the Cooker: Grease your pressure cooker with a little ghee. This is important to prevent sticking.
- Cook the Rice: Pour in the 4 cups of milk and add the powdered rice. Close the pressure cooker and cook for one whistle on medium heat.
- Simmer Gently: Once the whistle blows, reduce the heat to low and let it simmer for another 10 minutes. This allows the rice to fully cook and release its starch.
- Add Sugar & Thicken: Open the cooker and add the 0.5 cup of sugar. Simmer for another 10 minutes, stirring occasionally, until the Kheer thickens to your desired consistency.
- Garnish & Serve: Finally, garnish with a pinch of saffron, a sprinkle of cardamom powder, or some chopped nuts (almonds and pistachios are lovely!). Serve warm or chilled.
Expert Tips
Here are a few tricks I’ve learned over the years:
Achieving the Perfect Kheer Consistency
The key is patience! Simmering on low heat allows the rice to release its starch gradually, creating that creamy texture.
Preventing Kheer from Sticking & Burning
Greasing the pressure cooker well is crucial. Stir frequently, especially during the final stages of simmering.
The Right Heat for Roasting Rice
Medium heat is best. You want to toast the rice, not burn it!
Using Whole Milk vs. Toned Milk
Whole milk gives the richest flavour and creamiest texture. Toned milk will work in a pinch, but the Kheer won’t be quite as decadent.
Variations
Let’s get creative!
- Vegan Kheer Adaptation: Use plant-based milk (almond, soy, or coconut) and vegan ghee. It’s surprisingly delicious! My friend, Priya, swears by coconut milk Kheer.
- Gluten-Free Kheer: This recipe is naturally gluten-free, but always double-check your ingredients to be sure.
- Spice Level Adjustments: Add a pinch of nutmeg for a warmer flavour.
- Festival Adaptations: For Diwali, I love adding a generous amount of nuts and saffron. For weddings, I sometimes make a larger batch and serve it in small, decorative bowls.
Sugar Alternatives
If you’re watching your sugar intake, you can substitute with jaggery or honey, but it will slightly alter the flavour.
Serving Suggestions
Kheer is wonderful on its own, but it also pairs beautifully with:
- Puri or Paratha
- Gulab Jamun
- Jalebi
Storage Instructions
Kheer will keep in the refrigerator for up to 3 days. Store it in an airtight container. You might notice a slight skin forming on top – just stir it in before serving.
FAQs
What type of rice is best for making Kheer?
Short-grain, starchy rice like Basmati, Sona Masoori, or Pachari Paal are ideal.
Can I make Kheer ahead of time? How long will it keep?
Yes! Kheer can be made a day or two in advance. It will keep in the refrigerator for up to 3 days.
How do I prevent a skin from forming on my Kheer?
Stir it occasionally while it’s cooling, and store it in an airtight container. The skin is harmless, though!
What if my Kheer is too thin or too thick?
If it’s too thin, simmer for a few more minutes. If it’s too thick, add a splash of milk.
Can I use different types of nuts for garnish?
Absolutely! Cashews, walnuts, and even dried fruits like raisins and dates are delicious.
Is it necessary to use ghee, or can I substitute it with oil?
Ghee adds a unique flavour that oil can’t replicate. However, if you absolutely must, you can use a neutral-flavoured oil, but it won’t be quite the same.


Neha Deshmukh
Neha holds a B.A. in History with a focus on Indian and world history, including ancient, medieval, and modern periods. At RecipesOfIndia.org — the world’s largest database of Indian recipes — she combines her love for food and history by exploring how India’s past has shaped its culinary traditions.