- Grind small onions and red chilies into a smooth paste using a little water.
- In a mixing bowl, combine rice flour, urad dal flour, sesame seeds, melted butter, hot oil, asafoetida (hing), salt, and the onion-chili paste.
- Mix ingredients thoroughly, adding water gradually to form a firm, non-sticky dough.
- Grease a murukku maker with oil and attach a star-shaped disc.
- Heat oil in a kadai (or deep frying pan) over medium heat. Press dough directly into the hot oil in circular motions.
- Fry murukku on medium-low heat until golden brown and crisp, flipping once.
- Drain on paper towels and cool completely before storing in an airtight container.
- Calories:205 kcal25%
- Energy:857 kJ22%
- Protein:5 g28%
- Carbohydrates:39 mg40%
- Sugar:0.2 mg8%
- Salt:9 g25%
- Fat:3 g20%
Last Updated on 4 months by Neha Deshmukh
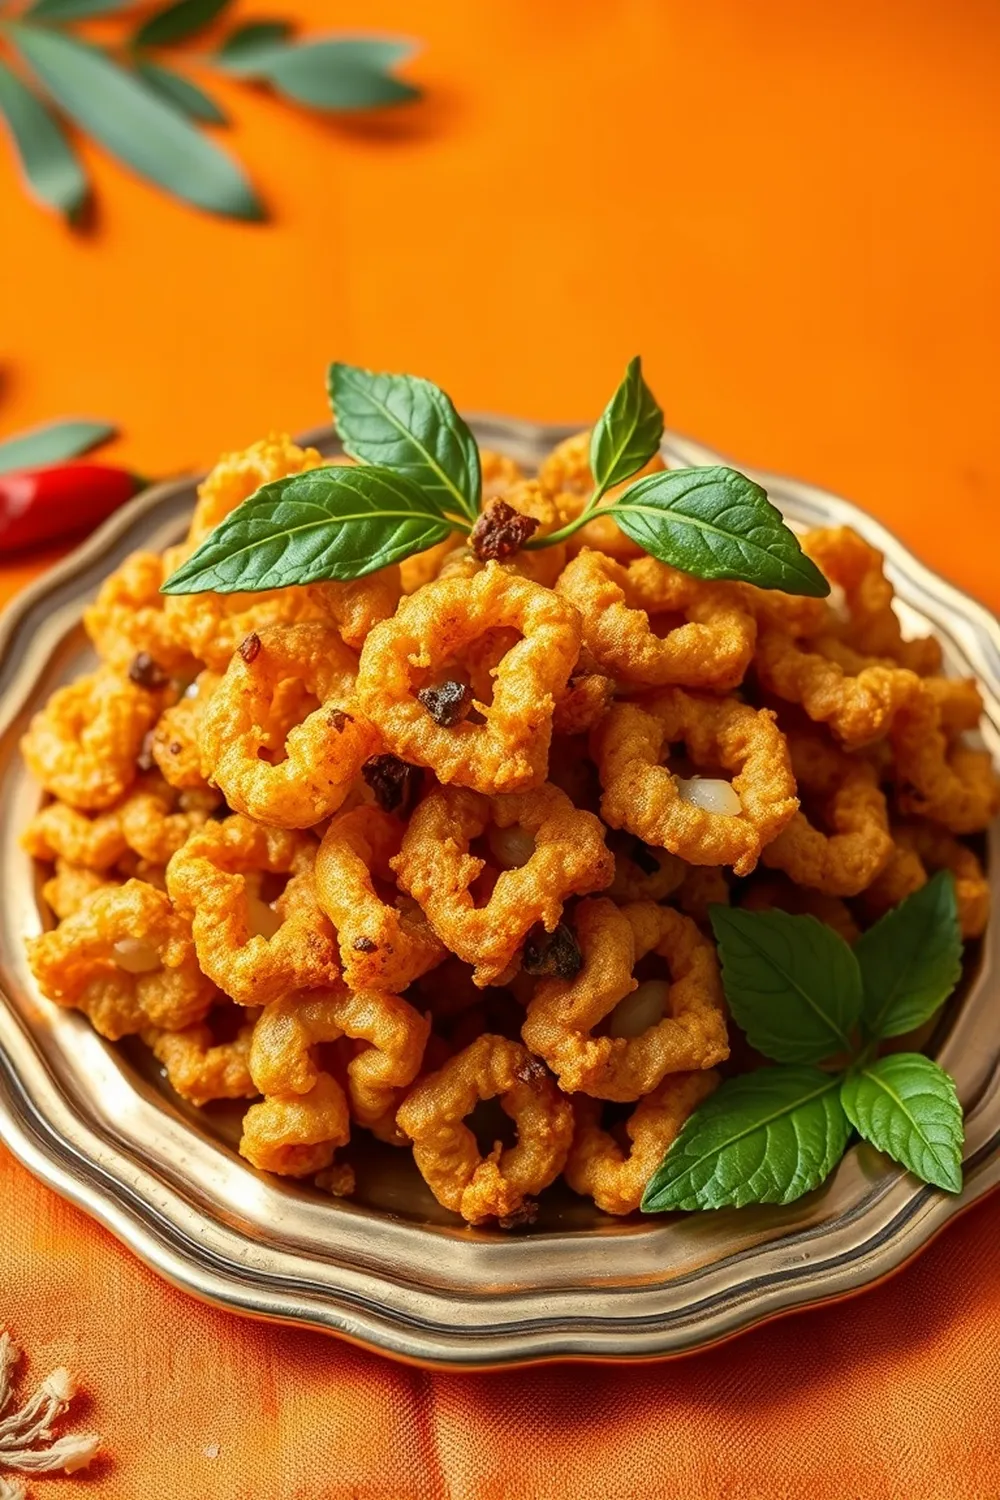
Authentic Murukku Recipe – Crispy Rice & Urad Dal Snack
Okay, let’s be real. Is there anything more satisfying than a crunchy, savory snack with your evening chai? For me, it’s Murukku, hands down! This recipe is a family favorite, and I’m so excited to finally share it with you. It’s a little bit of effort, but trust me – the reward is so worth it. Get ready for perfectly crispy, melt-in-your-mouth Murukku that will disappear in minutes!
Why You’ll Love This Recipe
This Murukku recipe isn’t just about the incredible taste and texture. It’s about tradition, about the joy of making something from scratch, and about sharing that with loved ones. It’s relatively easy, even if you’ve never used a Murukku maker before. Plus, it’s a fantastic make-ahead snack for festivals or just a cozy weekend treat. Seriously, once you make this, you’ll be hooked!
Ingredients
Here’s what you’ll need to create this magic:
- 1 cup rice flour (approximately 170g)
- ¼ cup urad dal flour (approximately 30g)
- ½ teaspoon sesame seeds (approximately 2.5g)
- 1 teaspoon melted butter (approximately 5ml)
- 1 teaspoon hot oil (approximately 5ml)
- A pinch of hing (asafoetida)
- Salt to taste
- 12 small onions, roughly chopped
- 3 red chillies
- ⅛ cup water (approximately 30ml) – plus more if needed!
Ingredient Notes
Let’s talk ingredients for a sec, because a few things really make a difference here.
- Urad Dal Flour: Don’t skip this! Urad dal flour (black gram flour) is key to getting that perfect, slightly flaky texture. It adds a wonderful depth of flavor too.
- Hing (Asafoetida): A tiny pinch of hing goes a long way. It adds a savory, umami note that really elevates the flavor. If you’re not familiar with it, it smells… interesting, but trust me, it tastes amazing when cooked!
- Sesame Seeds: My grandmother always used white sesame seeds, but you’ll often find black sesame seeds used in other regions of India. Both work beautifully – it really comes down to personal preference! Feel free to toast them lightly for extra flavor.
Step-By-Step Instructions
Alright, let’s get cooking!
- First, we need to make the onion-chilli paste. Grind the small onions and red chillies into a really smooth paste using a little water. A smooth paste is important for a good texture.
- In a mixing bowl, combine the rice flour, urad dal flour, sesame seeds, melted butter, hot oil, hing, and salt.
- Now, add the onion-chilli paste to the flour mixture.
- Gradually add water, a little at a time, and start mixing everything together. You want to form a firm, but pliable dough. It shouldn’t be sticky!
- Grease your Murukku maker with a little oil. Attach the star-shaped disc (or whichever shape you prefer!).
- Heat oil in a kadai (or a deep frying pan) over medium-low heat. This is important – you don’t want the Murukku to brown too quickly.
- Now, press the dough directly into the hot oil in circular motions.
- Fry the Murukku on medium-low heat until it’s golden brown and crispy, flipping it once halfway through.
- Remove the Murukku and drain it on paper towels to remove any excess oil.
- Let it cool completely before storing it in an airtight container. (If you can resist eating it all immediately, that is!)
Expert Tips
- Oil Temperature is Key: Seriously, keep the heat on medium-low. Too hot, and the Murukku will burn on the outside before it cooks through.
- Dough Consistency: The dough should be firm enough to hold its shape, but soft enough to pass through the Murukku maker easily.
- Don’t Overcrowd the Pan: Fry the Murukku in batches to maintain the oil temperature.
Variations
Want to switch things up? Here are a few ideas:
- Vegan Adaptation: Simply swap the butter for a vegan butter alternative or use the same amount of vegetable oil.
- Gluten-Free: This recipe is naturally gluten-free, as long as your urad dal flour is certified gluten-free.
- Spice Level: Adjust the number of red chillies to control the heat. My friend, Priya, loves to add a green chilli or two for an extra kick!
- Diwali/Festival Adaptations: I always double or triple this recipe when Diwali rolls around. It makes a lovely homemade gift! Package them in pretty boxes or tins.
Serving Suggestions
Murukku is fantastic on its own with a cup of chai. It also pairs beautifully with sambar, chutney, or even a simple yogurt dip. It’s the perfect snack for any time of day!
Storage Instructions
Store cooled Murukku in an airtight container at room temperature for up to a week. They might lose a little of their initial crunch over time, but they’ll still be delicious!
FAQs
Let’s answer some common questions:
- What type of oil is best for frying Murukku? Groundnut oil (peanut oil) is traditionally used, but you can also use vegetable oil or sunflower oil.
- Can I make the dough ahead of time? Yes, you can! Just store it in an airtight container in the refrigerator for up to 2 days. Let it come to room temperature before using.
- How do I prevent the Murukku from absorbing too much oil? Maintaining the correct oil temperature is crucial. Also, don’t overcrowd the pan.
- What is the purpose of adding hot oil to the dough? The hot oil helps create a light and crispy texture.
- Can I use a different shaped nozzle for the Murukku maker? Absolutely! There are lots of different shapes available. Experiment and have fun!


Neha Deshmukh
Neha holds a B.A. in History with a focus on Indian and world history, including ancient, medieval, and modern periods. At RecipesOfIndia.org — the world’s largest database of Indian recipes — she combines her love for food and history by exploring how India’s past has shaped its culinary traditions.


