- Steam maida (all-purpose flour) in a cloth pouch for 15-20 minutes using an idli steamer to reduce its glutinous texture.
- Cool the steamed flour completely, then grind it to a coarse consistency resembling rice flour.
- Mix the flour with melted butter, asafoetida (hing), sesame seeds, cumin seeds, grated coconut, coconut oil, and salt.
- Knead into a non-sticky dough using minimal water. Add water gradually, if needed.
- Gently roll the dough into small seedai balls without applying too much pressure. Optionally, prick each ball with a toothpick.
- Heat oil in a deep pan or wok over medium flame and fry the seedai in batches for 6-8 minutes, or until golden crisp and floating.
- Briefly increase the heat towards the end for color enhancement, being careful not to burn them. Drain on paper towels.
- Cool completely before storing in an airtight container to maintain optimal crispness.
- Calories:450 kcal25%
- Energy:1882 kJ22%
- Protein:5 g28%
- Carbohydrates:50 mg40%
- Sugar:1 mg8%
- Salt:150 g25%
- Fat:25 g20%
Last Updated on 4 months by Neha Deshmukh
Authentic Seedai Recipe – Maida, Sesame & Cumin Crisps
Introduction
Oh, Seedai! These little golden, crunchy delights are a huge part of my childhood memories, especially during festivals. My grandmother used to make the most incredible Seedai, and the aroma would fill the entire house. It’s a bit of work, but trust me, the satisfying crunch and flavour explosion are so worth it. I’m excited to share my version of this authentic Seedai recipe with you – it’s a little piece of South Indian tradition you can make right in your kitchen!
Why You’ll Love This Recipe
This Seedai recipe isn’t just about a delicious snack; it’s about experiencing a taste of South India. It’s surprisingly easy to make, even if you’re new to Indian cooking. Plus, it’s perfect for festive occasions, afternoon tea, or just when you’re craving something savoury and crunchy. You’ll love the unique blend of sesame, cumin, and coconut – it’s a flavour combination that’s simply irresistible.
Ingredients
Here’s what you’ll need to create these crispy Seedai:
- 2 cups Maida (All purpose flour) – about 250g
- 1 tablespoon Butter – about 15g
- ?? teaspoon Asafoetida powder – about 1/4 tsp (hing)
- 1 tablespoon Sesame seeds – about 10g
- 1 teaspoon Cumin seeds – about 5g
- 2 tablespoons Grated coconut – about 20g
- 1 teaspoon Coconut oil – about 5ml
- Salt – to taste
- Oil (for deep frying)
Ingredient Notes
Let’s talk ingredients! A few little tips can make all the difference.
Maida (All Purpose Flour) – Understanding its Role
Maida is the star of the show here. It gives Seedai its signature melt-in-your-mouth texture. We’ll be steaming it, which is a crucial step – more on that later!
Asafoetida Powder – A Key Flavor Component
Asafoetida (hing) adds a unique savoury depth. Don’t skip it! A little goes a long way, so start with a small amount and adjust to your liking.
Sesame Seeds – Regional Variations & Benefits
Black sesame seeds are traditionally used in some regions, while white sesame seeds are more common in others. Feel free to use whichever you prefer! Sesame seeds add a lovely nutty flavour and a beautiful visual appeal.
Coconut – Fresh vs. Dried & Flavor Impact
Freshly grated coconut is best, but unsweetened desiccated coconut works well in a pinch. The coconut adds a subtle sweetness and a lovely texture.
Coconut Oil – Traditional Choice & Aroma
Coconut oil lends a beautiful aroma and flavour that complements the other ingredients perfectly. You can substitute with vegetable oil, but the flavour won’t be quite the same.
Cumin Seeds – Roasting for Enhanced Flavor
Lightly roasting the cumin seeds before adding them to the dough intensifies their flavour. Just a minute or two in a dry pan is all it takes!
Step-By-Step Instructions
Alright, let’s get cooking!
- First, let’s steam the maida. Place the flour in a cloth pouch (a clean muslin cloth tied securely works great). Steam it in an idli steamer for about 15 minutes. This reduces the glutinous texture of the maida, giving Seedai its characteristic crispness.
- Once steamed, let the flour cool completely. Then, grind it to a coarse consistency – it should resemble rice flour.
- Now, in a large bowl, combine the cooled, ground flour with melted butter, asafoetida powder, sesame seeds, cumin seeds, grated coconut, coconut oil, and salt.
- Time to knead! Add minimal water, a teaspoon at a time, and knead until you have a non-sticky dough. Don’t over-knead it.
- Gently roll the dough into small, bite-sized balls – about the size of a small marble. Don’t press too hard, you want them to be light and airy. You can optionally prick each ball with a toothpick to prevent them from bursting while frying.
- Heat oil in a pan over medium heat. Carefully drop the Seedai balls into the hot oil, frying them for 8-10 minutes, or until they turn golden crisp and float to the surface.
- For that perfect golden colour, briefly increase the heat towards the end of frying. Be careful not to burn them!
- Remove the Seedai from the oil and drain them on paper towels.
- Let them cool completely before storing. This is important – they’ll get even crispier as they cool!
Expert Tips
- Don’t overcrowd the pan when frying. Fry in batches to maintain the oil temperature.
- The dough should be firm but pliable. If it’s too sticky, add a little more flour.
- Steaming the maida is key to achieving the right texture. Don’t skip this step!
Variations
- Vegan Seedai Adaptation: Substitute the butter with a vegan butter alternative.
- Gluten-Free Seedai – Exploring Alternative Flours: While traditional Seedai uses maida, you can experiment with gluten-free flour blends. Rice flour is a good starting point, but you might need to adjust the water content.
- Spice Level – Adding a Touch of Heat: My friend Priya loves to add a pinch of red chilli powder to the dough for a little kick!
- Festival Adaptations – Special Occasion Seedai: During Diwali, my family adds a few strands of saffron to the dough for a beautiful colour and aroma.
Serving Suggestions
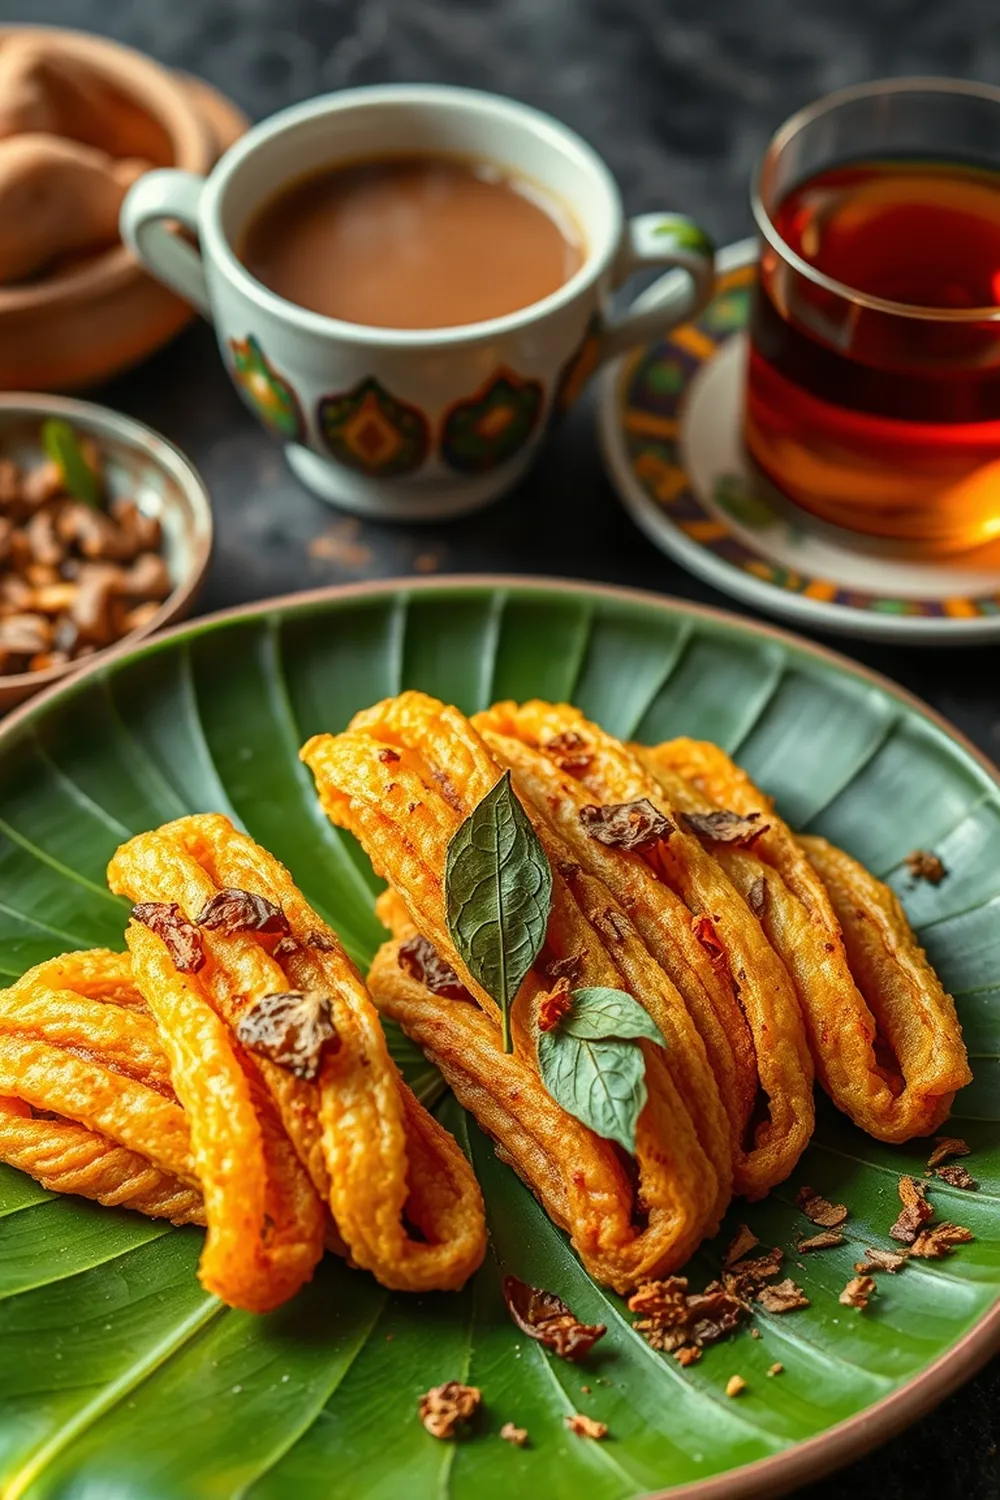
Seedai is fantastic on its own as a snack. It also pairs beautifully with a cup of hot chai or filter coffee. I love serving it during festivals and gatherings – it always disappears quickly!
Storage Instructions
Store cooled Seedai in an airtight container at room temperature. They’ll stay crispy for up to a week, but honestly, they rarely last that long in my house!
FAQs
What is the purpose of steaming the maida?
Steaming the maida reduces its glutinous texture, resulting in a lighter, crispier Seedai. It’s a crucial step for achieving the perfect texture.
Can I use whole wheat flour instead of maida?
You can try, but the texture will be different. Whole wheat flour will result in a denser, less crispy Seedai.
How do I achieve the perfect crispness in Seedai?
Steaming the maida, frying at the right temperature, and letting them cool completely are all essential for achieving perfect crispness.
What is the best way to store Seedai to maintain its crunch?
Store them in an airtight container at room temperature. Make sure they are completely cooled before storing.
Can I make Seedai ahead of time and freeze it?
I wouldn’t recommend freezing the fried Seedai, as it can affect the texture. However, you can prepare the dough ahead of time and store it in the refrigerator for a day or two.


Neha Deshmukh
Neha holds a B.A. in History with a focus on Indian and world history, including ancient, medieval, and modern periods. At RecipesOfIndia.org — the world’s largest database of Indian recipes — she combines her love for food and history by exploring how India’s past has shaped its culinary traditions.