- Mix 1 cup whole wheat flour and ¾ cup water in a bowl until no dry flour remains. Cover and rest for 30 minutes (autolyse technique).
- Add 1 teaspoon salt to the dough. Gently knead for 2-3 minutes to form a cohesive ball. Rest, covered, for another 30 minutes.
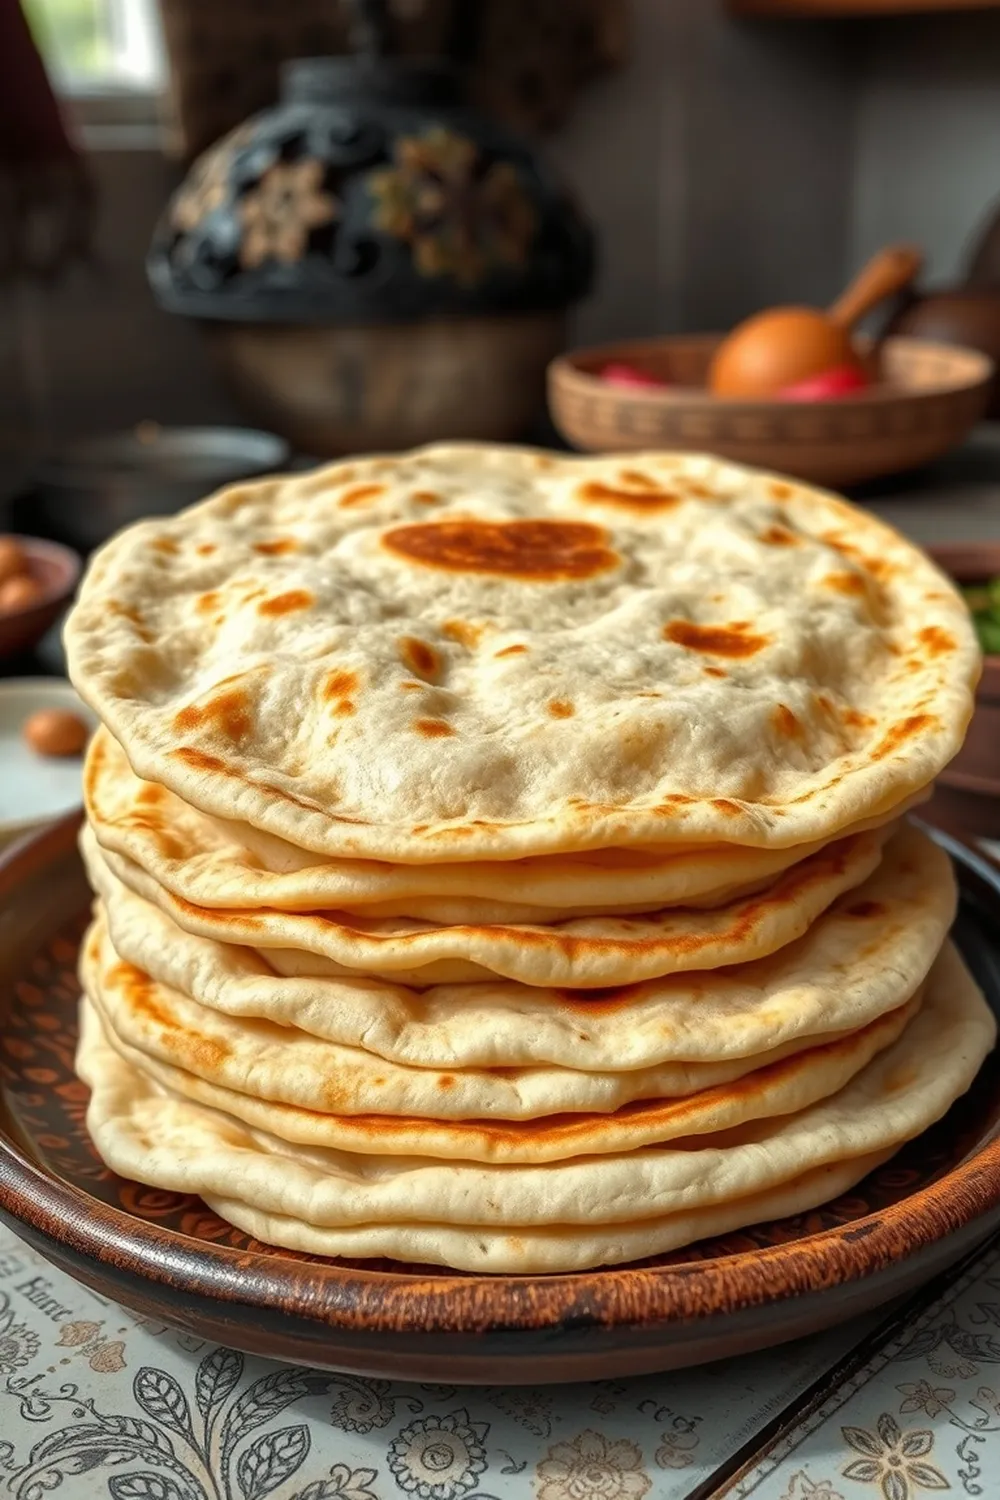
- Divide dough into lime-sized balls. Heat an iron griddle or tawa on medium-high heat.
- Roll each ball into a 4-inch round, dusting with flour as needed. Cook on the griddle for 10-15 seconds until bubbles begin to form.
- Flip and cook for 30-45 seconds. Press gently with a clean cloth or spatula to puff up the chapati. Flip once more and press again briefly.
- Store cooked chapatis in a cotton-lined bowl covered with a cloth to retain softness.
- Calories:70 kcal25%
- Energy:292 kJ22%
- Protein:2.5 g28%
- Carbohydrates:15 mg40%
- Sugar:mg8%
- Salt:150 g25%
- Fat:0.5 g20%
Last Updated on 2 months by Neha Deshmukh
Authentic Whole Wheat Chapati Recipe – Soft & Fluffy Indian Flatbread
Hey everyone! If you’ve ever craved that warm, soft, and slightly chewy Indian flatbread served with practically every meal, you’re in the right place. Chapati (also known as roti) is a staple in Indian households, and honestly, learning to make it well is a game-changer. I remember the first time I tried making chapati – it was a bit of a disaster! But with a little practice, it becomes second nature. And trust me, the satisfaction of a perfectly puffed chapati is so worth it.
Why You’ll Love This Recipe
This recipe focuses on achieving that perfect soft and fluffy texture. We’ll be using a simple technique called autolyse, which helps develop the gluten and results in incredibly tender chapatis. It’s easier than you think, and the results are seriously delicious. Plus, it only takes about 20 minutes of actual cooking time, though we’ll need an hour for resting the dough.
Ingredients
Here’s what you’ll need to make about 4 chapatis:
- 1 cup Whole Wheat Flour (Atta) – approximately 120g
- ½ cup Water – approximately 120ml
- 1 teaspoon Salt – approximately 6g
Ingredient Notes
Let’s talk about the star of the show: Whole Wheat Flour, or Atta as it’s traditionally called. It’s the heart and soul of a good chapati. You’ll find different varieties of atta available.
- Whole Wheat Atta: This is the most common type and what I recommend for beginners. It gives a lovely, slightly nutty flavor.
- Fine Atta: Some brands offer a finer grind, which can result in even softer chapatis.
- Chakki Atta: Stone-ground atta is considered premium and retains more nutrients.
Don’t skimp on the quality of your atta if you can help it! It really does make a difference. Also, the water temperature matters – lukewarm water helps activate the gluten.
Step-By-Step Instructions
Alright, let’s get cooking!
- First, in a nice big bowl, combine 1 cup of whole wheat flour and ½ cup of water. Mix it all together with your hands until no dry flour remains. It will look a little shaggy at first, that’s okay!
- Now, cover the bowl and let it rest for 30 minutes. This is the autolyse step – it allows the flour to fully hydrate, leading to a softer chapati. Trust me, don’t skip this!
- After 30 minutes, add 1 teaspoon of salt to the dough. Gently knead for about 2 minutes until it forms a cohesive, smooth ball. It shouldn’t be sticky.
- Cover the dough again and let it rest for another 30 minutes. This second rest is just as important!
- Divide the dough into lime-sized balls. About 4-5 balls should give you around 4 chapatis.
- Heat an iron griddle (tawa) on medium-high heat. It needs to be hot, but not scorching.
- Roll each ball into a 4-inch round, dusting with flour as needed to prevent sticking. Don’t worry about making it perfectly round – rustic is charming!
- Carefully place the rolled chapati on the hot griddle. Cook for 10-15 seconds until small bubbles start to form.
- Flip the chapati and cook for another 30 seconds. Now, here’s the trick: gently press around the edges of the chapati with a clean cloth or spatula. This encourages it to puff up!
- Flip once more and press again. You should see it puff up beautifully.
- Remove the chapati from the griddle and place it in a cotton-lined bowl covered with a cloth. This keeps them soft and warm.
Expert Tips
Want to take your chapati game to the next level? Here are a few things I’ve learned along the way:
- Softness is Key: The autolyse and resting periods are crucial for soft chapatis. Don’t rush them!
- Preventing Dryness: A little bit of oil (about ½ teaspoon) can be added to the dough for extra softness, but it’s not essential.
- Mastering the Puff: The griddle temperature and gentle pressing are key to getting that perfect puff. If it’s not puffing, your griddle might not be hot enough, or you might not be pressing firmly enough.
- Don’t Overcook: Overcooked chapatis will be hard and brittle.
Variations
Let’s get creative!
- Vegan Adaptation: This recipe is naturally vegan!
- Gluten-Free Adaptation: While traditional chapati uses wheat flour, you can experiment with gluten-free flour blends. A mix of rice flour, tapioca starch, and potato starch can work, but the texture will be different.
- Spice Level: Add a pinch of red chili flakes to the dough for a little kick. My friend loves doing this!
- Festival Adaptations: Serve chapatis with rich, festive curries and side dishes during celebrations like Diwali or Eid.
Serving Suggestions
Chapatis are incredibly versatile. They’re perfect with:
- Dal (lentil soup)
- Vegetable curries (like aloo gobi or palak paneer)
- Meat curries (like butter chicken or lamb rogan josh)
- Yogurt and pickle
Honestly, they go with just about anything!
Storage Instructions
Want to keep those chapatis soft? Here’s how:
- Cotton Cloth is Your Friend: Store cooked chapatis in a cotton-lined bowl covered with a clean cloth. The cotton helps absorb moisture and keeps them from drying out.
- Airtight Containers: If you have leftovers, you can store them in an airtight container in the refrigerator for a couple of days. Reheat gently (see FAQs below).
FAQs
Let’s tackle some common questions:
- What type of flour is best for making chapati? Whole wheat flour (atta) is the traditional and best choice for authentic chapati.
- How do I know when the griddle is hot enough? Sprinkle a few drops of water on the griddle. If they sizzle and evaporate immediately, it’s ready.
- Why are my chapatis tough and not soft? This is usually due to not resting the dough long enough, using too much flour while rolling, or overcooking them.
- Can I make chapati dough ahead of time? Yes, you can! Make the dough and let it rest in the refrigerator for up to 24 hours. Bring it to room temperature before rolling.
- How can I reheat chapatis without them becoming hard? Sprinkle a little water on each chapati and heat them on a griddle or in a microwave for a few seconds.
Enjoy making these chapatis! I hope this recipe brings a little bit of Indian home cooking into your kitchen. Let me know how they turn out in the comments below!


Neha Deshmukh
Neha holds a B.A. in History with a focus on Indian and world history, including ancient, medieval, and modern periods. At RecipesOfIndia.org — the world’s largest database of Indian recipes — she combines her love for food and history by exploring how India’s past has shaped its culinary traditions.


