- Combine all ingredients except oil/ghee in a mixing bowl. Gradually add water to form a thick pancake batter consistency.
- Heat a non-stick griddle and lightly sprinkle with water to cool it slightly. Pour 1/4 cup batter onto the griddle.
- Wet your hands and gently spread the batter into a circular shape (like a paratha). Cover and cook on medium heat for 2-3 minutes.
- Drizzle oil/ghee around the edges, flip the pancake, and cook the other side until golden brown spots appear.
- Serve hot with butter, chutney, or sauce.
- Calories:180 kcal25%
- Energy:753 kJ22%
- Protein:4 g28%
- Carbohydrates:25 mg40%
- Sugar:2 mg8%
- Salt:200 g25%
- Fat:6 g20%
Last Updated on 2 months by Neha Deshmukh
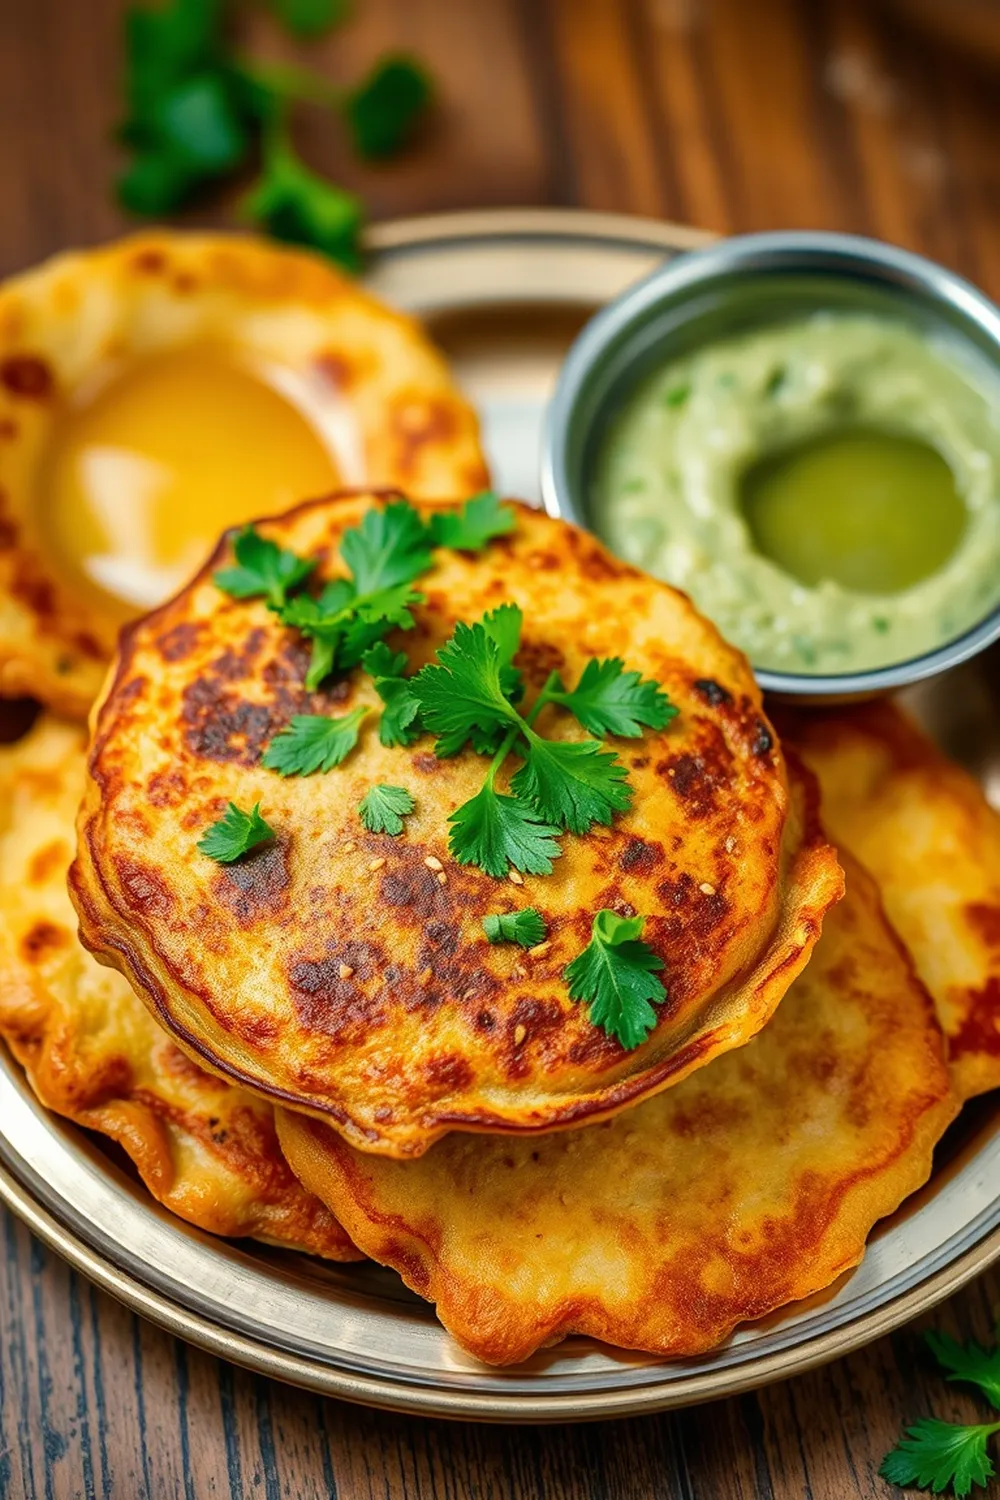
Bottle Gourd Pancake Recipe – Dudhi Chilla With Wheat Flour & Semolina
Hey everyone! If you’re looking for a super tasty and healthy breakfast or snack, you have to try these Dudhi Chilla pancakes. I remember my grandmother making these for me when I was little, and the aroma always filled the house with such warmth. They’re light, flavourful, and a brilliant way to sneak in some veggies!
Why You’ll Love This Recipe
These Dudhi Chilla pancakes are seriously addictive. They’re quick to make – perfect for busy mornings – and incredibly versatile. Plus, they’re packed with goodness from the bottle gourd (dudhi), making them a guilt-free treat. Honestly, once you try these, you’ll be making them again and again!
Ingredients
Here’s what you’ll need to whip up these delicious Dudhi Chilla:
- 1 cup Grated Dudhi / Lauki / Bottle Gourd
- 1 cup Wheat flour
- 2 tablespoons Rawa Barik (Semolina Fine)
- 2 tablespoons Rice Flour
- 2 tablespoons Gram Flour (Besan)
- ?? teaspoon Green Chilly Paste (adjust to your spice preference!)
- ?? teaspoon Tamarind dry pulp or buttermilk or Curd
- ?? teaspoon Turmeric Powder
- ?? teaspoon Crushed Ginger
- 1 teaspoon Sesame Seeds
- ?? teaspoon Carom Seeds (Ajwain)
- Salt to taste
- Oil / Ghee / Butter for roasting
Ingredient Notes
Let’s talk ingredients for a sec! Getting these right makes all the difference.
- Dudhi/Lauki/Bottle Gourd: This is the star! Make sure to grate it finely – a little moisture is okay, but you don’t want a soggy batter. I find using the smaller holes on a box grater works best.
- Rawa Barik (Semolina Fine): This gives the chilla a lovely texture. The barik (fine) variety is key for a softer pancake. If you only have coarse rawa, you can pulse it in a blender a few times to make it finer.
- Tamarind/Buttermilk/Curd: This is where the magic happens! The slight tanginess balances the flavours beautifully. I usually use buttermilk, but tamarind pulp adds a really authentic flavour. A tablespoon of plain yogurt works wonderfully too!
Step-By-Step Instructions
Alright, let’s get cooking!
- First, combine all the ingredients except the oil/ghee in a mixing bowl.
- Now, gradually add water – about ½ to ¾ cup – while mixing. You want a batter that’s thick, but still pourable, like a pancake batter. Don’t add all the water at once, add a little at a time until you get the right consistency.
- Heat a non-stick griddle or tawa over medium heat. Sprinkle a few drops of water on it – if the water sizzles and evaporates quickly, it’s ready!
- Pour about ¼ cup of batter onto the hot griddle.
- Wet your hands slightly with water and gently spread the batter into a circular shape, just like you would with a paratha.
- Cover the chilla and cook for 2-3 minutes, or until you see bubbles forming on the surface.
- Drizzle a little oil or ghee around the edges of the chilla.
- Flip it over and cook the other side until it’s golden brown and slightly crispy. You’ll know it’s ready when it looks beautifully speckled!
- Repeat with the remaining batter.
Expert Tips
- Don’t overcrowd the griddle: Cook one chilla at a time for the best results.
- Medium heat is your friend: Too high, and the chilla will burn before it cooks through. Too low, and it will be pale and soggy.
- A well-seasoned griddle is key: This will prevent sticking.
Variations
Want to switch things up? Here are a few ideas:
- Vegan Adaptation: Swap the buttermilk or curd for plant-based yogurt. Coconut yogurt works particularly well!
- Gluten-Free Adaptation: Use a gluten-free flour blend instead of wheat flour. A mix of rice flour, potato starch, and tapioca flour usually does the trick.
- Spice Level: My friend loves a real kick, so she adds a full teaspoon of green chili paste! Feel free to adjust the amount to your liking.
- Festival Adaptations: These are fantastic as a light breakfast during fasting periods like Navratri – just make sure to check that all your ingredients are allowed during the fast.
Serving Suggestions
Serve these Dudhi Chilla hot off the griddle with:
- Homemade white butter (so good!)
- Your favourite chutney – mint-coriander or tamarind chutney are classic choices.
- A dollop of yogurt.
- A side of spicy mango pickle.
Storage Instructions
Leftover chillas can be stored in an airtight container in the refrigerator for up to 2 days. Reheat them on a griddle or in a pan until warmed through. You can also store the batter in the fridge for a day, but it might thicken slightly, so add a splash of water before cooking.
FAQs
1. What is the best way to grate the bottle gourd for this recipe?
Use the smaller holes on a box grater. You want a fine grate, but not mushy!
2. Can I use coarse semolina (rawa) instead of fine semolina (rawa barik)?
You can, but the texture won’t be quite as soft. Pulse the coarse rawa in a blender a few times to make it finer.
3. What can I substitute for buttermilk or tamarind pulp?
Plain yogurt is a great substitute for both! Lemon juice can also work in a pinch, but use about half the amount.
4. How can I prevent the chilla from sticking to the griddle?
Make sure your griddle is well-seasoned and hot enough. A little oil or ghee also helps.
5. Can I add other vegetables to the Dudhi Chilla batter?
Absolutely! Grated carrots, onions, or even spinach would be delicious additions.
6. How long does the batter keep before it needs to be cooked?
The batter is best used immediately, but it will keep in the fridge for up to a day. It might thicken, so add a splash of water before cooking.
Enjoy making these Dudhi Chilla! Let me know how they turn out in the comments below. Happy cooking!


Neha Deshmukh
Neha holds a B.A. in History with a focus on Indian and world history, including ancient, medieval, and modern periods. At RecipesOfIndia.org — the world’s largest database of Indian recipes — she combines her love for food and history by exploring how India’s past has shaped its culinary traditions.


