- Dissolve coffee powder in 2 tablespoons of hot water. Set aside.
- In a saucepan, combine coconut milk, sugar, cocoa powder, and vanilla extract. Whisk until smooth.
- Add the prepared coffee mixture and salt. Mix well.
- Cook on medium heat for 8-10 minutes, stirring constantly until thickened. Remove from heat and cool completely.
- Refrigerate mixture for at least 1 hour. Stir in mini cereal before churning.
- Pour chilled mixture into ice cream maker. Churn for 15-20 minutes until it reaches a soft-serve consistency.
- Transfer to a freezer-safe container. Freeze overnight until firm.
- Let sit at room temperature for 10-15 minutes before scooping. Serve with desired toppings.
- Calories:203.74 kcal25%
- Energy:852 kJ22%
- Protein:3 g28%
- Carbohydrates:30 mg40%
- Sugar:20 mg8%
- Salt:75 g25%
- Fat:25 g20%
Last Updated on 6 months ago by Neha Deshmukh
Coconut Coffee Ice Cream Recipe – Easy Homemade Frozen Dessert
Hey everyone! If you’re anything like me, you’re always on the lookout for a dessert that’s a little different, a little special, and totally delicious. Well, look no further! This Coconut Coffee Ice Cream is exactly that. I first stumbled upon this recipe while trying to use up some extra coconut milk, and honestly, it’s become a summer staple in my house. It’s creamy, dreamy, and has the perfect kick of coffee. Let’s get scooping!
Why You’ll Love This Recipe
This isn’t your average ice cream. The combination of rich coconut milk and bold coffee is just… chef’s kiss. It’s surprisingly easy to make, even without an ice cream maker (though it definitely helps!). Plus, it’s a fantastic way to impress your friends and family with a homemade treat that feels a little bit fancy. Seriously, who doesn’t love a good homemade ice cream?
Ingredients
Here’s what you’ll need to whip up a batch of this delightful ice cream:
- 13.5 fl oz (400ml) full-fat coconut milk
- 1/3 cup (67g) sugar
- 1/4 cup (30g) cocoa powder
- 1 teaspoon vanilla extract
- 1 tablespoon coffee powder
- Pinch of salt
- 1 cup (approx. 85g) mini cereal (like Rice Krispies or similar)
Ingredient Notes
Let’s talk ingredients for a sec, because a few little things can make a big difference:
- Coconut Milk: Seriously, go for full-fat here. It’s what gives this ice cream its incredible creaminess. Don’t even think about using light coconut milk – it just won’t be the same!
- Cocoa Powder: I prefer using Dutch-processed cocoa powder for a smoother, less acidic chocolate flavor. But regular unsweetened cocoa powder works just fine too.
- Coffee Powder: This is where you can really play around! I usually use instant coffee powder, but you can also use finely ground espresso powder for a more intense coffee flavor. Just adjust the amount to your liking.
- Sugar: Granulated sugar works perfectly. You can also experiment with brown sugar for a slightly caramel-y note.
Step-By-Step Instructions
Alright, let’s get to the fun part! Here’s how to make this Coconut Coffee Ice Cream:
- First, dissolve the coffee powder in 2 tablespoons of hot water. Set this aside – it’ll become our coffee concentrate.
- In a pan, combine the coconut milk, sugar, cocoa powder, and vanilla extract. Whisk everything together until it’s nice and smooth. No lumps allowed!
- Now, add the prepared coffee mixture and a tiny pinch of salt to the pan. Give it another good mix.
- Place the pan over medium heat and cook for 8-10 minutes, stirring constantly. You want the mixture to thicken slightly. Don’t let it boil! Once it’s thickened, remove from the heat and let it cool completely.
- Once cooled, refrigerate the mixture for at least an hour. This is important – it needs to be really cold before churning. After chilling, stir in the mini cereal.
- Pour the chilled mixture into your ice cream maker and churn for 15-20 minutes, or until it reaches a soft-serve consistency.
- Transfer the ice cream to a freezer-safe container and freeze overnight (or for at least 4-6 hours) until it’s firm enough to scoop.
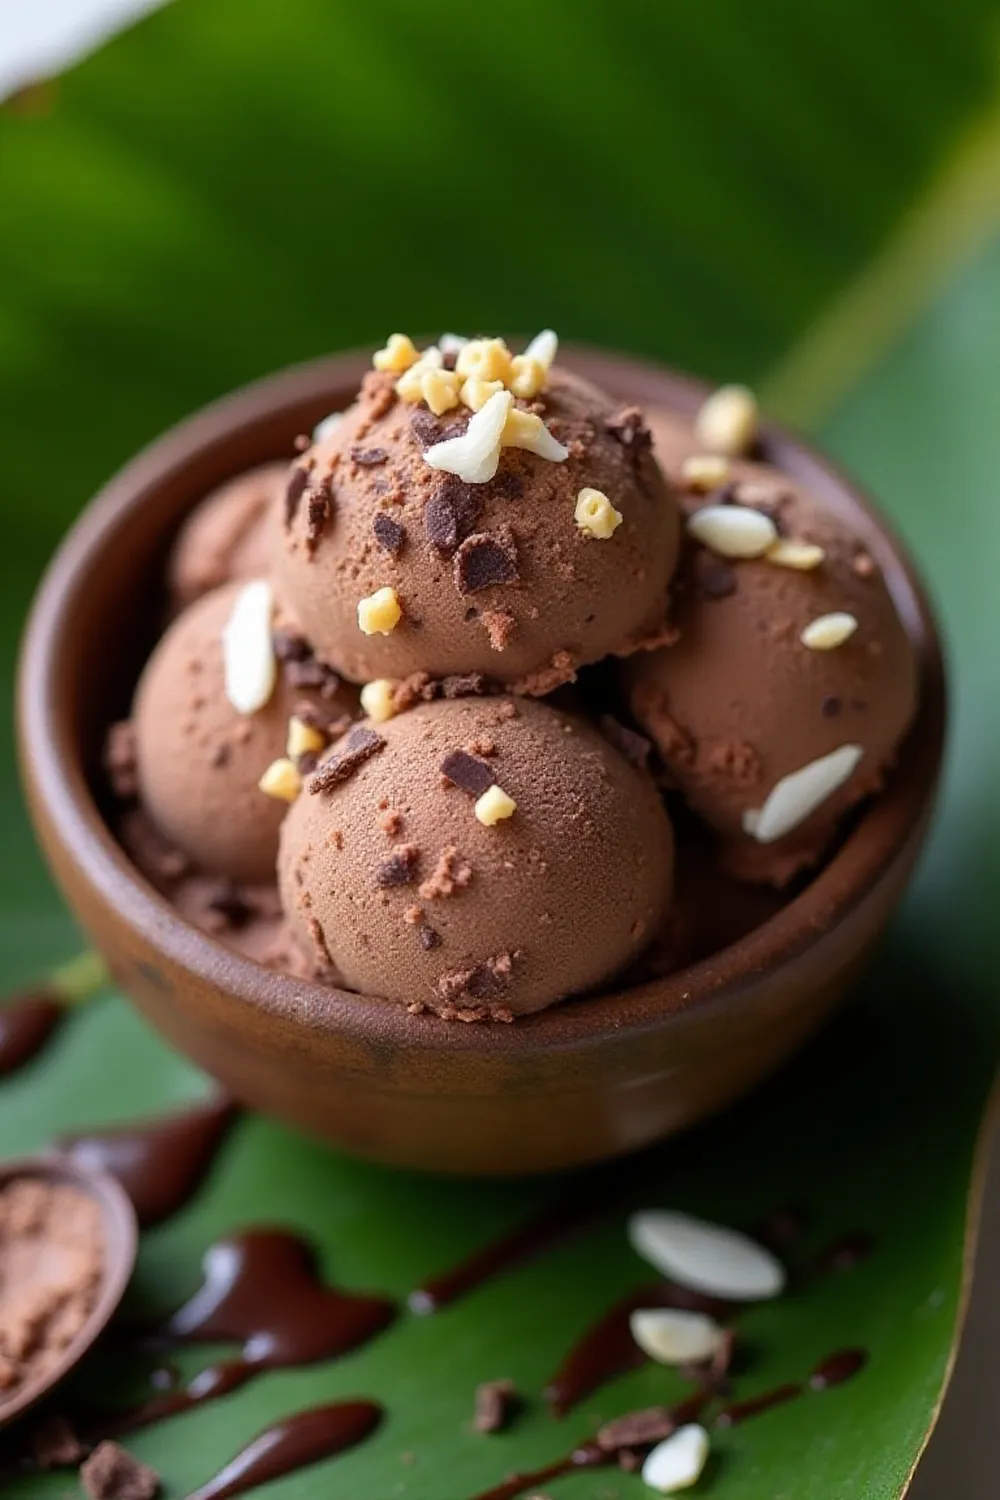
- Before serving, let it sit at room temperature for 10-15 minutes to soften slightly. Then, scoop and enjoy with your favorite toppings!
Expert Tips
- Don’t skip the chilling time! A cold mixture churns much faster and results in a smoother ice cream.
- Stir, stir, stir! Constant stirring prevents the mixture from sticking to the bottom of the pan and ensures even cooking.
- Taste as you go. Adjust the sugar and coffee powder to your preference.
Variations
Want to switch things up? Here are a few ideas:
- Vegan Adaptation: This recipe is already pretty close to vegan! Just double-check your cereal is vegan-friendly.
- Sugar-Free Option: Use your favorite sugar substitute (like erythritol or stevia) instead of sugar.
- Stronger Coffee Flavor: Add an extra tablespoon of coffee powder or a teaspoon of espresso powder. My friend, Priya, loves this version!
- Chocolate Cereal Variation: Swap the mini cereal for chocolate-flavored cereal for an extra chocolatey treat. My kids love this one.
- Festival Adaptations – Summer Treats: Serve in waffle cones during summer festivals or add a sprinkle of cardamom for a festive touch during Diwali.
Serving Suggestions
This ice cream is delicious on its own, but it’s even better with toppings! Here are a few ideas:
- Chocolate sauce
- Whipped cream
- Chopped nuts
- Fresh berries
- Chocolate shavings
Storage Instructions
Store the ice cream in an airtight, freezer-safe container for up to 2 weeks. It might get a little icy after that, but it will still be tasty!
FAQs
Let’s answer some common questions:
- Is this recipe suitable for those with dairy allergies? Yes! Since it’s made with coconut milk, it’s naturally dairy-free.
- Can I use a different type of cereal? Absolutely! Feel free to experiment with your favorite cereals.
- How can I adjust the sweetness level? Simply add more or less sugar to the mixture.
- What if I don’t have an ice cream maker? You can still make this ice cream! Pour the chilled mixture into a freezer-safe container and freeze for 3-4 hours, stirring every 30-60 minutes to break up ice crystals. It won’t be quite as smooth, but it will still be delicious.
- How long does this ice cream stay fresh in the freezer? It’s best enjoyed within 2 weeks for optimal texture and flavor.


Neha Deshmukh
Neha holds a B.A. in History with a focus on Indian and world history, including ancient, medieval, and modern periods. At RecipesOfIndia.org — the world’s largest database of Indian recipes — she combines her love for food and history by exploring how India’s past has shaped its culinary traditions.


