- Combine evaporated milk and coffee in a sealed container. Refrigerate for 24 hours to infuse flavor.
- Strain coffee-infused milk into a cold bowl. Whip until fluffy and thickened.
- In a separate bowl, whip cream to soft peaks. Add condensed milk and vanilla, then gently fold in the whipped evaporated milk mixture.
- Pour the base into a freezer-safe container. Freeze for 1-2 hours, or until a semi-firm consistency is reached.
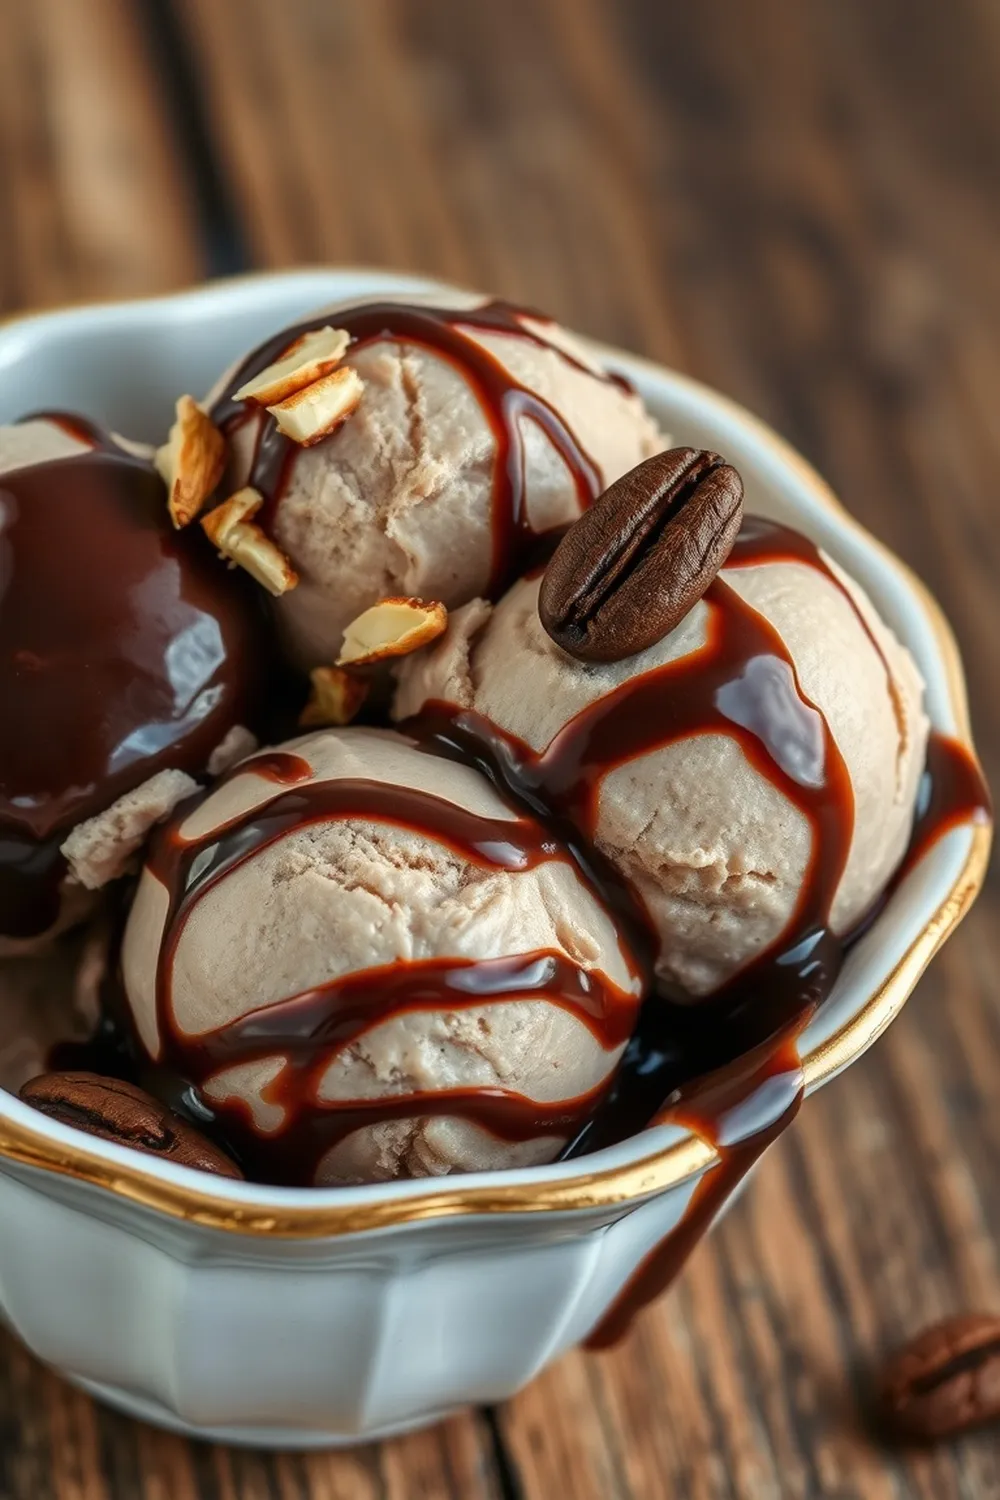
- Toast almonds in a dry pan until fragrant, then chop coarsely.
- Prepare fudge sauce: Combine cocoa powder, sugar, golden syrup, milk, and vanilla extract in a saucepan. Cook over low heat, stirring constantly, until thickened (about 5-7 minutes). Cool completely.
- Remove the semi-set ice cream from the freezer. Layer toasted almonds and drizzle some of the fudge sauce over the top. Gently swirl with a knife.
- Top with the remaining fudge sauce and freeze for at least 4 hours, or preferably overnight, until firm.
- Calories:350 kcal25%
- Energy:1464 kJ22%
- Protein:5 g28%
- Carbohydrates:35 mg40%
- Sugar:25 mg8%
- Salt:100 g25%
- Fat:20 g20%
Last Updated on 6 months ago by Neha Deshmukh
Coffee Almond Ice Cream Recipe – Easy Homemade Frozen Dessert
Hey everyone! If you’re anything like me, a hot summer day just begs for a cool, creamy treat. And honestly, nothing beats the satisfaction of making something delicious entirely from scratch. I stumbled upon this Coffee Almond Ice Cream recipe a few years ago, and it’s been a family favourite ever since. It’s a little bit of effort, yes, but trust me – the rich coffee flavour combined with the crunch of almonds is so worth it! Let’s get started, shall we?
Why You’ll Love This Recipe
This isn’t your average ice cream. It’s incredibly flavourful, with a lovely, smooth texture thanks to a little kitchen secret (we’ll get to that!). Plus, making ice cream at home lets you control exactly what goes into it – no weird additives or preservatives here! It’s perfect for a special occasion, a weekend treat, or just when you need a little pick-me-up.
Ingredients
Here’s what you’ll need to whip up a batch of this dreamy ice cream:
- 1 cup evaporated milk
- 1 heaped tbsp espresso coffee/ roast coffee
- 1 cup whipping cream
- 1 tsp vanilla extract
- 1/4 cup condensed milk
- 1/2 cup almonds
- 2 tbsp cocoa powder
- 1 tbsp sugar
- 1/4 cup golden syrup
- 2 tbsp milk
- 1 tsp vanilla extract
Ingredient Notes
Let’s talk ingredients for a sec! A few things can really make or break this recipe, so here are my tips:
- Evaporated Milk for Texture: Don’t skip the evaporated milk! It’s the key to getting that incredibly smooth, creamy texture without needing an ice cream maker (though you can use one – more on that later!).
- Espresso/Roast Coffee Choice: I prefer using a really good quality espresso coffee for a strong, bold flavour. But if you’re a fan of a milder coffee taste, roast coffee works beautifully too. Feel free to adjust the amount to your liking!
- Golden Syrup – Regional Variation: Golden syrup might be a new one for some of you. It’s a lovely, buttery-tasting syrup popular in India and the UK. If you can’t find it, you can substitute with light corn syrup or even a mix of honey and maple syrup, but the flavour will be slightly different.
Step-By-Step Instructions
Alright, let’s get cooking (or rather, freezing!).
- First, in a sealed jug, combine the evaporated milk and coffee. Now, this is where the patience comes in! Refrigerate this mixture for a full 24 hours. This allows the coffee to really infuse into the milk, giving you a deep, rich flavour.
- After 24 hours, strain the coffee-infused milk into a cold pan. Now, we’re going to whip it! Whip until it’s fluffy and thickened – you want it to hold soft peaks.
- In a separate bowl, whip the whipping cream to soft peaks. Add the condensed milk and vanilla extract, and gently fold in the whipped evaporated milk mixture. Be gentle! We want to keep all that lovely air in there.
- Pour the base into a freezer-safe container. Pop it in the freezer for about an hour – we want it to start to set, but not freeze solid.
- While that’s chilling, let’s toast the almonds. In a dry pan, toast them over medium heat until they’re fragrant and lightly golden. Then, roughly chop them.
- Now for the fudge sauce! In a saucepan, mix together the cocoa powder, sugar, golden syrup, milk, and vanilla extract. Cook over low heat, stirring constantly, until it thickens – about 5-7 minutes. Let it cool completely.
- Remove the semi-set ice cream from the freezer. Sprinkle the toasted almonds over the top and drizzle about half of the fudge sauce. Gently swirl it in with a knife – don’t overmix!
- Top with the remaining fudge sauce and freeze for at least 4 hours, or preferably overnight, until it’s firm enough to scoop.
Expert Tips
- Don’t rush the coffee infusion! The 24 hours is crucial for a strong coffee flavour.
- Folding is key! Be gentle when combining the mixtures to maintain a light and airy texture.
- For easier scooping, let the ice cream sit at room temperature for 5-10 minutes before serving.
Variations
Want to make this recipe your own? Here are a few ideas:
- Vegan Adaptation – Coconut Cream Based: Swap the evaporated milk and whipping cream for full-fat coconut cream. It’ll give you a deliciously creamy, dairy-free ice cream!
- Gluten-Free: This recipe is naturally gluten-free, but always double-check your golden syrup label to be sure.
- Spice Level – Coffee Strength: My friend, Priya, loves to add a pinch of cardamom to the coffee-infused milk for a warm, aromatic twist. Feel free to experiment with different spices!
- Festival Adaptations – Summer Cooling Treat: This is the perfect ice cream for a hot summer day, especially during festivals like Holi or Baisakhi. It’s a guaranteed crowd-pleaser!
Serving Suggestions
This ice cream is amazing on its own, but here are a few ideas to take it to the next level:
- Serve with a sprinkle of extra chopped almonds.
- Drizzle with a little more fudge sauce (because why not?).
- Pair it with a warm chocolate brownie or a slice of fruit cake.
Storage Instructions
Store leftover ice cream in an airtight container in the freezer for up to 2 weeks. It might get a little icy after that, but it will still be delicious!
FAQs
Let’s answer some common questions:
1. Can I use instant coffee instead of espresso/roast coffee?
You can, but the flavour won’t be as strong or complex. If you’re using instant coffee, use about 2 tablespoons and dissolve it in a little hot water before adding it to the evaporated milk.
2. How can I prevent ice crystals from forming in my homemade ice cream?
The key is to minimize temperature fluctuations. Make sure your ingredients are cold, and store the ice cream in an airtight container. The evaporated milk also helps prevent ice crystals.
3. What is golden syrup and can I substitute it?
Golden syrup is a thick, golden-coloured syrup made from sugar. If you can’t find it, you can substitute with light corn syrup or a mix of honey and maple syrup.
4. Can this ice cream be made in an ice cream maker?
Absolutely! Follow the instructions for your ice cream maker, using the same base recipe. It will likely result in an even smoother texture.
5. How long does this ice cream keep in the freezer?
It’s best enjoyed within 2 weeks for optimal texture and flavour.
6. Can I add other nuts or flavors to this ice cream?
Definitely! Feel free to experiment with different nuts like pistachios or walnuts, or add a swirl of caramel or chocolate chips. The possibilities are endless!
Enjoy making (and eating!) this delicious Coffee Almond Ice Cream. Let me know how it turns out in the comments below!

Neha Deshmukh
Neha holds a B.A. in History with a focus on Indian and world history, including ancient, medieval, and modern periods. At RecipesOfIndia.org — the world’s largest database of Indian recipes — she combines her love for food and history by exploring how India’s past has shaped its culinary traditions.