- Preheat oven to 350°F (175°C). Line a baking sheet with parchment paper.
- Spread thin poha in a single layer on the baking sheet. Roast for 15 minutes, stirring once, until crispy. Transfer to a large bowl.
- Add peanuts and cashews to the same baking sheet. Roast for 11-13 minutes until golden brown. Transfer to the bowl with poha.
- Heat oil in a pan over medium heat. Fry raisins for 1 minute until plump. Remove and drain on paper towels.
- Reduce heat to low. Add curry leaves and sauté for 1-2 minutes until crisp. Add hing, turmeric, and red chili powder; stir quickly.
- Pour the tempering over the roasted poha and nuts. Add salt, pepper, sugar, and fried raisins. Mix well, crushing curry leaves slightly.
- Cool completely and store in an airtight container.
- Calories:246 kcal25%
- Energy:1029 kJ22%
- Protein:4 g28%
- Carbohydrates:11 mg40%
- Sugar:6 mg8%
- Salt:441 g25%
- Fat:16 g20%
Last Updated on 4 months by Neha Deshmukh
Crispy Poha Chivda Recipe – Peanuts, Cashews & Curry Leaves
Introduction
Oh, chivda! Is there anything more satisfying than a crunchy, savory snack with a hint of sweetness? This Poha Chivda is a family favorite, and honestly, it disappears fast whenever I make it. I first made this for Diwali a few years ago, and it’s been a tradition ever since. It’s the perfect blend of textures and flavors – crispy poha, crunchy nuts, and that lovely aromatic tempering. Plus, it’s surprisingly easy to make! Let’s get started, shall we?
Why You’ll Love This Recipe
This Poha Chivda isn’t just delicious; it’s also incredibly versatile. It’s fantastic as a standalone snack, a topping for yogurt, or even as a crunchy element in chaat. It’s gluten-free, vegetarian, and can easily be made vegan. Best of all, it’s a wonderful way to use up leftover poha! You’ll love how quickly it comes together and how much everyone enjoys it.
Ingredients
Here’s what you’ll need to make this delightful chivda:
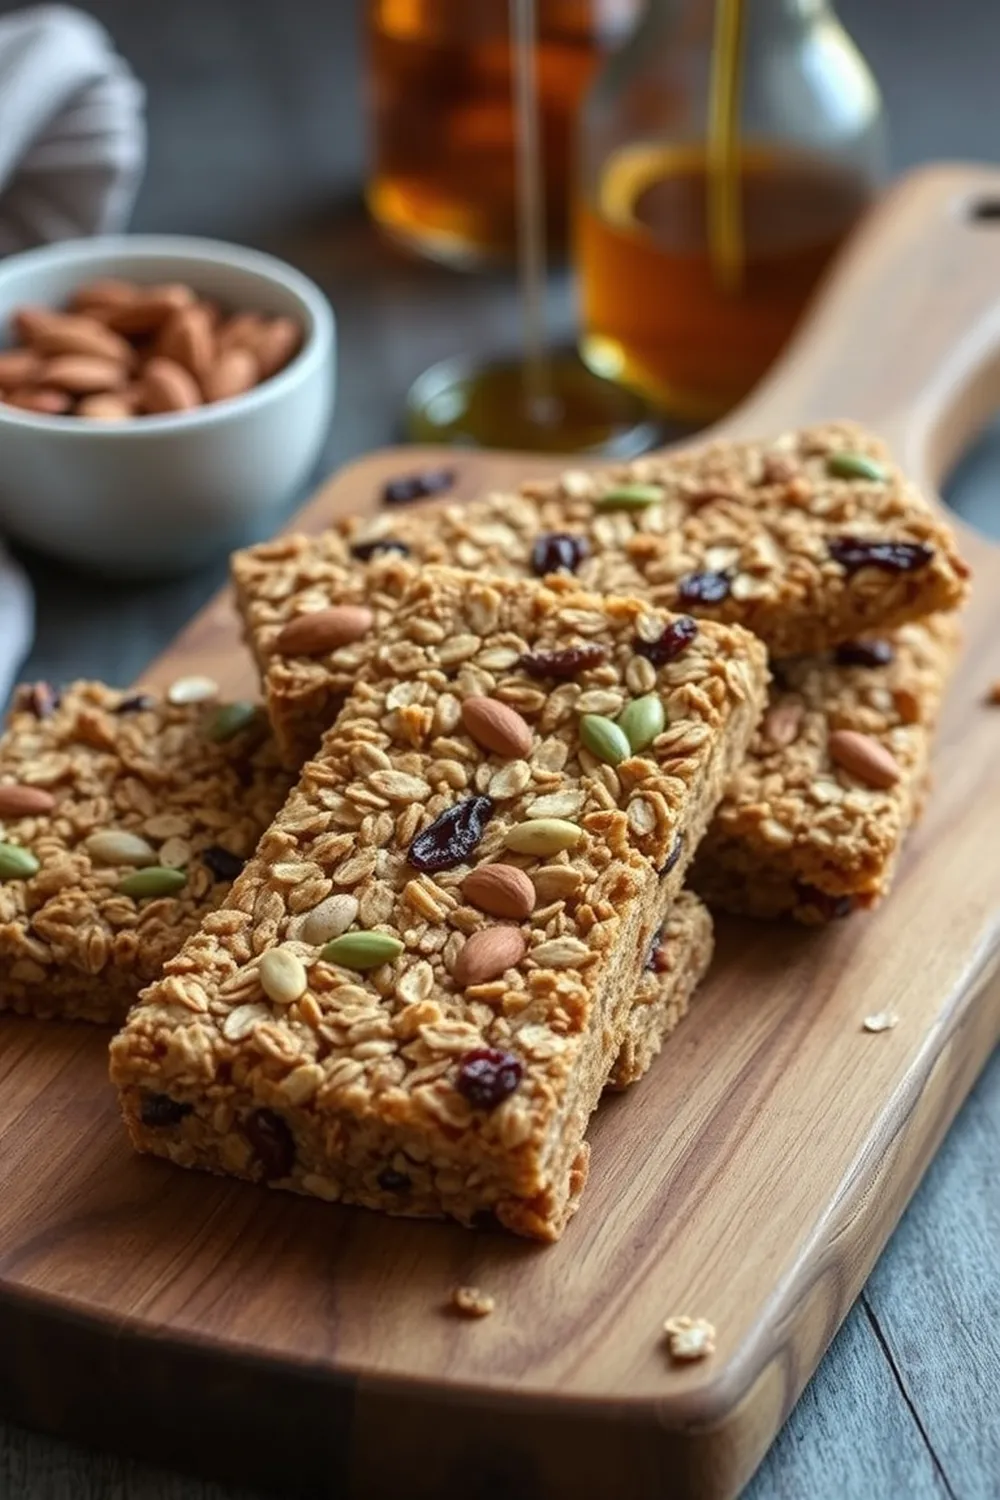
- 3 cup thin poha (flattened rice) – about 150g
- 3 tablespoon peanuts – about 30g
- 3 tablespoon whole cashews – about 30g
- 2.5 tablespoon oil – about 37.5ml
- 2 tablespoon golden raisins – about 20g
- 15-20 curry leaves
- Generous pinch of hing (asafoetida)
- 0.5 teaspoon turmeric powder – about 2.5g
- 0.375 teaspoon red chili powder – about 1.875g
- 0.5-0.75 teaspoon salt (to taste) – about 3-4.5g
- 0.375 teaspoon black pepper – about 1.875g
- 2 teaspoon powdered sugar – about 10g
Ingredient Notes
Let’s talk ingredients for a moment, because a few things really make a difference in this recipe:
- Poha: This is key! You need thin poha for the best crispy texture. The thicker variety will be too chewy. Look for ‘poha’ or ‘flattened rice’ in Indian grocery stores.
- Curry Leaves: Fresh curry leaves are a must. They impart such a beautiful aroma and flavor. If you can find them, grab a big bunch! They freeze really well too.
- Hing (Asafoetida): Don’t skip this! It adds a unique savory depth that you won’t get from anything else. It has a strong smell in its raw form, but it mellows out beautifully when cooked. You can find it at most Indian grocery stores, often in powdered form.
Step-By-Step Instructions
Alright, let’s get cooking!
- First, preheat your oven to 350°F (175°C). Line a baking sheet with parchment paper – this prevents sticking and makes cleanup a breeze.
- Spread the poha in a single layer on the baking sheet. Roast for about 15 minutes, giving it a stir halfway through, until it’s beautifully crispy. Keep a close eye on it towards the end to prevent burning! Once crispy, transfer it to a large bowl.
- Now, add the peanuts and cashews to the same baking sheet. Roast them for 11-13 minutes, or until they’re golden brown and fragrant. Add them to the bowl with the poha.
- Heat the oil in a pan over medium heat. Add the golden raisins and fry for about a minute, until they plump up nicely. Remove them with a slotted spoon and drain them on paper towels.
- Reduce the heat to low. Add the curry leaves and sauté for 1-2 minutes, until they become super crisp. Be careful, they can splatter! Then, add the hing, turmeric powder, and red chili powder. Stir quickly – you don’t want the spices to burn.
- Pour this fragrant tempering over the roasted poha and nuts. Add the salt, pepper, sugar, and fried raisins. Mix everything really well, gently crushing the curry leaves as you go.
- Finally, let the chivda cool completely before storing it in an airtight container. This is important, as any residual moisture will make it lose its crispness.
Expert Tips
- Don’t overcrowd the baking sheet when roasting the poha and nuts. Work in batches if necessary.
- Keep a close eye on the curry leaves while frying – they burn easily!
- For extra flavor, you can add a squeeze of lemon juice after mixing everything together.
Variations
- Spice Level Adjustments: If you like things spicier, add a little more red chili powder or a pinch of cayenne pepper.
- Sweetness Level: Adjust the amount of powdered sugar to your liking. Some people prefer a more savory chivda, while others like a bit more sweetness.
- Nut Variations: Feel free to swap out the cashews and peanuts for other nuts like almonds or walnuts.
- Festival Adaptations: During Diwali, I sometimes add a sprinkle of sev (thin chickpea noodles) for extra crunch. For Holi, a dash of colorful edible glitter can be a fun addition!
Serving Suggestions
This chivda is delicious on its own as a snack with a cup of chai. It’s also wonderful:
- Sprinkled over yogurt for a crunchy topping.
- Added to trail mix for a flavorful boost.
- Served alongside a cup of hot soup.
- As part of a festive snack platter.
Storage Instructions
Store the cooled chivda in an airtight container at room temperature. It should stay crispy for up to a week, but honestly, it never lasts that long in my house!
FAQs
- What type of Poha works best for Chivda? Definitely thin poha! It’s the key to achieving that perfect crispy texture.
- Can I make this Chivda ahead of time? Absolutely! You can make it a day or two in advance. Just make sure to store it in an airtight container to keep it crispy.
- How do I achieve the perfect crispy texture? Roasting the poha and nuts properly is crucial. Make sure they’re spread in a single layer on the baking sheet and roasted until golden brown and crispy.
- What is Hing and where can I find it? Hing, also known as asafoetida, is a resin with a pungent smell. It adds a unique savory flavor to Indian dishes. You can find it at most Indian grocery stores.
- Can I adjust the spice level in this recipe? Yes, definitely! Feel free to adjust the amount of red chili powder to your liking.


Neha Deshmukh
Neha holds a B.A. in History with a focus on Indian and world history, including ancient, medieval, and modern periods. At RecipesOfIndia.org — the world’s largest database of Indian recipes — she combines her love for food and history by exploring how India’s past has shaped its culinary traditions.