- Boil water with salt and cook soya chunks for 5-7 minutes. Drain, rinse, and squeeze out excess water.
- In a bowl, mix the boiled soya chunks with turmeric powder, chilli powder, coriander powder, cumin powder, garam masala, salt, chopped coriander, and ginger-garlic paste.
- Add curd (yogurt), corn flour, and maida (all-purpose flour) to the mixture. Coat the soya chunks evenly with the batter.
- Deep fry the coated soya chunks in medium-hot oil until golden brown and crispy. Ensure the oil is hot enough before adding the chunks.
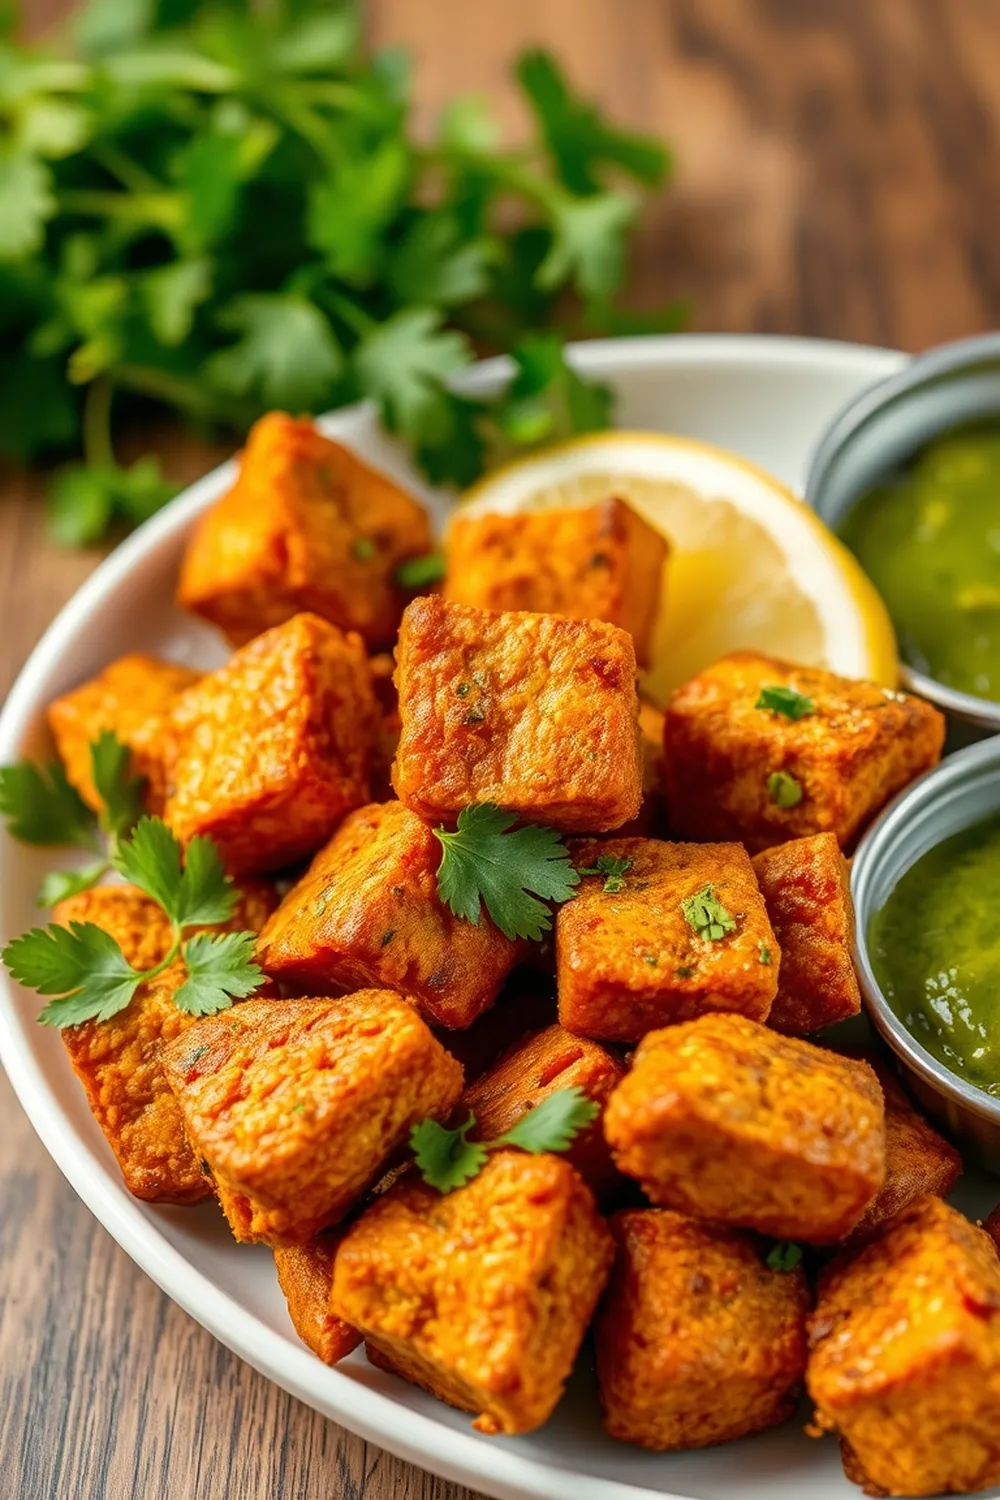
- Drain excess oil on paper towels and serve hot with green chutney.
- Calories:243 kcal25%
- Energy:1016 kJ22%
- Protein:26 g28%
- Carbohydrates:28 mg40%
- Sugar:6 mg8%
- Salt:308 g25%
- Fat:2 g20%
Last Updated on 4 months by Neha Deshmukh
Crispy Soya Chunk Recipe – Indian Style Fried Snacks
Hey everyone! If you’re looking for a quick, easy, and seriously satisfying snack, you have to try these crispy soya chunks. I first made these when I was craving something crunchy and flavorful, but didn’t want to spend hours in the kitchen. They’ve been a hit ever since! They’re perfect for an evening tea, a party appetizer, or just when you need a little something to munch on.
Why You’ll Love This Recipe
These Indian-style fried soya chunks are a total winner for a few reasons. They’re packed with protein, incredibly crispy, and bursting with aromatic Indian spices. Plus, they come together in under 30 minutes – perfect for busy weeknights or when unexpected guests arrive. Honestly, who doesn’t love a good, crunchy snack?
Ingredients
Here’s what you’ll need to make these delicious soya chunks:
- 2 cup soya chunks
- ½ tsp turmeric powder (haldi)
- 1 tsp chilli powder (lal mirch)
- 1 tsp coriander powder (dhaniya powder)
- ½ tsp cumin powder (jeera powder)
- ½ tsp garam masala
- ¾ tsp salt (or to taste)
- 2 tbsp chopped coriander (cilantro)
- 1 tsp ginger garlic paste
- ½ cup curd (yogurt)
- ¼ cup corn flour (makai ka atta)
- ¼ cup maida (all-purpose flour)
- Oil for deep frying
Ingredient Notes
Let’s talk ingredients for a sec!
- Soya Chunks: These are a fantastic source of plant-based protein and a great alternative to meat. You can find them easily in most Indian grocery stores.
- Spice Blends: Feel free to adjust the spice levels to your liking! Every family has their own secret blend, so don’t be afraid to experiment. Some people like to add a pinch of amchur (dry mango powder) for a tangy kick.
- The Magic of Curd: The curd (yogurt) is key here. It tenderizes the soya chunks and helps the spices cling to them beautifully. It also adds a lovely tanginess to the final product. Don’t skip it!
Step-By-Step Instructions
Alright, let’s get cooking!
- First, bring some water to a boil with a pinch of salt. Add the soya chunks and let them simmer for about 5 minutes. This rehydrates them and gets rid of any raw taste.
- Drain the soya chunks really well, and gently squeeze out any excess water. You want them to be as dry as possible so the batter sticks.
- In a large bowl, combine the boiled soya chunks with all the spices – turmeric, chilli powder, coriander powder, cumin powder, garam masala, and salt. Add the chopped coriander and ginger-garlic paste too. Mix everything up really well, making sure every chunk is coated.
- Now, add the curd, corn flour, and maida to the bowl. This is where things get a little messy (but fun!). Mix everything together until the soya chunks are evenly coated with the batter.
- Heat up some oil in a deep frying pan or wok over medium heat. Carefully drop the coated soya chunks into the hot oil, a few at a time.
- Fry them until they’re golden brown and super crispy – about 3-4 minutes per batch.
- Remove the fried soya chunks with a slotted spoon and place them on a paper towel-lined plate to drain any excess oil.
And that’s it! You’ve got yourself a batch of incredibly delicious, crispy soya chunks.
Expert Tips
- Don’t overcrowd the pan when frying. This will lower the oil temperature and result in soggy soya chunks.
- Make sure the oil is hot enough before adding the soya chunks. A good test is to drop a tiny piece of batter into the oil – it should sizzle immediately.
- For extra crispy soya chunks, you can double fry them. Fry them once at a lower temperature, then again at a higher temperature for a shorter time.
Variations
Want to switch things up? Here are a few ideas:
- Vegan Adaptation: Swap the curd for plant-based yogurt – cashew or soy yogurt work great!
- Gluten-Free Adaptation: Replace the maida with besan (gram flour) or rice flour.
- Spice Level Adjustments: My family loves a good kick, but if you prefer milder flavors, reduce the amount of chilli powder.
- Snack/Appetizer vs. Side Dish Adaptation: Serve with a side of dal and rice for a complete meal, or enjoy them as a standalone snack with a cup of chai.
Serving Suggestions
These soya chunks are amazing on their own, but they’re even better with a dipping sauce! I highly recommend serving them with a vibrant green chutney (mint-coriander chutney) or a sweet tamarind chutney. A squeeze of lemon juice also adds a lovely freshness.
Storage Instructions
Leftover soya chunks can be stored in an airtight container at room temperature for up to 2 days. They might lose a little of their crispiness, but they’ll still be delicious! You can also reheat them in a preheated oven or air fryer to restore some of the crunch.
FAQs
Let’s answer some common questions:
- What are soya chunks and are they healthy? Soya chunks are made from defatted soybean flour and are a great source of protein, fiber, and iron. They’re a healthy and affordable alternative to meat.
- Can I bake these instead of frying? Yes, you can! Preheat your oven to 200°C (390°F) and bake the coated soya chunks on a baking sheet lined with parchment paper for about 20-25 minutes, flipping halfway through. They won’t be quite as crispy as fried ones, but still tasty.
- How do I get the soya chunks extra crispy? Double frying is the trick! Also, make sure they’re thoroughly drained and dry before coating them in the batter.
- What is the best chutney to serve with these? Green chutney is a classic pairing, but sweet tamarind chutney or even a simple yogurt dip work beautifully.
- Can I make the batter ahead of time? Yes, you can! Just store it in the refrigerator for up to 24 hours. You might need to add a splash of water to thin it out a bit before using.
Enjoy! Let me know in the comments if you try this recipe and how it turns out. I love hearing from you all.


Neha Deshmukh
Neha holds a B.A. in History with a focus on Indian and world history, including ancient, medieval, and modern periods. At RecipesOfIndia.org — the world’s largest database of Indian recipes — she combines her love for food and history by exploring how India’s past has shaped its culinary traditions.


