- In a large pot, bring 2 liters of milk to a boil.
- Once the milk is about to boil, add 2 tablespoons of lemon juice or vinegar and stir until it curdles.
- If needed, add another tablespoon of lemon juice or vinegar to ensure complete separation of curds and whey.
- Drain the curdled milk through a cheesecloth-lined sieve and rinse with cold water to remove the sour taste.
- Gently squeeze the paneer to remove excess water, avoiding over-squeezing.
- Transfer the paneer to a food processor or blender, add cream, salt, and mixed herbs.
- Blend until smooth, adding 1-2 tablespoons of milk if the mixture is too thick.
- Continue blending until a silky, creamy consistency is achieved.
- Transfer to an airtight container and refrigerate if not using immediately.
- Serve as a spread on bread, roti, or as a dip with snacks.
- Calories:420 kcal25%
- Energy:1757 kJ22%
- Protein:3 g28%
- Carbohydrates:3 mg40%
- Sugar:1 mg8%
- Salt:628 g25%
- Fat:44 g20%
Last Updated on 4 months by Neha Deshmukh
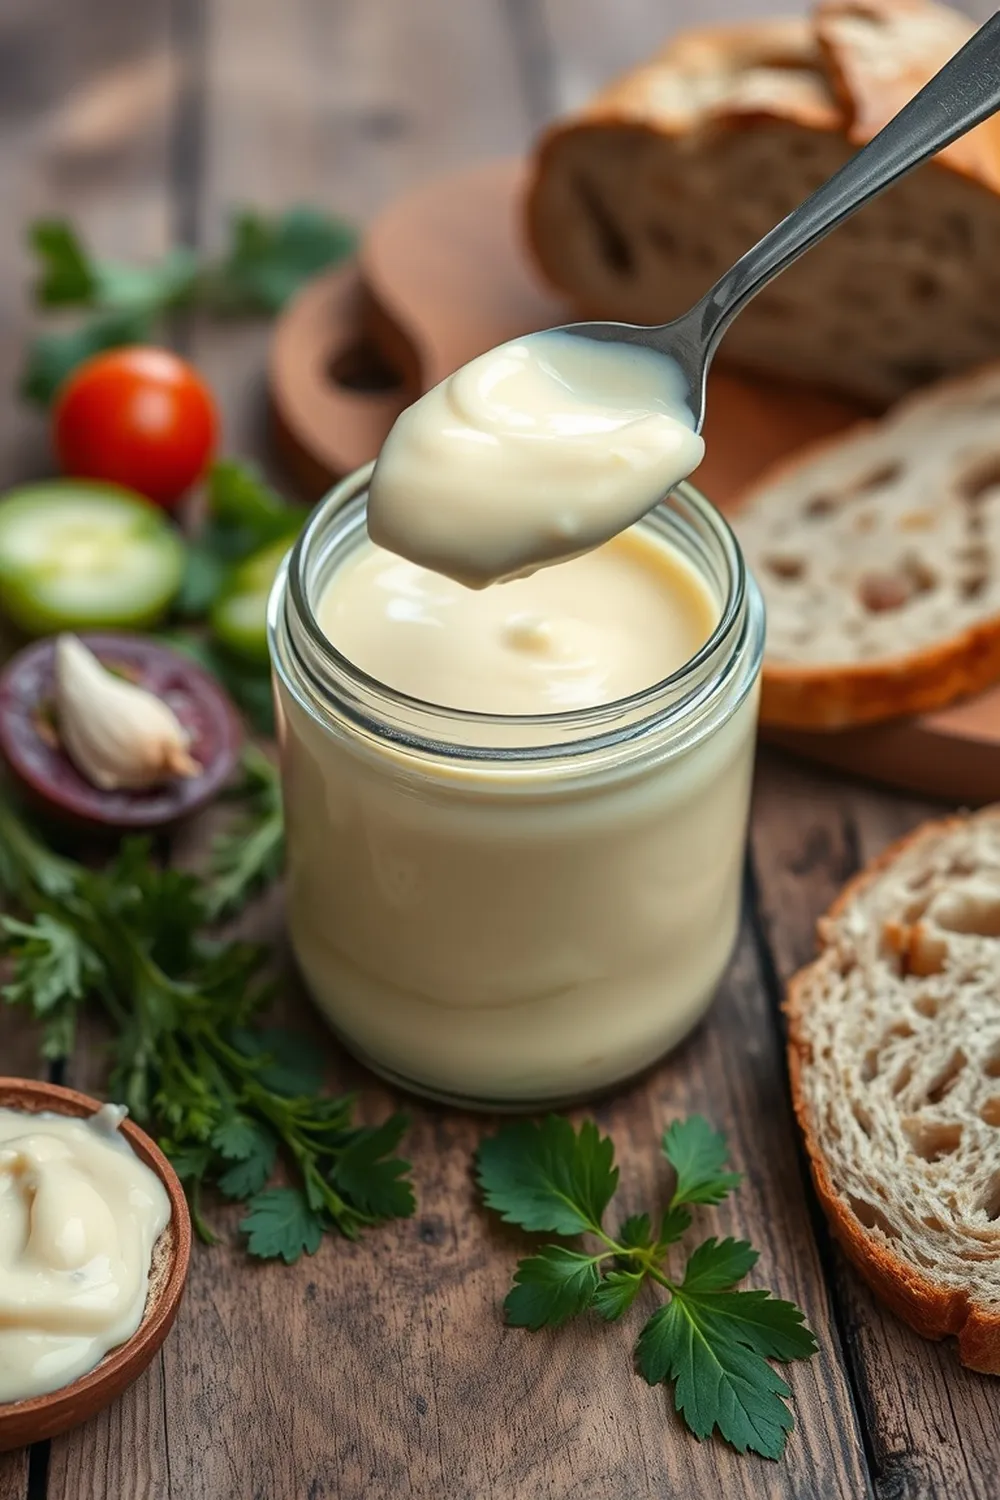
Easy Paneer Spread Recipe – Creamy Herb & Milk Indian Dip
Hey everyone! I’m so excited to share this recipe with you – it’s for a super creamy, dreamy paneer spread that’s become a total staple in my kitchen. Seriously, once you make this, you’ll find a million uses for it! It’s perfect for a quick breakfast, a satisfying snack, or even as a fancy little dip for parties. Let’s get started, shall we?
Why You’ll Love This Recipe
This paneer spread is unbelievably easy to make, needing just a handful of ingredients and about 15 minutes of your time. It’s a fantastic way to use up leftover paneer, and honestly, it tastes way better than anything you’d find in a store. Plus, it’s incredibly versatile – spread it on bread, dip veggies in it, or use it as a filling for wraps. You’ll absolutely love how fresh and flavorful it is!
Ingredients
Here’s what you’ll need to whip up this delicious spread:
- 2 liters milk (full-fat milk works best for a richer spread, but toned milk will also do!)
- 3 tablespoons vinegar (white vinegar is classic, but apple cider vinegar works too)
- ½ – ¾ cup cream (heavy cream gives the most luxurious texture, but you can use a lighter cream if you prefer)
- ½ – 1 teaspoon salt (adjust to your taste!)
- 1-2 teaspoons mixed herbs (I love a blend of dried oregano, basil, and thyme)
- 2 tablespoons milk (optional, for blending – use more if needed)
Ingredient Notes
Let’s talk ingredients for a sec!
- Milk: I always reach for full-fat milk when making paneer because it results in a softer, more flavorful cheese. But toned milk works in a pinch, it just won’t be quite as rich.
- Vinegar: Vinegar is key to curdling the milk. If you don’t have vinegar, lemon juice is a fantastic substitute! Use about 3-4 tablespoons of lemon juice instead.
- Herbs: This is where you can really get creative! I usually use a classic Italian herb blend, but you could also experiment with Indian spices like kasuri methi (dried fenugreek leaves) or a pinch of garam masala for a unique twist. My friend, Priya, swears by adding a little chopped cilantro and green chili for a vibrant, spicy spread.
Step-By-Step Instructions
Alright, let’s get cooking!
- In a large vessel, bring the 2 liters of milk to a boil. Keep a close eye on it – you don’t want it to overflow!
- Once the milk is just about to boil, reduce the heat slightly and slowly add the 3 tablespoons of vinegar. Gently stir the milk as you add the vinegar. You’ll start to see the milk separate into curds (the solid bits) and whey (the watery liquid).
- If the milk doesn’t fully curdle, add another tablespoon of vinegar and stir again. You want a clear separation.
- Now, carefully drain the curdled milk through a cheesecloth. This is important! Rinse the paneer with cold water to get rid of any lingering sourness.
- Gently squeeze the paneer to remove excess water, but don’t overdo it! You want to retain some moisture for a creamy spread.
- Transfer the paneer to a blender (or food processor). Add the cream, salt, and mixed herbs.
- Blend everything together until it’s super smooth. If the mixture is too thick, add the optional 2 tablespoons of milk, one tablespoon at a time, until you reach your desired consistency.
- Keep blending until it’s silky and creamy – this usually takes a couple of minutes.
- Transfer the spread to an airtight container and pop it in the fridge if you’re not using it right away.
Expert Tips
Want to make this paneer spread perfect? Here are a few tips I’ve learned along the way:
- Paneer Consistency: The key to a smooth spread is well-made paneer. Don’t skip rinsing it thoroughly!
- Grainy Texture: If your spread seems grainy, it means the paneer wasn’t blended enough. Just keep blending for a little longer – it will come together.
- Tanginess: Adjust the amount of vinegar to control the tanginess. Start with 3 tablespoons and add more if you like a sharper flavor.
Variations
Let’s get creative! Here are a few ways to customize this recipe:
- Vegan Paneer Spread: Substitute the dairy milk with plant-based milk (soy or almond work well) and use a vegan cream alternative.
- Spice It Up: Add a finely chopped green chili or a pinch of red chili powder for a spicy kick. My brother loves this!
- Gluten-Free Pairing: Serve with gluten-free bread, roti made from gluten-free flour, or vegetable sticks.
- Festive Dip: During Diwali or Holi, add a sprinkle of chaat masala and some chopped cilantro for a festive touch.
Serving Suggestions
Okay, so what do you do with this amazing spread? Here are a few ideas:
- Spread it on toast or roti for a quick breakfast.
- Use it as a dip for veggies, crackers, or chips.
- Spread it on sandwiches or wraps.
- Serve it as part of a cheese and cracker board.
Storage Instructions
This paneer spread will keep in an airtight container in the refrigerator for up to 3-4 days.
FAQs
Got questions? I’ve got answers!
- What type of paneer works best for this spread? Homemade paneer is ideal, but store-bought paneer will work too. Just make sure it’s fresh and not too firm.
- Can I make this spread ahead of time? Absolutely! It actually tastes even better after it’s had a chance to sit in the fridge for a few hours.
- How long does the spread last in the refrigerator? Up to 3-4 days.
- What can I serve this spread with besides bread and roti? Veggie sticks (carrots, celery, cucumber), crackers, chips, or even as a filling for wraps!
- Can I use a food processor instead of a blender? Yes, a food processor will work just fine! You might need to scrape down the sides a few times to ensure everything is blended evenly.
Enjoy! I really hope you give this recipe a try. Let me know what you think in the comments below!


Neha Deshmukh
Neha holds a B.A. in History with a focus on Indian and world history, including ancient, medieval, and modern periods. At RecipesOfIndia.org — the world’s largest database of Indian recipes — she combines her love for food and history by exploring how India’s past has shaped its culinary traditions.