
- Whisk flour and salt together in a large bowl or the bowl of a stand mixer. Add the cubed butter and toss to coat with the flour. Chill for 20 minutes.
- Blend the mixture on low speed for 1-2 minutes until the butter is broken down into pea-sized pieces. Gradually add the ice water-vinegar mixture while mixing until the dough just comes together in shaggy chunks.
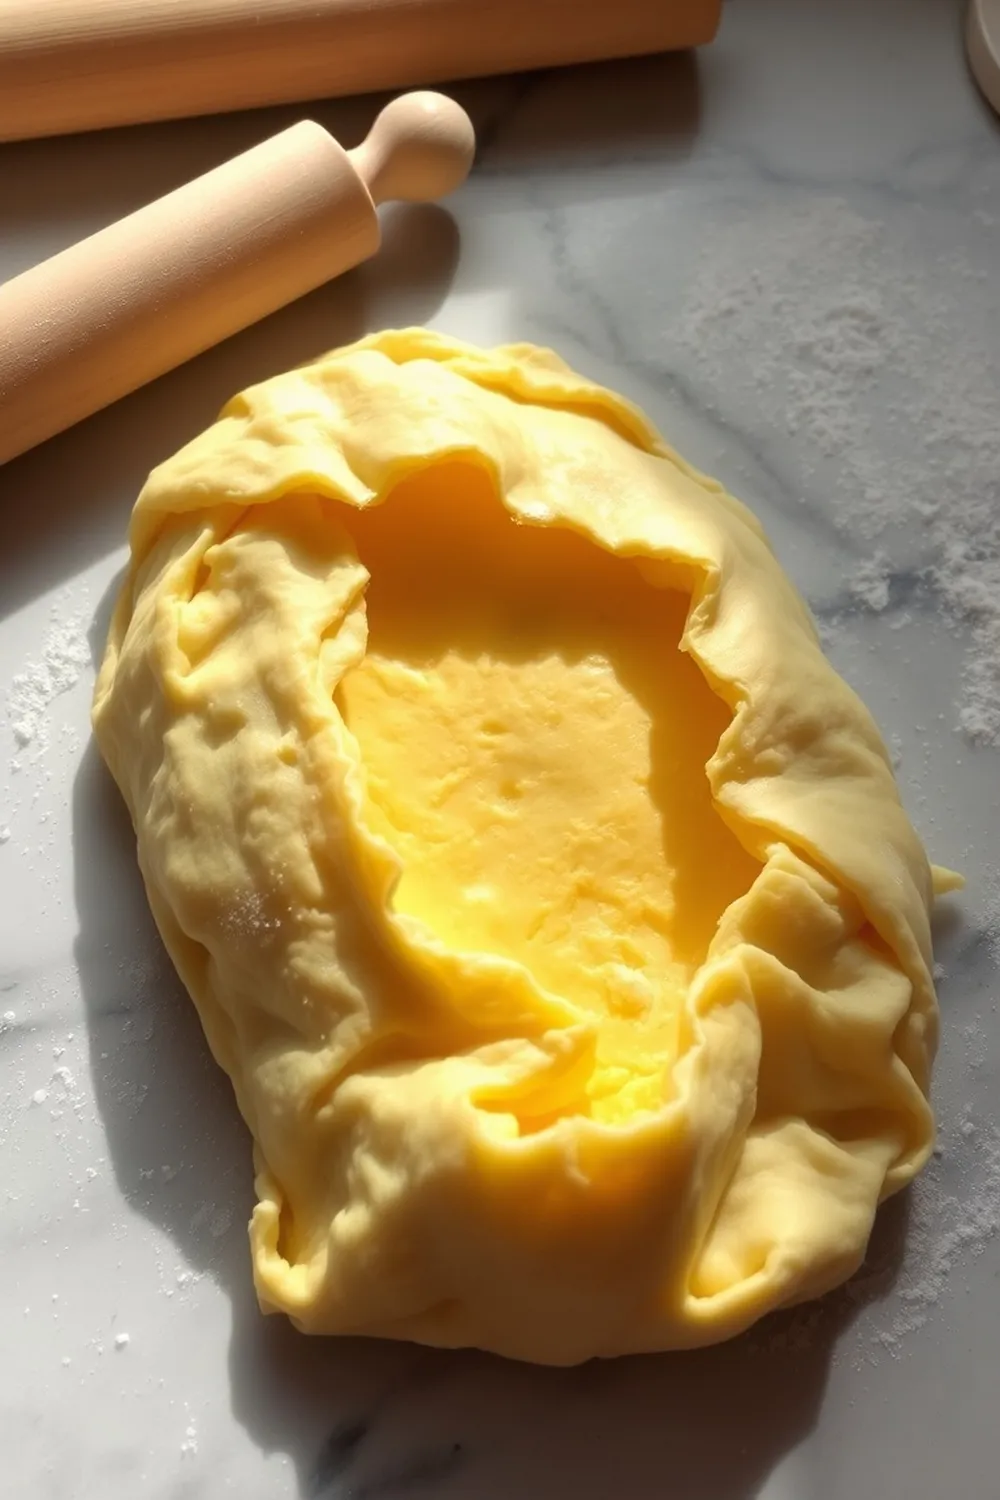
- Turn the dough out onto a lightly floured surface. Gently shape it into a rectangle using your hands or a rolling pin.
- Perform a single fold (letter fold) on the dough, wrap it tightly, and chill for 20 minutes. Repeat the folding and chilling process twice more (for a total of three folds).
- Wrap the dough tightly and refrigerate for at least 1 hour, or freeze for later use.
- Calories:2512 kcal25%
- Energy:10510 kJ22%
- Protein:21 g28%
- Carbohydrates:143 mg40%
- Sugar:mg8%
- Salt:34 g25%
- Fat:208 g20%
Last Updated on 5 months ago by Neha Deshmukh
Flaky Indian Roti Recipe – Butter & Flour Dough Technique
Hey everyone! If you’ve ever dreamed of making incredibly flaky, melt-in-your-mouth roti at home, you’re in the right place. I remember the first time I tried making roti – it was… a learning experience, let’s just say! But after a lot of practice (and a few tough rotis!), I’ve perfected a technique using a butter and flour dough that delivers seriously impressive results. This isn’t your everyday roti recipe; it’s a little extra, but so worth it.
Why You’ll Love This Recipe
This recipe isn’t just about making roti; it’s about creating a little bit of magic in your kitchen. The secret lies in layering cold butter into the dough, which creates those beautiful, flaky layers we all crave. It’s surprisingly easy, even for beginners, and the payoff is huge. Imagine serving warm, soft roti with your favorite curry – pure comfort food! Plus, it’s a fantastic base for so many different flavors.
Ingredients
Here’s what you’ll need to get started:
- 1.5 cups (192g) all-purpose flour
- 9 ounces (255g) cold unsalted butter, cubed
- 0.375 teaspoon (1.875ml) salt
- 3 tablespoons (45ml) water
- 0.75 teaspoon (3.75ml) cider vinegar
Ingredient Notes
Let’s talk ingredients for a sec, because getting these right makes all the difference!
- Cold Butter is Key: Seriously, cold butter. Don’t even think about softening it. We want those little chunks of butter to stay solid as we work the dough, creating those flaky layers. I often pop the butter in the freezer for 10-15 minutes before starting.
- All-Purpose Flour vs. Whole Wheat: All-purpose flour gives you the most tender and flaky result. While you can experiment with whole wheat, it will result in a denser roti. If you do use whole wheat, try a blend – maybe 50/50 with all-purpose.
- The Magic of Cider Vinegar: Don’t skip the cider vinegar! It helps to tenderize the dough and prevents it from becoming too tough. You won’t taste it in the final product, I promise. Lemon juice can be used as a substitute in a pinch.
Step-By-Step Instructions
Alright, let’s get baking!
- First, in a stand mixer bowl, whisk together the flour and salt. Then, add the cubed cold butter and toss to coat everything evenly. This is where the flakiness begins!
- Now, chill that mixture for about 20 minutes. This helps keep the butter cold, which is super important.
- Blend the flour-butter mixture on low speed for about 1.5 minutes, until the butter starts to break down into smaller pieces. It won’t be fully incorporated – that’s okay!
- Next, slowly add the water and cider vinegar mixture while the mixer is running, until the dough starts to come together in chunks. Don’t overmix!
- Turn the dough out onto a lightly floured surface. Gently shape it into a rectangle using a rolling pin.
- Here comes the folding fun! Fold the dough into a letter fold (like folding a letter into thirds). Wrap it up and chill for another 20 minutes.
- Repeat the folding and chilling process twice more. This is what builds those gorgeous layers.
- Finally, wrap the dough tightly and refrigerate for at least 1 hour, or freeze for later use.
Expert Tips
Want to take your roti game to the next level? Here are a few things I’ve learned along the way:
- Consistent Flakiness: The colder everything is, the better. Work quickly to prevent the butter from melting.
- Dough Readiness: The dough should be firm and elastic, but not sticky. If it’s too sticky, add a little more flour, one tablespoon at a time.
- Preventing Gluten Development: Don’t overwork the dough! Overmixing develops the gluten, which will make your roti tough.
Variations
This recipe is a fantastic base for all sorts of delicious variations. Here are a few of my favorites:
- Whole Wheat Roti: Substitute up to half of the all-purpose flour with whole wheat flour for a nuttier flavor.
- Gluten-Free Roti: Use a gluten-free all-purpose flour blend. You might need to adjust the amount of water slightly.
- Spice Infused Roti: My friend, Priya, loves adding a teaspoon of her favorite garam masala or some finely chopped herbs (like cilantro or mint) to the dough for extra flavor.
- Festival Adaptations: During Diwali, my family loves serving this roti with a rich, creamy butter chicken. It’s the perfect pairing!
Serving Suggestions
Warm roti is best served immediately with your favorite Indian curries, dals, or vegetable dishes. It’s also amazing with a simple dollop of ghee or yogurt. Seriously, it goes with everything.
Storage Instructions
Leftover roti can be stored in an airtight container at room temperature for up to 2 days, or in the freezer for up to a month. Reheat in a dry skillet or microwave before serving.
FAQs
Got questions? I’ve got answers!
- What type of flour is best for flaky roti? All-purpose flour is your best bet for the flakiest results.
- Can I use salted butter instead of unsalted? You can, but reduce the amount of salt in the recipe to 1/4 teaspoon.
- How do I know when the dough is properly chilled? The dough should be firm and hold its shape.
- Can I make the dough ahead of time and freeze it? Absolutely! Wrap it tightly and freeze for up to 3 months. Thaw in the refrigerator overnight before using.
- What if my roti is tough instead of flaky? You likely overworked the dough or didn’t keep the butter cold enough. Don’t worry, practice makes perfect!
Enjoy making these flaky rotis! I hope they bring as much joy to your table as they do to mine. Let me know how they turn out in the comments below!

Neha Deshmukh
Neha holds a B.A. in History with a focus on Indian and world history, including ancient, medieval, and modern periods. At RecipesOfIndia.org — the world’s largest database of Indian recipes — she combines her love for food and history by exploring how India’s past has shaped its culinary traditions.


