- Clean and separate the *mudakathan keerai* leaves, discarding the stalks. Rinse thoroughly and set aside to drain.
- Soak idli rice, urad dal, and fenugreek seeds in water for 4-6 hours.
- Drain the soaked ingredients and grind with the *keerai* leaves, ginger, and curry leaves. Add water gradually to form a coarse batter.
- Add aval (poha) to the batter and grind again until smooth.
- Transfer the batter to a bowl, mix in salt, and cover loosely. Allow to ferment at room temperature for 8-12 hours.
- Adjust the batter consistency with water until it resembles a medium-thick batter (not 'thick paint').
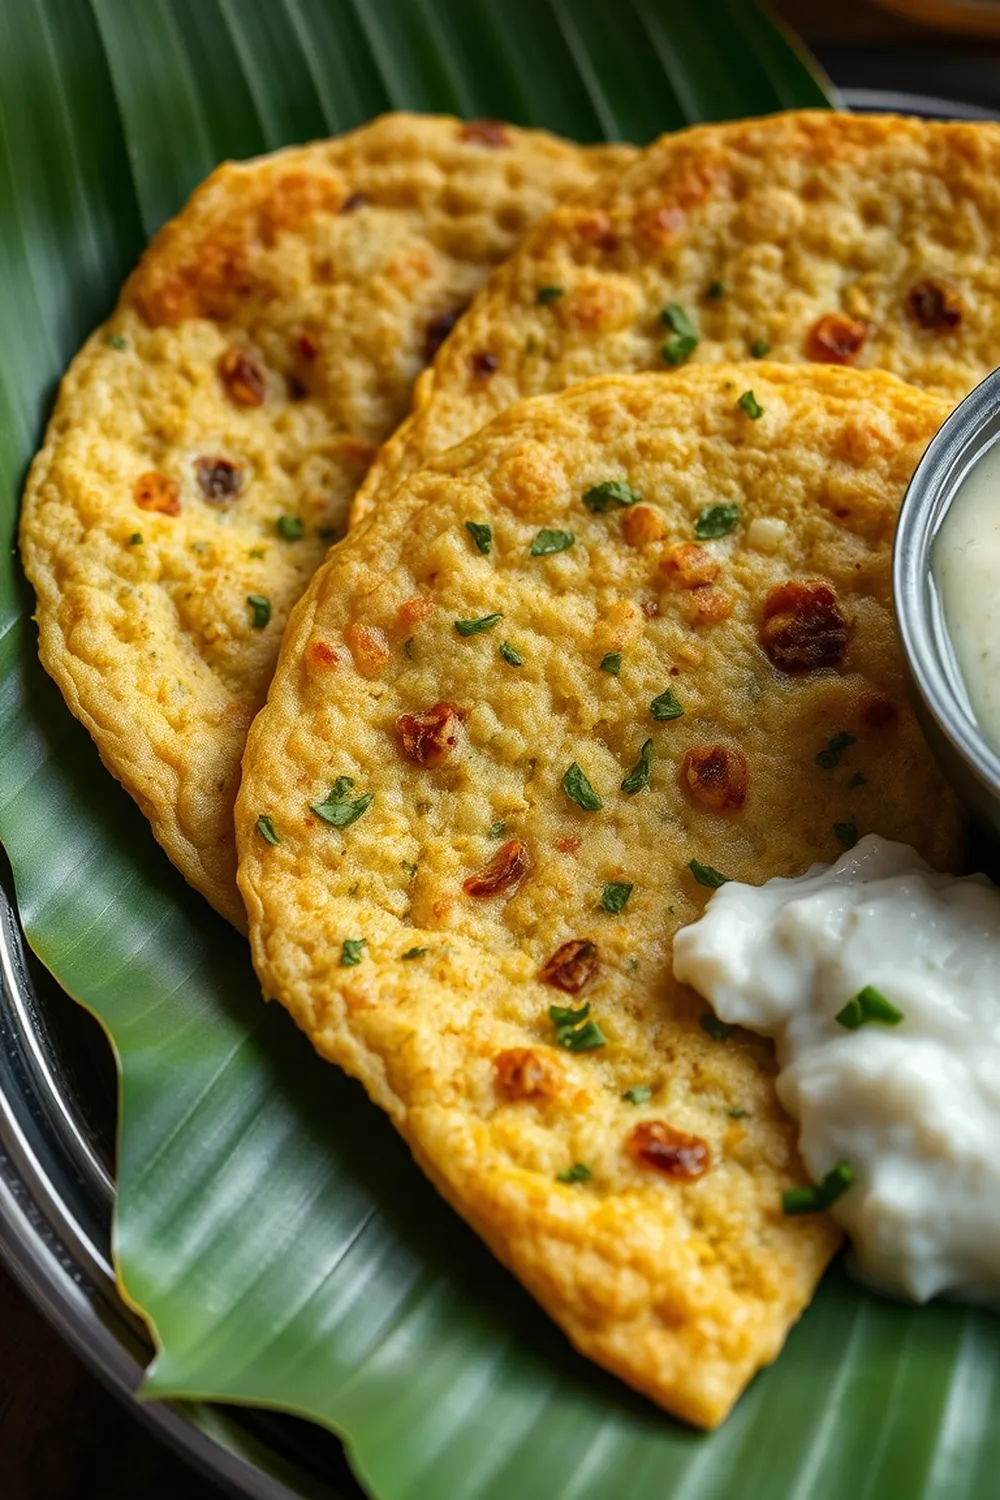
- Heat a dosa griddle over medium heat. Pour a ladle of batter and spread into a thin circle. Drizzle sesame oil around the edges.
- Cook until golden brown and crisp, then flip and cook the other side for 30 seconds.
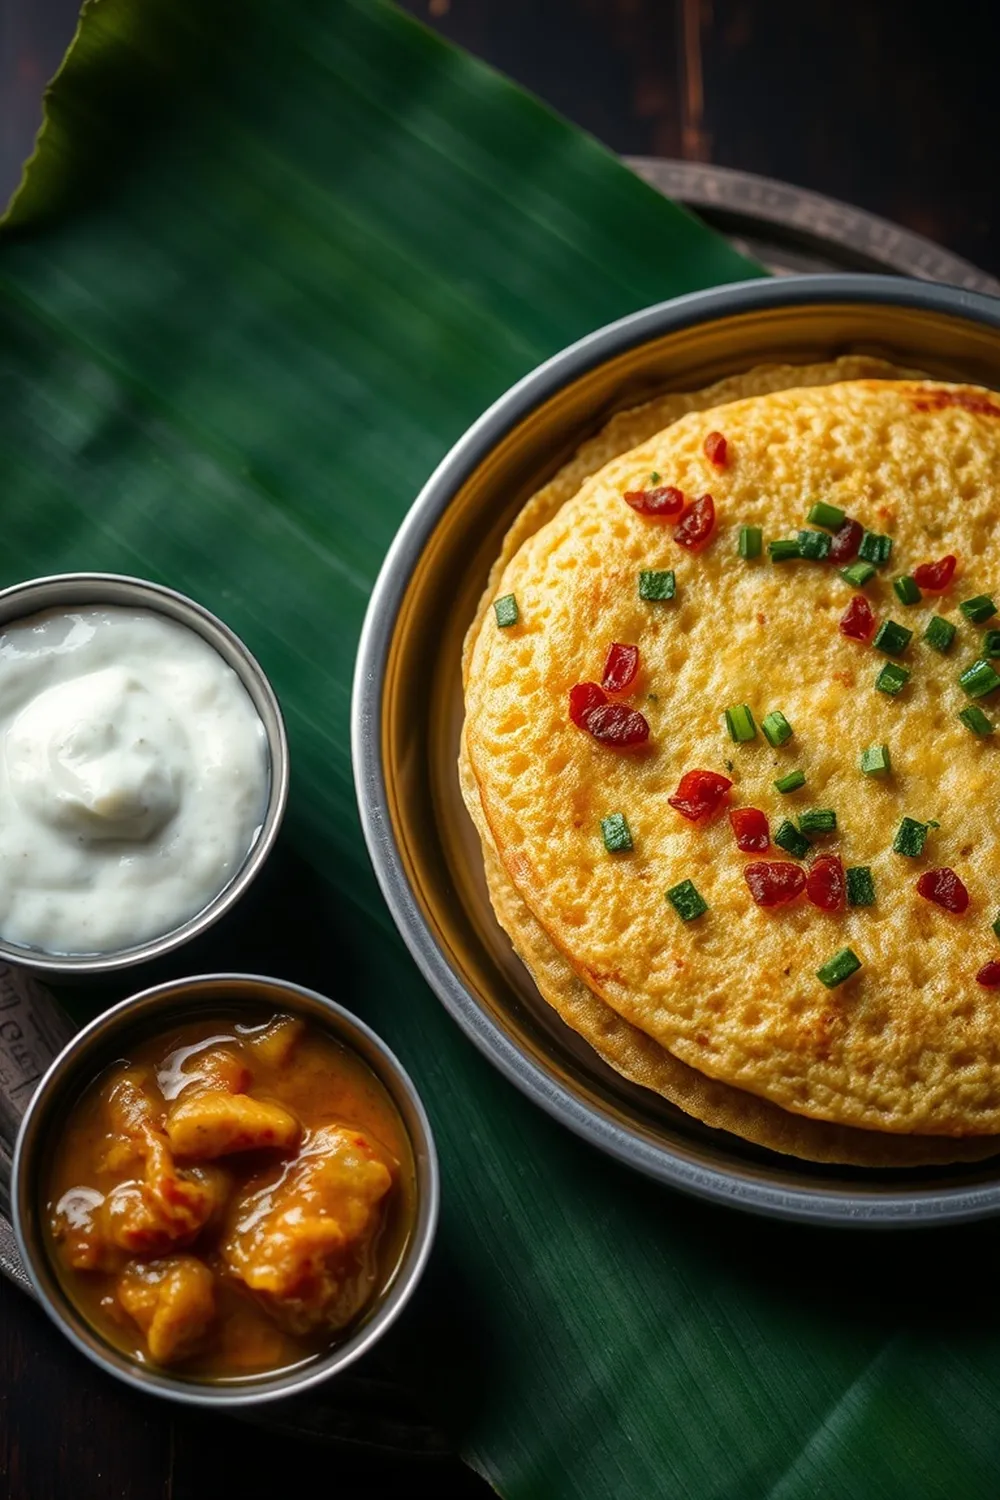
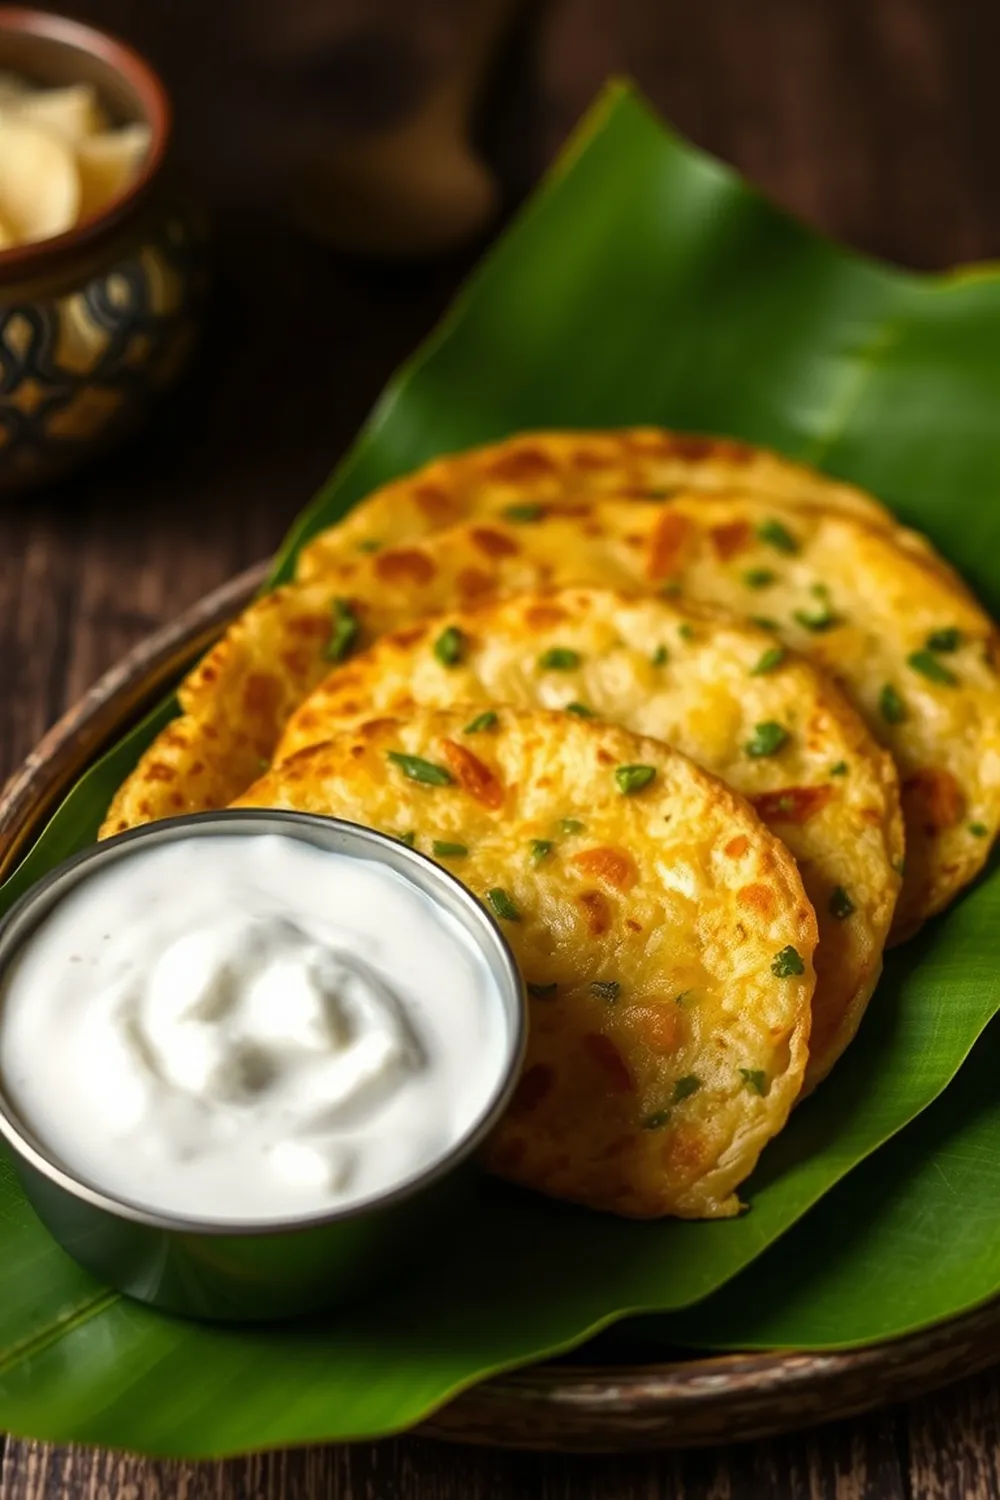
- Serve hot with coconut chutney. Use the batter within 24 hours.
- Calories:120 kcal25%
- Energy:502 kJ22%
- Protein:4 g28%
- Carbohydrates:18 mg40%
- Sugar:1 mg8%
- Salt:300 g25%
- Fat:4 g20%
Last Updated on 6 months ago by Neha Deshmukh
Mudakathan Keerai Dosa Recipe – Authentic Indian Fermented Crepe
Introduction
There’s just something magical about a crispy, golden dosa, isn’t there? Especially when it’s packed with the goodness of nutritious greens! I remember the first time my grandmother made me Mudakathan Keerai Dosa – I was a little skeptical about greens in my dosa, but one bite changed everything. It’s a flavour I’ve been chasing ever since, and I’m so excited to share my version with you. This isn’t just a dosa; it’s a little piece of South Indian comfort food, brimming with health and flavour.
Why You’ll Love This Recipe
This Mudakathan Keerai Dosa is special. It’s a fantastic way to sneak in some extra greens into your diet, and the fermentation process makes it incredibly easy to digest. Plus, the unique flavour of Mudakathan Keerai (amaranth leaves) adds a delightful earthy note that you won’t find in your regular dosa. It’s a little bit of effort, but trust me, the results are so worth it!
Ingredients
Here’s what you’ll need to make this delicious dosa:
- 1 cup cleaned mudakathan keerai leaves
- 1 cup idli rice
- 1 teaspoon fenugreek seeds
- 1 tablespoon urad dal
- 0.5 inch ginger
- 2 sprigs curry leaves
- 0.25 cup thick aval (poha)
- 1 teaspoon salt
- Indian sesame oil as needed
Ingredient Notes
Let’s talk ingredients! Getting these right will make all the difference.
Mudakathan Keerai (Amaranth Leaves) – A Nutritional Powerhouse
Mudakathan Keerai is the star of the show! It’s packed with iron, calcium, and antioxidants. You can usually find it at Indian grocery stores. If you can’t find fresh, frozen can work in a pinch, but fresh is always best.
Idli Rice & Urad Dal – The Classic South Indian Combination
These two are the foundation of many South Indian staples. Idli rice gives the dosa its light and airy texture, while urad dal adds to the fermentation and flavour.
Fenugreek Seeds – Enhancing Flavor & Fermentation
Don’t skip these! Fenugreek seeds add a subtle sweetness and help with the fermentation process, giving your dosa that lovely tangy flavour.
Aval (Poha) – For Texture & Binding
Poha helps bind the batter and gives the dosa a slightly crispy texture. Make sure it’s the thick variety for the best results.
Indian Sesame Oil – The Traditional Touch
Sesame oil is the traditional choice for making dosas. It adds a wonderful aroma and flavour. You can substitute with other neutral oils if needed, but sesame oil really elevates the taste.
Step-By-Step Instructions
Alright, let’s get cooking!
- First, clean and separate the mudakathan keerai leaves, discarding the stalks. Rinse them thoroughly and set aside to drain completely. Nobody likes a soggy dosa!
- Now, soak the idli rice, urad dal, and fenugreek seeds in water for 3-4 hours. This is crucial for softening them up for grinding.
- Drain the soaked ingredients and add them to a grinder along with the keerai leaves, ginger, and curry leaves. Add water gradually while grinding to form a coarse mixture.
- Next, add the aval (poha) to the mixture and grind again until smooth and fine. This might take a little patience!
- Transfer the batter to a large bowl, mix in the salt, and cover loosely. Let it ferment at room temperature for 8-10 hours, or until it’s doubled in size. This is where the magic happens!
- After fermentation, adjust the batter consistency with water until it resembles thick paint. It should be pourable but not too runny.
- Heat a dosa griddle (tawa) over medium heat. Pour a ladleful of batter onto the griddle and spread it into a thin circle.
- Drizzle sesame oil around the edges of the dosa. This helps it get nice and crispy.
- Cook until golden and crisp, then flip and cook the other side for about 30 seconds.
- Serve hot with your favourite coconut chutney! The batter is best used within 24 hours.
Expert Tips
Let’s make sure your dosas turn out perfect!
Achieving the Perfect Dosa Crispness
A hot griddle and enough oil are key! Don’t be afraid to add a little extra oil if needed. Also, spreading the batter thinly is essential.
Fermentation – Key to Flavor & Texture
Fermentation time depends on the weather. In warmer climates, it might take less time. In colder climates, it might take longer. Look for the batter to double in size and have a slightly sour aroma.
Working with Mudakathan Keerai
Make sure the keerai leaves are completely dry before grinding. This will help prevent the batter from becoming too watery.
Variations
Want to switch things up? Here are a few ideas:
Vegan Mudakathan Keerai Dosa
This recipe is already naturally vegan! Just ensure your sesame oil is plant-based.
Gluten-Free Mudakathan Keerai Dosa
This recipe is naturally gluten-free!
Spice Level Adjustment – Adding Green Chilies
My friend loves a spicy kick, so I sometimes add 1-2 green chilies to the grinder along with the ginger and curry leaves.
Festival Adaptations – A Navaratri Special?
During Navaratri, many families avoid grains. While this dosa contains rice, it’s a great way to enjoy a flavourful and nutritious meal during the festival.
Serving Suggestions
Mudakathan Keerai Dosa is fantastic with:
- Coconut chutney (a must!)
- Sambar
- Tomato chutney
- A sprinkle of sambar powder
Storage Instructions
Leftover dosa batter can be stored in the refrigerator for up to 24 hours. The fermentation process will continue, so it might become slightly more sour. You can also freeze the batter for longer storage, but the texture might change slightly.
FAQs
Got questions? I’ve got answers!
What is Mudakathan Keerai and where can I find it?
Mudakathan Keerai, also known as Amaranth leaves, is a nutritious green leafy vegetable commonly used in South Indian cuisine. You can find it at most Indian grocery stores, or sometimes at Asian markets.
Can I use a different type of rice instead of Idli rice?
While Idli rice is ideal for its texture, you can try using parboiled rice as a substitute. The results might vary slightly.
What if my dosa batter doesn’t ferment properly?
Make sure the batter is kept in a warm place. You can also add a pinch of baking soda to help with fermentation, but it’s best to avoid it if possible.
Can I make the dosa batter ahead of time and store it for longer?
You can make the batter a day ahead and store it in the refrigerator. However, the longer it sits, the more sour it will become.
Is it possible to make this dosa on a non-stick pan?
Yes, you can! However, a traditional dosa griddle (tawa) will give you the best results. You might need to use a little more oil on a non-stick pan to achieve the desired crispness.
Neha Deshmukh
Neha holds a B.A. in History with a focus on Indian and world history, including ancient, medieval, and modern periods. At RecipesOfIndia.org — the world’s largest database of Indian recipes — she combines her love for food and history by exploring how India’s past has shaped its culinary traditions.