- Heat oil and butter in a thick-bottomed pan or tava over medium heat.
- Add chopped onions and green chilies. Sauté for 2-3 minutes until translucent.
- Stir in diced bell peppers and cook for another 2-3 minutes.
- Add tomatoes and salt. Cook for 4-5 minutes, mashing with a potato masher to create a chunky base.
- Mix in red chili powder and pav bhaji masala. Add water as needed to maintain moisture. Remove from heat.
- Butter both sides of bread slices generously.
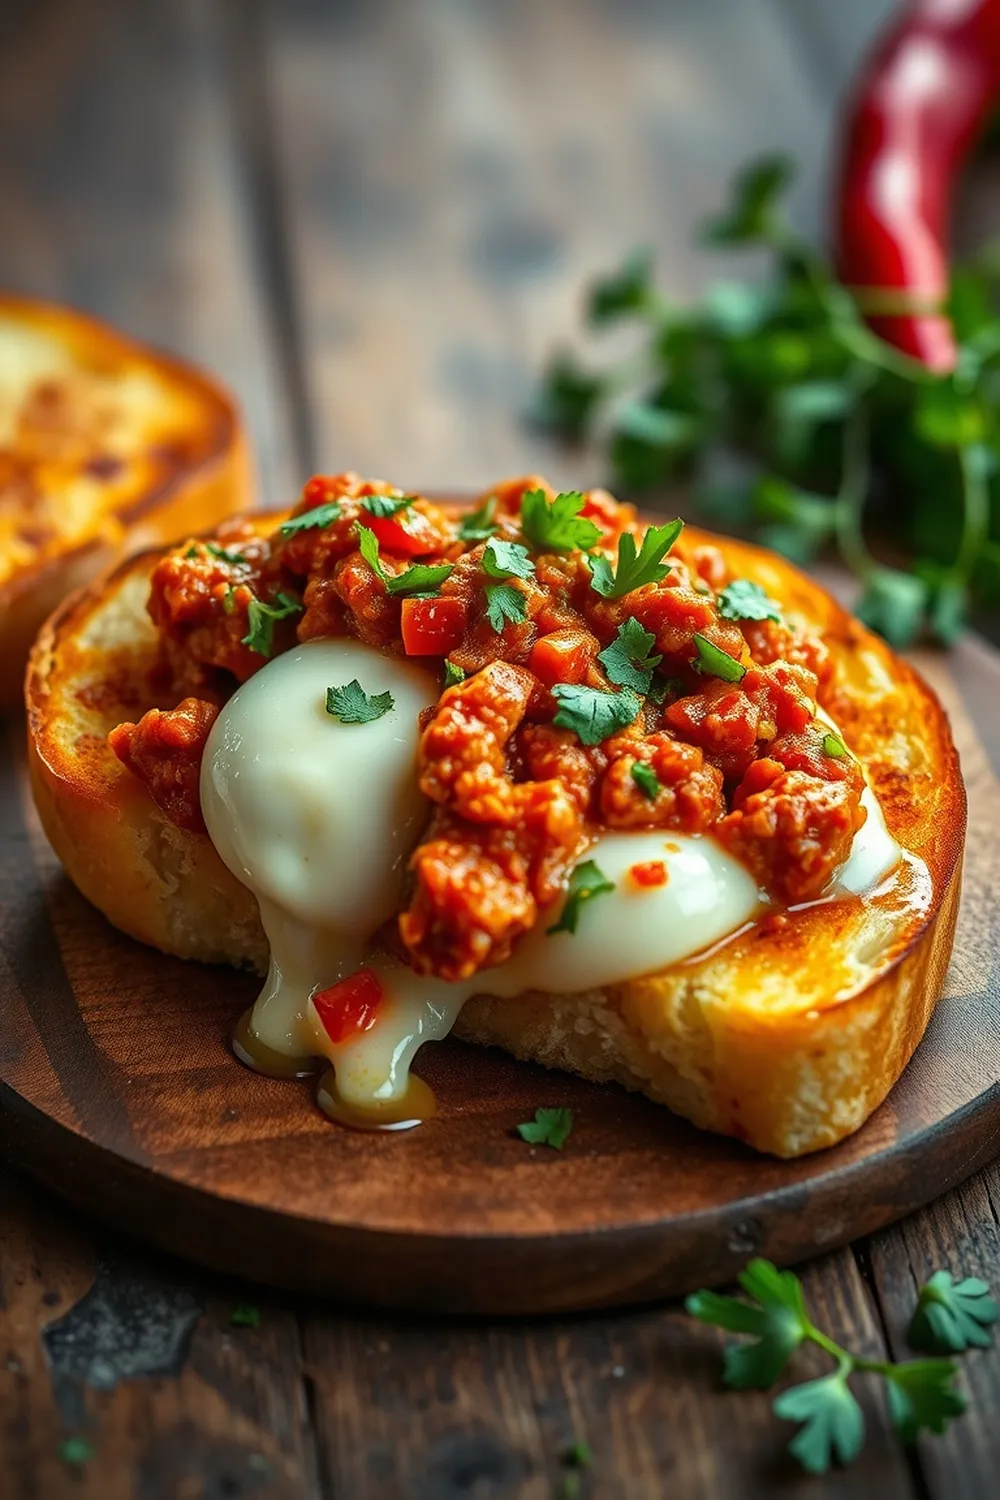
- Spread the tava masala mixture on one side of each slice, then top with grated mozzarella.
- Cook on a preheated pan over low heat, covered, for 3-4 minutes until the cheese melts and bread turns golden brown.
- For oven method: Broil at 200°C for 2-3 minutes until the cheese bubbles and edges crisp.
- Calories:320 kcal25%
- Energy:1338 kJ22%
- Protein:12 g28%
- Carbohydrates:28 mg40%
- Sugar:6 mg8%
- Salt:480 g25%
- Fat:18 g20%
Last Updated on 6 months ago by Neha Deshmukh
Mumbai Pav Bhaji Toast Recipe – Quick & Easy Cheese Bread
Hey everyone! If you’re anything like me, you love the vibrant flavors of Pav Bhaji, but sometimes you just want something…quicker. I first made this Pav Bhaji Toast when I was craving that spicy, buttery goodness but didn’t have the time for the full-on bhaji experience. It’s seriously become a weeknight staple in my house, and I’m so excited to share it with you! It’s the perfect fusion of comfort food and Indian flavors.
Why You’ll Love This Recipe
This Mumbai Pav Bhaji Toast is a total game-changer. It takes all the deliciousness of pav bhaji – that spicy, tangy vegetable mash – and transforms it into a super satisfying, cheesy toast. It’s ready in under 30 minutes, making it ideal for busy weeknights, a quick lunch, or even a fun snack. Plus, who doesn’t love melted mozzarella?!
Ingredients
Here’s what you’ll need to whip up this delightful toast:
- 100g Onion
- 50g Bell Peppers (I like a mix of colors for extra vibrancy!)
- 200g Tomato
- 2 Green chilli (adjust to your spice preference!)
- 1 Tbsp Butter (plus 2 tbsp for toasting)
- Salt, to taste
- 1 tsp Red chilli powder
- 1 tsp Pav Bhaji Masala
- 4 slices Whole wheat bread (or your favorite bread)
- 1 cup grated Mozzarella cheese
Ingredient Notes
Let’s talk ingredients for a sec! A few little things can make a big difference:
- Pav Bhaji Masala: This is key. It’s a blend of spices that gives pav bhaji its signature flavor. You can find it at most Indian grocery stores, or online. MDH and Everest are popular brands.
- Bread Choice: I prefer whole wheat bread for a bit more texture and fiber, but white bread works beautifully too – especially if you’re going for that classic pav bhaji feel.
- Mozzarella: I use a block of mozzarella and grate it myself, as it melts better than pre-shredded. Low-moisture, part-skim mozzarella is a good choice to avoid a soggy toast.
Step-By-Step Instructions
Alright, let’s get cooking!
- Heat 1 tablespoon of butter and a splash of oil in a thick-bottomed pan or tava over medium heat. This prevents the butter from burning.
- Add the chopped onions and green chilies. Sauté for 2-3 minutes, until the onions become translucent and fragrant.
- Stir in the diced bell peppers and cook for another 2-3 minutes, until they start to soften.
- Add the chopped tomatoes and a pinch of salt. Cook for 4-5 minutes, gently mashing them with a potato masher to create a chunky base. Don’t overthink it – a little texture is good!
- Mix in the red chilli powder and pav bhaji masala. Add a tablespoon or two of water if needed to keep things from sticking and to help the flavors meld. Remove from the heat.
- Now for the fun part! Generously butter both sides of each bread slice. Seriously, don’t skimp on the butter – it’s what makes it golden and crispy.
- Spread the pav bhaji mixture evenly on one side of each bread slice, then top with a generous helping of grated mozzarella.
- For the stovetop method: Cook on a preheated pan over low heat, covered, for 3-4 minutes, until the cheese is melted and bubbly and the bread is golden brown.
- For the oven method: Broil at 200°C (390°F) for 2-3 minutes, keeping a close eye on it, until the cheese bubbles and the edges are nicely crisp.
Expert Tips
- Don’t overcrowd the pan when cooking the vegetables. Work in batches if necessary to ensure they cook evenly.
- Mashing the tomatoes really helps create that authentic pav bhaji texture.
- Keep the heat low when toasting the bread to prevent burning the butter.
Variations
Want to switch things up? Here are a few ideas:
- Vegan Adaptation: Use vegan butter and vegan mozzarella cheese. There are some great options available now! My friend, Priya, swears by the Daiya mozzarella shreds.
- Gluten-Free Adaptation: Simply use your favorite gluten-free bread.
- Spice Level Adjustment: Add more or less green chili and red chili powder to adjust the spice level to your liking.
- Festival Adaptation: This makes a fantastic quick snack for festivals like Ganesh Chaturthi! It’s easy to make a big batch and share with family and friends.
Serving Suggestions
Serve your Pav Bhaji Toast immediately while it’s hot and cheesy! It’s delicious on its own, or you can pair it with a side of ketchup or a cooling raita (yogurt dip). A sprinkle of chopped cilantro adds a nice fresh touch.
Storage Instructions
This is best enjoyed fresh, but you can store any leftover pav bhaji base in an airtight container in the refrigerator for up to 2 days. Reheat it before spreading on the bread and toasting.
FAQs
Let’s answer some common questions:
- Is this recipe suitable for kids? Yes! You can reduce or omit the green chilies to make it milder for little ones.
- Can I make the pav bhaji base ahead of time? Absolutely! You can make it a day or two in advance and store it in the fridge.
- What is the best type of bread to use? Whole wheat or white bread both work well. It really comes down to personal preference.
- Can I use a different cheese? Cheddar or a mozzarella-cheddar blend would also be tasty!
- How can I adjust the spice level? Control the amount of green chilies and red chili powder you use. Start with less and add more to taste.
Enjoy! I hope you love this quick and easy Pav Bhaji Toast as much as my family does. Let me know in the comments how it turns out for you!


Neha Deshmukh
Neha holds a B.A. in History with a focus on Indian and world history, including ancient, medieval, and modern periods. At RecipesOfIndia.org — the world’s largest database of Indian recipes — she combines her love for food and history by exploring how India’s past has shaped its culinary traditions.