- Combine sliced onions, curry leaves, ginger, green chilies, hot oil, and salt in a mixing bowl. Mix until onions release moisture.
- Add rava (semolina) to the mixture and mix thoroughly.
- Mix in sesame seeds, crushed cashews, maida (all-purpose flour), rice flour, and ghee until the dough holds its shape when pressed.
- Sprinkle water gradually and knead into a firm, smooth dough. Divide into 6 equal balls.
- Flatten each ball into a thick vada using greased baking paper or your hands.
- Heat oil in a kadai (deep frying pan) over medium heat. Gently slide vadas into the hot oil and fry until golden brown and onions are caramelized.
- Flip vadas occasionally for even frying. Drain on paper towels to remove excess oil before serving.
- Calories:280 kcal25%
- Energy:1171 kJ22%
- Protein:6 g28%
- Carbohydrates:30 mg40%
- Sugar:2 mg8%
- Salt:300 g25%
- Fat:15 g20%
Last Updated on 6 months ago by Neha Deshmukh
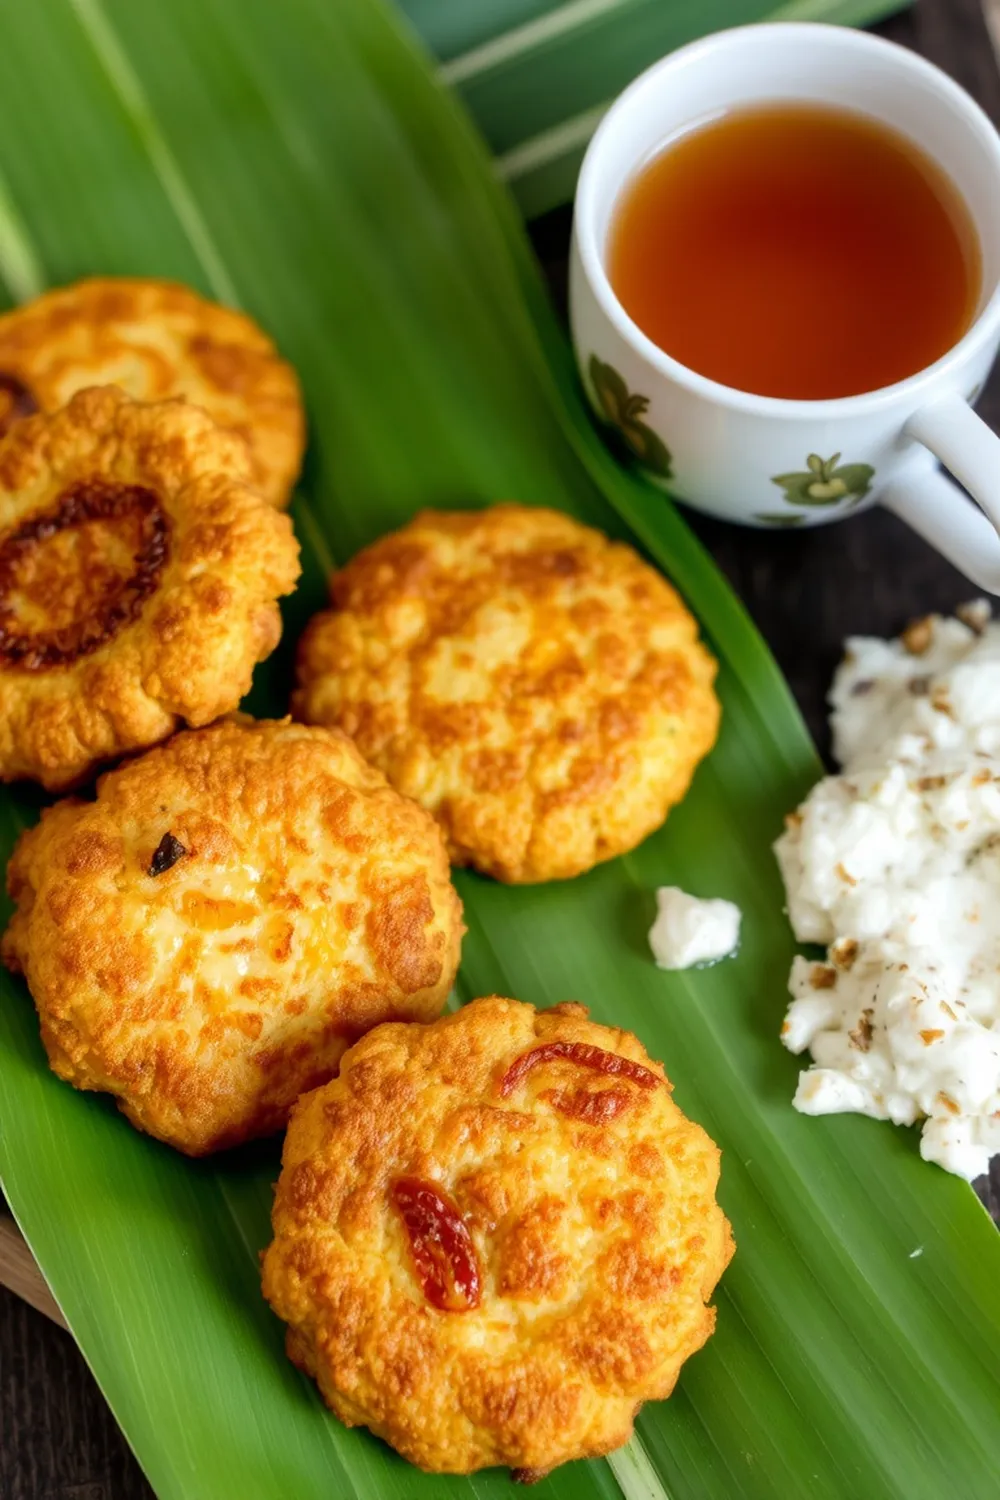
Onion Vada Recipe: Authentic Indian Semolina & Cashew Fritters
Introduction
Oh, Onion Vadas! These crispy, golden fritters are a total comfort food for me. I remember my nani (grandmother) making these during monsoon season, and the aroma would fill the entire house. They’re the perfect rainy-day snack with a cup of chai, or honestly, any time you’re craving something savory and satisfying. This recipe is a little bit of a labor of love, but trust me, the results are so worth it. Let’s dive in and make some magic!
Why You’ll Love This Recipe
This Onion Vada recipe isn’t just about a delicious snack; it’s about experiencing a little piece of Indian culinary tradition. It’s a fantastic blend of textures – crispy on the outside, soft and flavorful on the inside. Plus, the addition of cashews and sesame seeds adds a lovely nutty aroma and crunch. You’ll love how these vadas disappear quickly once they’re served!
Ingredients
Here’s what you’ll need to create these delightful Onion Vadas:
- 1 cup Rava (Semolina) – about 150g
- 1/2 cup All-purpose flour (Maida) – about 60g
- 1/4 cup Rice flour – about 30g
- 4 Onions (chopped) – medium sized
- 2 tablespoons Oil (hot)
- 1 Green chilli (finely chopped) – adjust to your spice preference
- 1 tablespoon Ginger (finely chopped)
- 1 tablespoon Curry leaves (finely chopped)
- 1 tablespoon Sesame seeds
- 1 tablespoon Cashews (crushed)
- 1 tablespoon Ghee
- Salt as needed
- Oil for deep frying
Ingredient Notes
Let’s talk ingredients! A few little tips can make all the difference.
Rava (Semolina) – Types and Toasting
There are different types of rava available. I prefer using fine rava for this recipe, as it gives a softer texture. You can lightly toast the rava in a dry pan for a few minutes before using it. This enhances its flavor and helps the vadas become extra crispy.
Maida (All-Purpose Flour) – Substitutions
Maida gives the vadas a nice binding. If you’re looking for a healthier alternative, you can try using whole wheat flour, but the texture will be slightly different.
Rice Flour – Regional Variations & Texture
Rice flour adds to the crispness. In some South Indian variations, you’ll find more rice flour used, resulting in a very crunchy vada. Feel free to experiment!
Onions – Choosing the Right Variety
I usually use regular yellow onions, but red onions work well too, giving a slightly sweeter flavor. Just make sure they aren’t too strong.
Curry Leaves – Fresh vs. Dried
Fresh curry leaves are always best! They have a much more vibrant aroma. If you can’t find fresh, you can use dried, but use about half the amount.
Hot Oil – Importance of Temperature
The hot oil initially helps release moisture from the onions. Don’t skip this step! It’s crucial for getting that perfect texture.
Cashews – Roasting for Enhanced Flavor
Lightly roasting the cashews before crushing them intensifies their flavor. A quick toast in a dry pan does the trick.
Ghee – Traditional Significance & Alternatives
Ghee adds a beautiful richness and aroma. If you don’t have ghee, you can substitute it with vegetable oil, but ghee really elevates the flavor.
Step-By-Step Instructions
Alright, let’s get cooking!
- First, in a mixing bowl, combine the chopped onions, curry leaves, ginger, green chili, hot oil, and salt. Mix everything well with your hands until the onions start to release their moisture. This takes a bit of effort, but it’s important!
- Now, add the rava (semolina) to the onion mixture and blend it thoroughly. Make sure the rava is well coated with the onion mixture.
- Next, mix in the sesame seeds, crushed cashews, maida, rice flour, and ghee. Continue mixing until the dough starts to come together and holds its shape when you press it.
- Sprinkle water gradually, a little at a time, and knead the dough into a firm, but not overly sticky, consistency. This might take 5-7 minutes.
- Divide the dough into 6 equal balls.
- Grease your hands or use greased baking paper to flatten each ball into a thick vada – about 1/2 inch thick. Don’t make them too thin, or they might break apart during frying.
- Heat oil in a kadai (deep frying pan) over medium heat. Gently slide the vadas into the hot oil, being careful not to overcrowd the pan.
- Fry the vadas until the onions caramelize to a deep golden-red color, flipping them occasionally for even frying. This usually takes about 3-4 minutes per batch.
- Remove the vadas from the oil and drain them on paper towels before serving.
Expert Tips
Here are a few things I’ve learned over the years to make the perfect Onion Vadas:
Achieving the Perfect Crispness
Toasting the rava and using the right amount of rice flour are key to achieving that perfect crispness.
Preventing Vadas from Disintegrating
Make sure the dough is firm enough and the oil isn’t too hot initially. Gently slide the vadas into the oil.
Kneading the Dough – Consistency is Key
The dough should be firm and hold its shape, but not be too dry. Add water gradually until you reach the right consistency.
Oil Temperature Control
Maintaining the right oil temperature is crucial. If it’s too hot, the vadas will burn on the outside and remain uncooked inside. If it’s too cold, they’ll absorb too much oil.
Frying in Stages for Even Cooking
Don’t overcrowd the pan. Fry the vadas in batches to ensure they cook evenly.
Variations
Want to switch things up? Here are a few ideas:
Vegan Onion Vada
Simply substitute the ghee with vegetable oil.
Gluten-Free Onion Vada
Use a gluten-free all-purpose flour blend instead of maida.
Spice Level Adjustment – Adding More Green Chilies
My friend, Priya, loves her vadas spicy. Feel free to add more green chilies if you like a kick!
Festival Adaptations – Diwali & Janmashtami
These are often made during Diwali and Janmashtami. My family loves to serve them with a special tamarind chutney during these festivals.
Regional Variations – South Indian vs. North Indian Styles
South Indian vadas often use more rice flour and are typically larger. North Indian versions tend to be smaller and use a bit more maida.
Serving Suggestions
Onion Vadas are best enjoyed hot and fresh! They’re amazing with:
- Mint-coriander chutney
- Tamarind chutney
- A cup of masala chai
- Tomato ketchup (a childhood favorite of mine!)
Storage Instructions
Leftover vadas can be stored in an airtight container at room temperature for a day. Reheat them in a preheated oven or air fryer to restore some of their crispness.
FAQs
Let’s answer some common questions:
What type of oil is best for frying Onion Vadas?
Groundnut oil or vegetable oil are both good choices. They have a high smoke point and a neutral flavor.
Can I make the vada batter ahead of time?
You can prepare the dough ahead of time and store it in the refrigerator for up to 24 hours. Bring it to room temperature before frying.
How do I know if the oil is hot enough for frying?
A small piece of dough should sizzle and rise to the surface immediately when dropped into the oil.
What can I serve with Onion Vadas besides chutney?
You can serve them with yogurt, raita, or even a simple lemon wedge.
Can I bake these vadas instead of frying them?
While you can bake them, they won’t have the same crispy texture as fried vadas. If you do bake them, brush them with oil and bake at 180°C (350°F) for about 20-25 minutes, flipping halfway through.


Neha Deshmukh
Neha holds a B.A. in History with a focus on Indian and world history, including ancient, medieval, and modern periods. At RecipesOfIndia.org — the world’s largest database of Indian recipes — she combines her love for food and history by exploring how India’s past has shaped its culinary traditions.


