- Heat ghee and oil in a pressure cooker. Roast cashews until golden brown, then set aside.
- Fry paneer cubes until golden brown and set aside.
- Add cumin seeds, cinnamon sticks, cloves, cardamom pods, and kasuri methi. Sauté until aromatic.
- Add sliced onions, green chilies, and ginger-garlic paste. Sauté until onions soften.
- Stir in carrots, peas, chili powder, garam masala, and salt. Cook for 2 minutes.
- Pour in water and bring to a boil.
- Add soaked basmati rice, fried cashews, paneer, slit green chilies, and lemon juice. Mix well.
- Close the pressure cooker lid and cook for 2 whistles on medium heat.
- Once the pressure releases naturally, open the cooker and fluff the rice gently.
- Serve hot with raita.
- Calories:722 kcal25%
- Energy:3020 kJ22%
- Protein:20 g28%
- Carbohydrates:73 mg40%
- Sugar:9 mg8%
- Salt:829 g25%
- Fat:40 g20%
Last Updated on 5 months ago by Neha Deshmukh
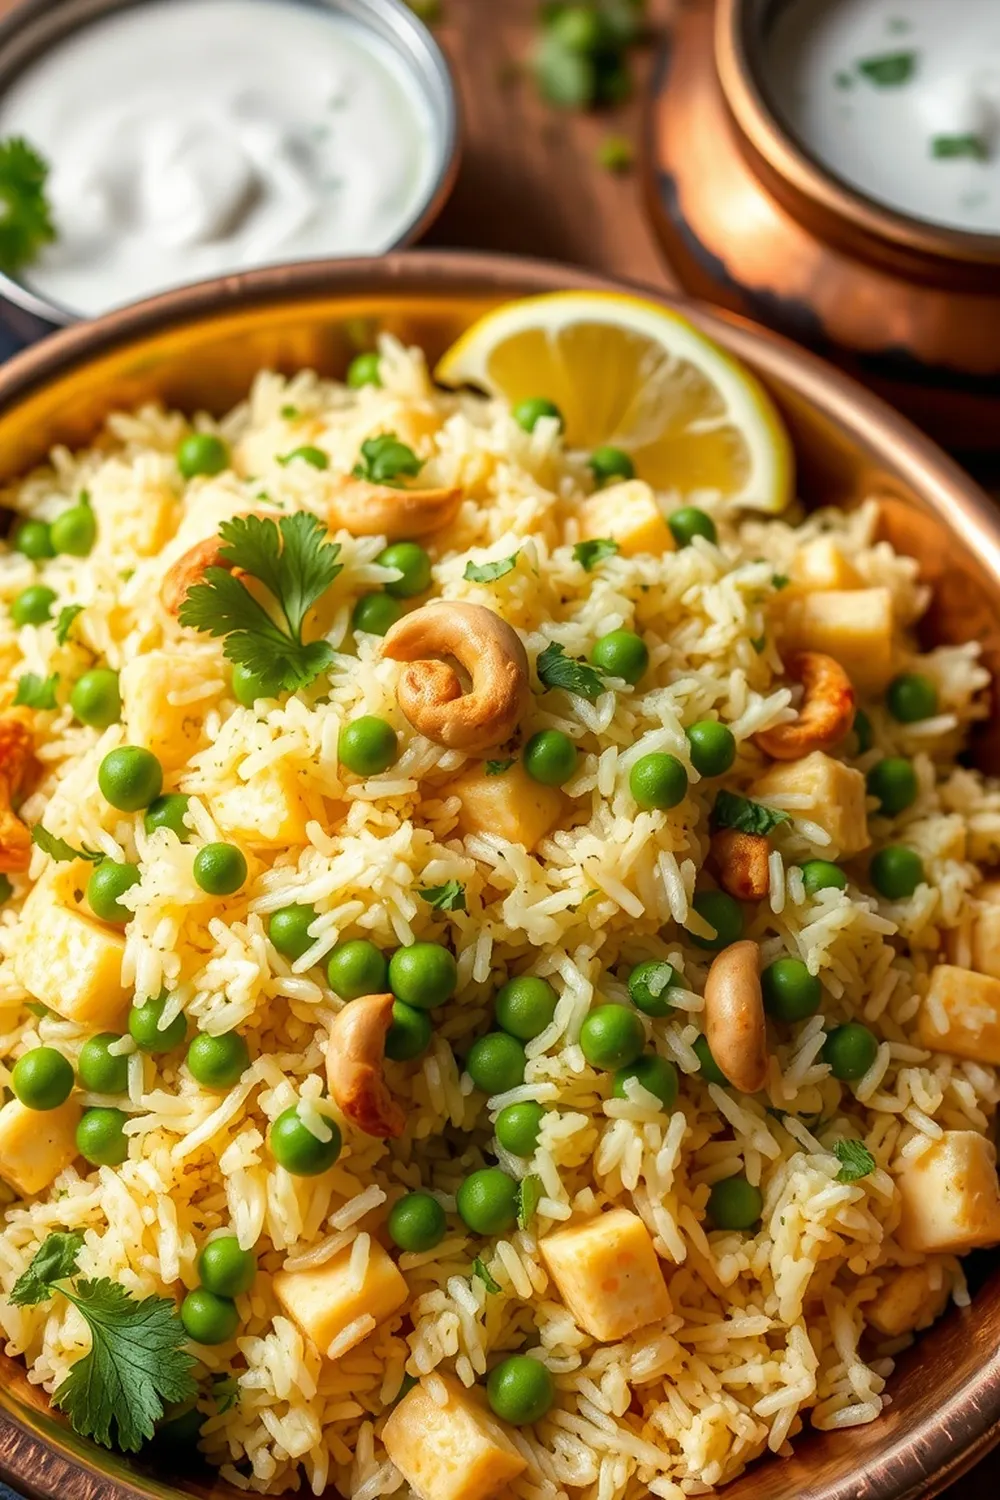
Paneer & Vegetable Biryani Recipe – Authentic Indian Pressure Cooker Meal
Hey everyone! If you’re anything like me, you love a good biryani. It’s the kind of dish that just feels special, right? Perfect for a weekend treat, a celebration, or honestly, just because you deserve something delicious. I’m so excited to share my go-to Paneer & Vegetable Biryani recipe with you – it’s incredibly flavorful, surprisingly easy (thanks to the pressure cooker!), and always a crowd-pleaser. I first made this for a family gathering and it disappeared in minutes!
Why You’ll Love This Recipe
This isn’t your average biryani recipe. It’s packed with tender paneer, vibrant veggies, and aromatic spices. Using a pressure cooker cuts down on cooking time without sacrificing any of the authentic flavors. Plus, it’s a fantastic way to enjoy a restaurant-style biryani in the comfort of your own kitchen. Seriously, who doesn’t love that?
Ingredients
Here’s what you’ll need to create this flavorful masterpiece:
- 2 tbsp ghee
- 2 tbsp oil
- 2 tbsp cashews
- 200 grams paneer, cubed
- 1 tsp cumin seeds
- 1 inch cinnamon stick
- ½ tsp cloves
- 3 cardamom pods
- 1 black cardamom pod
- 2 tbsp kasuri methi (dried fenugreek leaves)
- 1 onion, sliced
- 2 green chilies, slit
- 1 tsp ginger-garlic paste
- ½ cup carrots, chopped
- 1 cup peas
- 1 tsp chili powder (adjust to taste)
- 1 tsp garam masala
- 1 tsp salt (or to taste)
- 2 cups water
- 1 cup basmati rice, soaked for 30 minutes
- 3 green chilies, slit (for layering)
- 2 tbsp lemon juice
Ingredient Notes
Let’s talk ingredients for a sec! A few things really make this biryani sing:
- Kasuri Methi: Don’t skip this! It adds a unique, slightly bitter aroma that’s essential for authentic biryani flavor. You can find it at most Indian grocery stores.
- Black Cardamom: This adds a smoky depth that regular green cardamom just can’t match. It’s a little secret weapon!
- Basmati Rice: This is the only rice to use for biryani. Its long grains and delicate fragrance are key. Make sure to soak it for at least 30 minutes before cooking – this helps it stay fluffy and separate. I always use aged basmati rice for the best results.
Step-By-Step Instructions
Alright, let’s get cooking!
- First, heat the ghee and oil in your pressure cooker over medium heat. Add the cashews and roast until they turn golden brown and fragrant. Remove them and set aside.
- Now, add the paneer cubes to the same cooker and fry them until they’re lightly golden on all sides. Don’t overcrowd the cooker – work in batches if needed. Once fried, set the paneer aside.
- Time for the spices! Add the cumin seeds, cinnamon stick, cloves, cardamom pods, and black cardamom to the cooker. Sauté for about 30 seconds, until they become fragrant. This is where your kitchen will start to smell amazing!
- Add the sliced onions, slit green chilies, and ginger-garlic paste. Sauté until the onions soften and turn translucent, about 5-7 minutes.
- Stir in the chopped carrots, peas, chili powder, garam masala, and salt. Cook for another 2 minutes, allowing the spices to bloom.
- Pour in the water and bring the mixture to a boil.
- Gently add the soaked basmati rice, fried cashews, fried paneer, slit green chilies, and lemon juice. Mix everything well, being careful not to break the rice grains.
- Close the pressure cooker lid and cook on medium heat for 2 whistles.
- Once the pressure has released naturally, open the cooker and fluff the rice gently with a fork. Be careful not to overmix!
Expert Tips
- Don’t overcook the rice: Overcooked rice will be mushy. Keep a close eye on the pressure cooker and adjust the cooking time if needed.
- Layering is key (optional): For a more traditional biryani, you can layer the rice and vegetable mixture in the pressure cooker.
- Ghee is your friend: It adds a richness and flavor that oil just can’t replicate.
Variations
Want to switch things up? Here are a few ideas:
- Vegan Adaptation: Use plant-based paneer and ghee alternatives. Coconut oil works beautifully!
- Gluten-Free: This recipe is naturally gluten-free, so you’re good to go!
- Spice Level: Adjust the amount of chili powder to your liking. For a milder biryani, use ½ tsp. For a spicier kick, go up to 1 ½ tsp. My friend loves it extra spicy, so I always make a small batch with extra chili for her.
- Festival Adaptations: This biryani is perfect for Eid, Diwali, or any special occasion. You can add a sprinkle of saffron strands for an extra touch of luxury during festivals.
Serving Suggestions
Serve this Paneer & Vegetable Biryani hot with a side of refreshing raita (yogurt dip). A simple salad also complements it beautifully. It’s a complete meal in itself, but a little papadum on the side never hurts!
Storage Instructions
Leftovers can be stored in an airtight container in the refrigerator for up to 3 days. Reheat gently in the microwave or on the stovetop.
FAQs
Let’s answer some common questions:
- What type of paneer works best for biryani? I recommend using fresh, soft paneer. If you’re using frozen paneer, thaw it completely and gently squeeze out any excess water before frying.
- Can I make this biryani without a pressure cooker? Yes, you can! Cook it in a heavy-bottomed pot on the stovetop, but it will take longer (about 45-60 minutes).
- How do I prevent the rice from sticking to the bottom of the cooker? Make sure to use enough water and avoid stirring the biryani too much while it’s cooking.
- What is Kasuri Methi and where can I find it? Kasuri Methi is dried fenugreek leaves. You can find it at most Indian grocery stores or online.
- Can I add other vegetables to this biryani? Absolutely! Feel free to add vegetables like potatoes, cauliflower, or beans. Just adjust the cooking time accordingly.
Enjoy making this delicious Paneer & Vegetable Biryani! I hope it becomes a favorite in your home, just like it is in mine. Happy cooking!


Neha Deshmukh
Neha holds a B.A. in History with a focus on Indian and world history, including ancient, medieval, and modern periods. At RecipesOfIndia.org — the world’s largest database of Indian recipes — she combines her love for food and history by exploring how India’s past has shaped its culinary traditions.


