- Soak 4 cups raw rice overnight and 1 cup urad dal for 4-5 hours. Drain the rice and grind it into a powder. Grind the dal into a paste. Combine the rice powder and dal paste to make a batter and ferment for 6-7 hours.
- Heat oil in a deep pan. Drop tablespoons of the fermented batter into medium-hot oil. Fry 10-12 Punukkulu per batch until golden brown. Drain on paper towels.
- For chutney: Sauté 3-4 green chilies and 1.5 cups coriander leaves in 2 tsp oil for 2-3 minutes. Let cool.
- Grind the sautéed mixture with 1/4 cup roasted peanuts, soaked tamarind, 1 tsp jaggery, and salt. Add water as needed to achieve a smooth consistency.
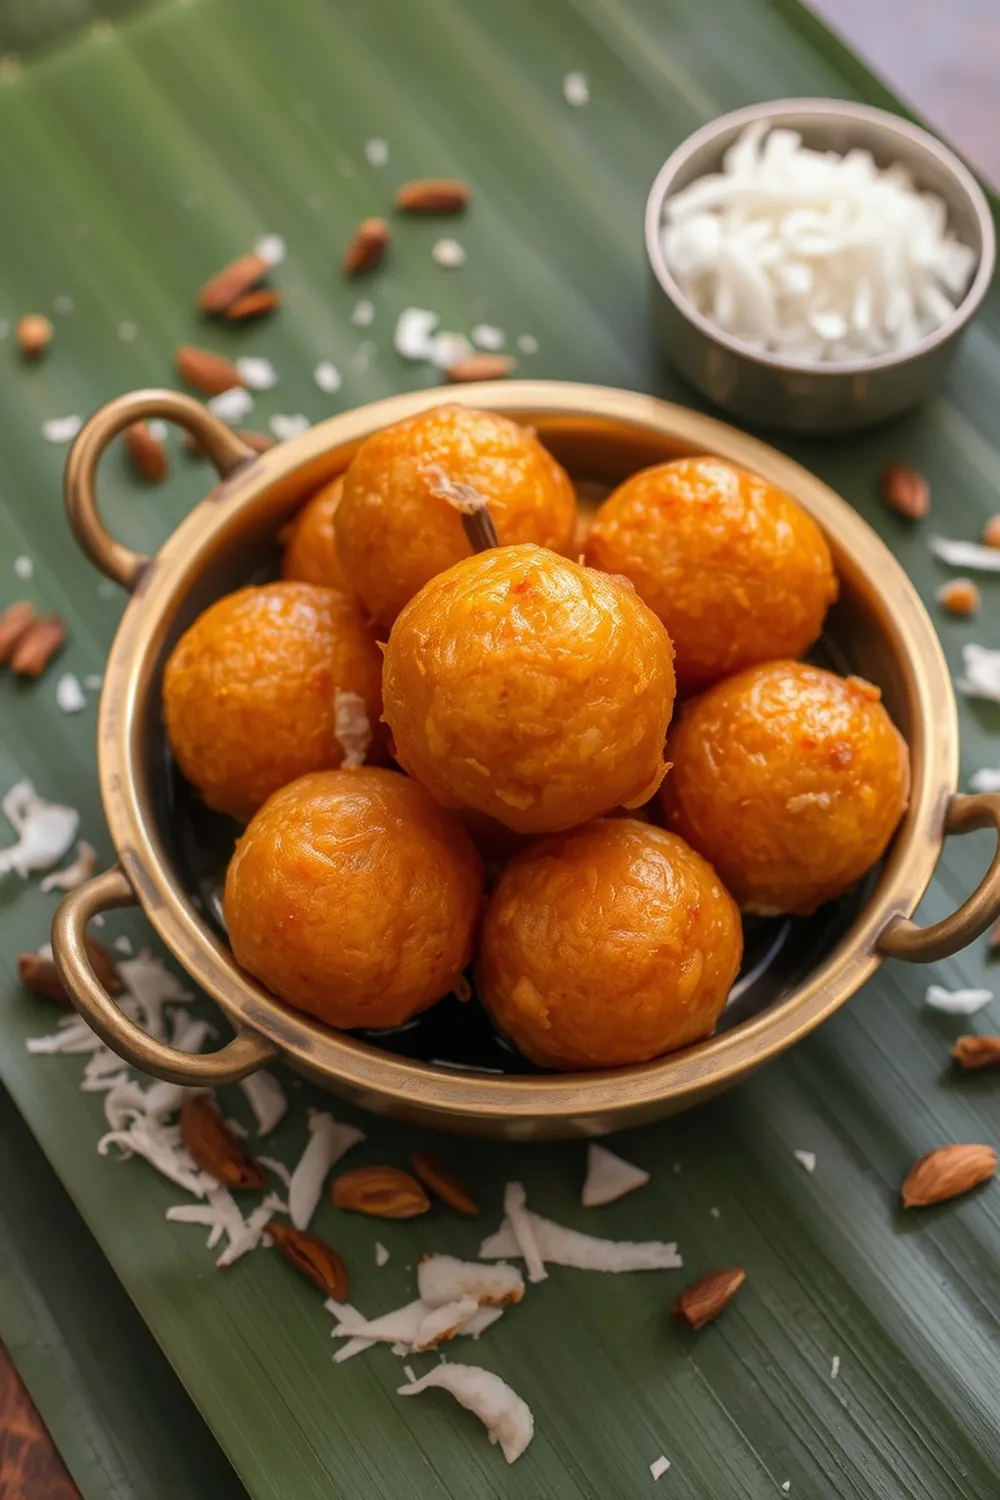
- Serve crispy Punukkulu hot with peanut-coriander chutney and chopped onions.
- Calories:320 kcal25%
- Energy:1338 kJ22%
- Protein:8 g28%
- Carbohydrates:35 mg40%
- Sugar:3 mg8%
- Salt:220 g25%
- Fat:18 g20%
Last Updated on 4 months by Neha Deshmukh
Punukkulu Recipe – Authentic Rice & Lentil Fritters with Peanut Chutney
Introduction
Oh, Punukkulu! These crispy, golden fritters hold such a special place in my heart. I remember my grandmother making these during festivals, the whole house smelling of frying batter and fresh chutney. They’re a classic Andhra snack, and honestly, once you try them, you’ll be hooked. They’re a little bit of work, but so worth it. Let’s get into making these delightful rice and lentil fritters!
Why You’ll Love This Recipe
Punukkulu aren’t just delicious; they’re a little slice of South Indian comfort food. They’re wonderfully crispy on the outside, soft on the inside, and the peanut chutney? Forget about it! It’s the perfect balance of spicy, tangy, and nutty. Plus, they’re naturally gluten-free, and easily adaptable to be vegan.
Ingredients
Here’s what you’ll need to make these beauties:
- 4 cups raw rice
- 1 cup urad dal (split black lentils)
- Oil for deep frying
- Salt to taste
- 1.5 cups fresh coriander leaves, roughly chopped
- 0.75 cup roasted peanuts
- 3-4 green chillies
- 1 small gooseberry-sized tamarind
- 1 tsp jaggery
- 2 tsp oil (for chutney)
Ingredient Notes
Let’s talk ingredients for a sec. Getting these right makes all the difference!
- Raw Rice Varieties for Punukkulu: You can use regular raw rice, but a short-grain variety like sona masuri works beautifully. It gives a nice, slightly sticky texture to the batter.
- Urad Dal: The Importance of Soaking: Don’t skip the soaking! It softens the dal, making it easier to grind into a smooth paste. This is key for a light and fluffy Punukkulu.
- Oil for Frying: Choosing the Right Oil: I prefer using groundnut oil for deep frying because of its high smoke point and neutral flavour. Sunflower oil or vegetable oil also work well.
- Regional Variations in Spice Levels: Andhra cuisine is known for its spice! Feel free to adjust the number of green chillies in the chutney to your liking.
- Authentic Tamarind & Jaggery Balance: The tamarind and jaggery create a wonderful sweet and sour flavour in the chutney. Don’t be afraid to taste and adjust the quantities to get the perfect balance.
Step-By-Step Instructions
Alright, let’s get cooking!
- First, soak the 4 cups of raw rice overnight. Then, soak 1 cup of urad dal for 4-5 hours.
- Drain the rice and grind it into a slightly coarse powder. You don’t want it completely smooth.
- Grind the urad dal into a smooth paste. Add a little water if needed, but keep it thick.
- Combine the ground rice and dal paste in a large bowl. Mix well and add salt to taste.
- Now, the important part: fermentation! Cover the batter and let it ferment for 6-7 hours, or until it’s bubbly and has a slightly sour smell. The warmer the climate, the faster it will ferment.
- While the batter ferments, let’s make the chutney. Heat 2 tsp of oil in a pan. Sauté the 3-4 green chillies and 1.5 cups of coriander leaves for 2-3 minutes until fragrant. Let it cool.
- In a grinder, combine the sautéed mixture, 0.75 cup roasted peanuts, the tamarind, 1 tsp jaggery, and salt. Grind to a smooth paste, adding water as needed.
- Heat oil in a deep pan over medium heat.
- Once the oil is hot, drop tablespoons of the fermented batter into the oil. Fry 10-12 Punukkulu per batch, turning occasionally, until they’re golden brown and crispy.
- Drain the fried Punukkulu on paper towels to remove excess oil.
Expert Tips
A few little things I’ve learned over the years…
- Achieving the Perfect Fermentation: Fermentation is key! If your batter isn’t fermenting well, try adding a pinch of baking soda.
- Maintaining Oil Temperature for Crispy Fritters: Keep the oil at a consistent medium heat. If it’s too hot, the Punukkulu will burn on the outside before cooking through. If it’s too cold, they’ll absorb too much oil.
- Troubleshooting Batter Consistency: If the batter is too thick, add a little water. If it’s too thin, add a tablespoon of rice flour.
- Tips for Grinding Rice & Dal: A wet grinder gives the best results, but a high-powered blender can work in a pinch. Grind in batches to avoid overheating the motor.
- Making the Chutney Ahead of Time: The chutney actually tastes better after it’s had a chance to sit for a few hours, so feel free to make it a day ahead!
Variations
Let’s get creative!
- Vegan Punukkulu: This recipe is already naturally vegan! Just ensure your jaggery is vegan-friendly (some may be processed with bone char).
- Gluten-Free Punukkulu: Naturally gluten-free!
- Spice Level Adjustments: My friend loves to add a pinch of red chilli powder to the batter for an extra kick.
- Festival Adaptations (Especially for Ganesh Chaturthi & Sankranthi): During Ganesh Chaturthi, we often make smaller Punukkulu as offerings. For Sankranthi, we make a huge batch to share with family and friends.
Serving Suggestions
Serve these crispy Punukkulu hot, hot, hot! They’re amazing with the peanut-coriander chutney, of course, and a side of chopped onions. A dollop of yogurt also complements them beautifully.
Storage Instructions
Punukkulu are best enjoyed fresh, but you can store leftovers in an airtight container at room temperature for a day or two. They will lose some of their crispness, but you can reheat them in a preheated oven or air fryer to restore some of the crunch.
FAQs
Got questions? I’ve got answers!
- What type of rice is best for making Punukkulu? Short-grain rice like sona masuri works best, but regular raw rice will do in a pinch.
- Can I use a blender instead of a grinder for the batter? Yes, but a wet grinder is preferred for a smoother texture. Grind in batches if using a blender.
- How do I know if the batter is fermented enough? The batter should be bubbly and have a slightly sour smell.
- Can I make the chutney without peanuts? Absolutely! You can substitute the peanuts with sesame seeds or cashews.
- How can I prevent the Punukkulu from absorbing too much oil? Maintain the correct oil temperature and don’t overcrowd the pan.
- What is the best way to reheat leftover Punukkulu? Reheat in a preheated oven or air fryer for a few minutes to restore crispness.


Neha Deshmukh
Neha holds a B.A. in History with a focus on Indian and world history, including ancient, medieval, and modern periods. At RecipesOfIndia.org — the world’s largest database of Indian recipes — she combines her love for food and history by exploring how India’s past has shaped its culinary traditions.