- Wash soya chunks thoroughly and boil in salted water with a pinch of garam masala for 6-8 minutes. Drain and squeeze excess water.
- Grind sliced onions and chopped tomatoes into a fine paste.
- Heat oil in a pan. Add cinnamon, cloves, and bay leaf. Sauté for 1 minute.
- Add onion-tomato paste and ginger-garlic paste. Cook until fragrant.
- Mix in red chili powder, turmeric powder, coriander powder, and dry coconut powder. Fry until oil separates.
- Add diced capsicum and green chilies. Sauté for 2-3 minutes.
- Stir in boiled soya chunks and garam masala. Add 1 cup water. Cover and cook until capsicum softens.
- Crush kasuri methi into the curry. Adjust consistency and cook for 1 minute.
- Turn off heat. Stir in cream (optional). Serve hot with rice or roti.
- Calories:128 kcal25%
- Energy:535 kJ22%
- Protein:2 g28%
- Carbohydrates:10 mg40%
- Sugar:3 mg8%
- Salt:167 g25%
- Fat:10 g20%
Last Updated on 4 months by Neha Deshmukh
Soya Chunks Curry Recipe – Spicy Indian Capsicum & Coconut Delight
Introduction
Oh, this Soya Chunks Curry! It’s one of those recipes that just feels like home. I first stumbled upon it while looking for a satisfying, protein-packed vegetarian meal, and it quickly became a family favorite. It’s a beautiful blend of spicy, savory, and slightly sweet flavors, and honestly, it’s way easier to make than you might think. Get ready for a delicious journey into Indian flavors!
Why You’ll Love This Recipe
This soya chunks curry isn’t just tasty; it’s a winner for so many reasons. It’s a fantastic source of plant-based protein, packed with veggies, and bursting with aromatic spices. Plus, it’s relatively quick to whip up – perfect for a weeknight dinner. And the best part? It’s incredibly versatile! You can adjust the spice level to your liking and even adapt it to suit different dietary needs.
Ingredients
Here’s what you’ll need to create this flavorful curry:
- 1 cup Soya Chunks
- 2 Onion, finely sliced
- 1 big Tomato, chopped (about 200g)
- 1 big green Capsicum, diced
- 1 Green chili, cut into half (adjust to your spice preference!)
- 1-inch Cinnamon stick
- 3 Cloves
- 1 Bay leaf
- 1 tbsp Red chili powder (adjust to taste)
- 1 tbsp Coriander powder
- ?? Turmeric powder (about 1 tsp)
- ?? Garam Masala (about 1-2 tsp)
- ?? dry Coconut powder (about 2-3 tbsp)
- ?? Ginger-Garlic paste (about 1 tbsp)
- as per taste Salt
- ?? Kasuri meethi/Dry Fenugreek leaves (about 1 tbsp)
- 2 tbsp Cream (optional)
- 3 tbsp Oil
Ingredient Notes
Let’s talk ingredients! A few little tips can make all the difference:
- Soya Chunks: Types & Preparation You’ll find different sizes of soya chunks. I prefer the medium-sized ones, but any will work. Remember to wash them really well and boil them to soften – more on that in the instructions!
- Capsicum: Choosing the Right Variety Green capsicum is traditional, but you can experiment with red or yellow for a sweeter flavor and a pop of color.
- The Role of Dry Coconut Powder in Indian Curries Don’t skip the dry coconut powder! It adds a lovely richness and subtle sweetness that’s characteristic of many Indian curries. It really balances the spice.
- Spice Blend: Understanding Garam Masala Garam masala is a blend of warming spices – typically cinnamon, cardamom, cloves, and cumin. Every family has their own version, so feel free to use your favorite!
- Kasuri Methi: The Secret to Authentic Flavor Kasuri methi (dried fenugreek leaves) adds a unique, slightly bitter aroma that elevates the curry. Crush it between your palms before adding to release its flavor.
Step-By-Step Instructions
Alright, let’s get cooking!
- First, wash the soya chunks thoroughly under cold water. Boil them in salted water with a pinch of garam masala for 6-8 minutes. This rehydrates them and gets rid of any excess saltiness. Drain well and gently squeeze out any extra water.
- Next, grind those sliced onions and chopped tomatoes into a smooth paste. A blender or food processor works best for this.
- Heat the oil in a nice, heavy-bottomed pan. Add the cinnamon stick, cloves, and bay leaf. Let them sizzle for about a minute – this is called “blooming” the spices and it releases their aroma.
- Now, add the onion-tomato paste and ginger-garlic paste. Cook this until it’s fragrant and the raw smell of the tomatoes has disappeared, usually around 5-7 minutes.
- Time for the spice magic! Mix in the red chili powder, turmeric powder, coriander powder, and dry coconut powder. Fry this mixture for a few minutes until the oil starts to separate from the sides – this is a sign that the spices are well cooked.
- Add the diced capsicum and green chili. Sauté for 2-3 minutes until the capsicum is slightly softened.
- Stir in the boiled soya chunks and another sprinkle of garam masala. Add 1 cup of water, give it a good mix, cover the pan, and let it simmer until the capsicum is tender, about 10-15 minutes.
- Crush the kasuri methi between your palms and sprinkle it into the curry. Adjust the consistency with a little more water if needed, and cook for another minute.
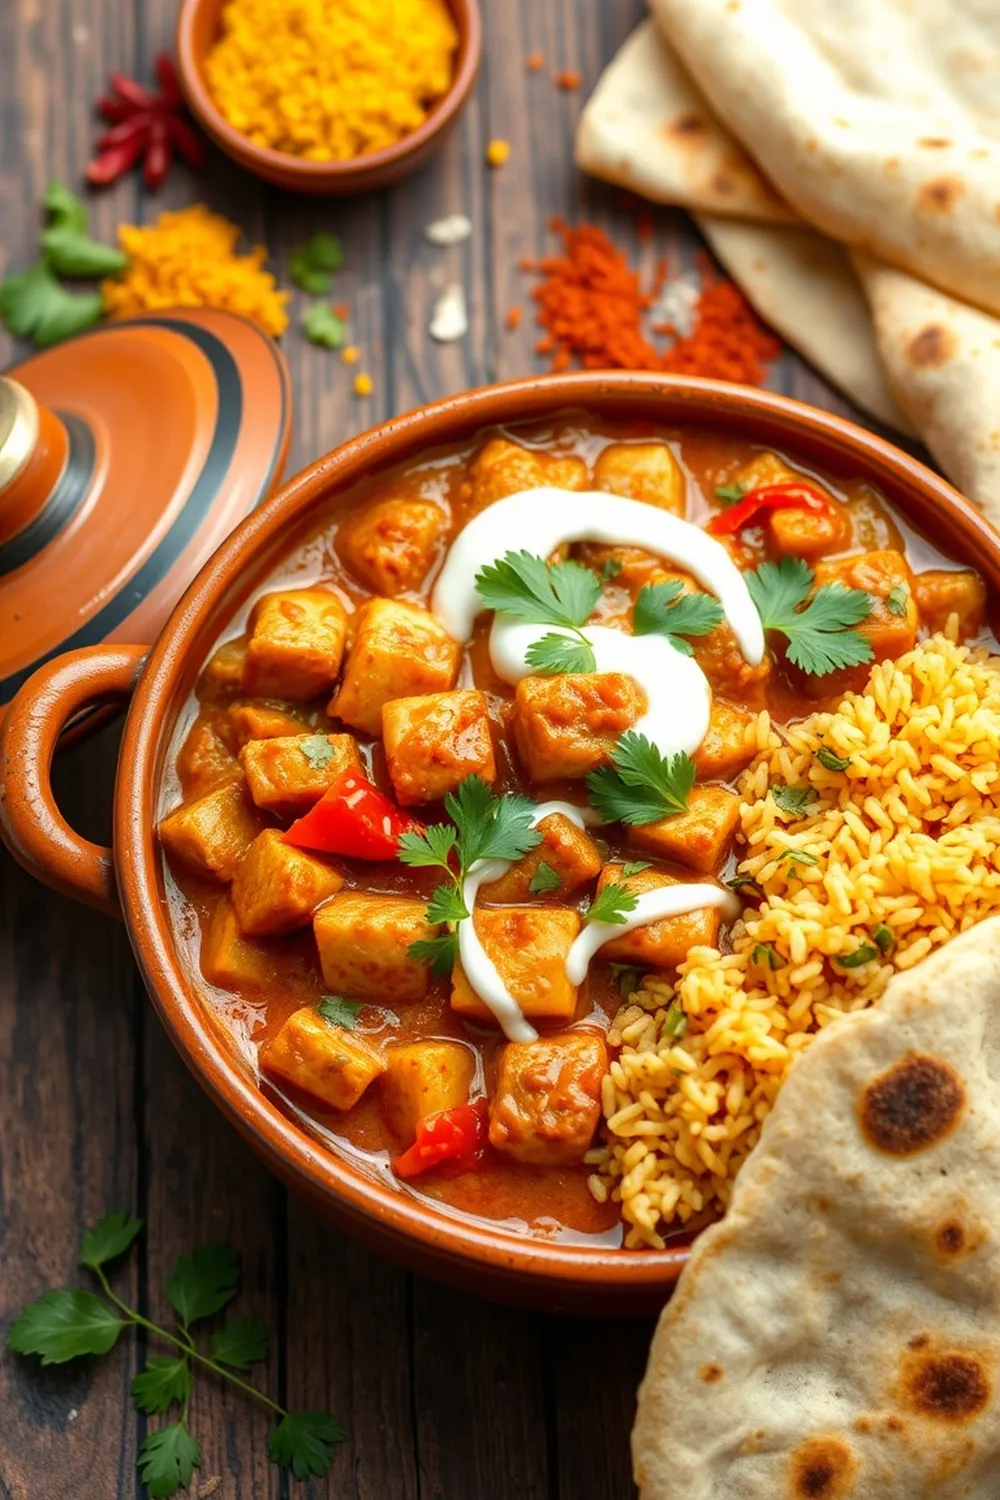
- Finally, turn off the heat and stir in the cream (if using). Serve hot with rice or roti!
Expert Tips
Here are a few things I’ve learned over the years:
- Achieving the Perfect Curry Consistency If your curry is too thick, add a splash of water. If it’s too thin, simmer uncovered for a few more minutes.
- Blooming Spices for Maximum Flavor Don’t rush the process of blooming the spices! It really makes a difference in the final flavor.
- Working with Soya Chunks: Texture & Taste Squeezing out the excess water from the soya chunks is key to preventing a soggy curry.
Variations
- Vegan Soya Chunks Curry Simply skip the cream! The curry is delicious without it.
- Gluten-Free Adaptation This recipe is naturally gluten-free!
- Spice Level Adjustment: Mild to Fiery Reduce or omit the red chili powder for a milder curry. Add a pinch of cayenne pepper for extra heat.
- Festival Adaptation: Navratri-Friendly Version Omit the onion and garlic for a Navratri-compliant version.
Serving Suggestions
This soya chunks curry is fantastic with:
- Steaming hot basmati rice
- Warm, fluffy roti or naan
- A side of raita (yogurt dip)
- A simple salad
Storage Instructions
Leftovers can be stored in an airtight container in the refrigerator for up to 3 days. Reheat gently on the stovetop or in the microwave.
FAQs
- What are soya chunks and are they healthy? Soya chunks are made from defatted soybean flour and are a great source of plant-based protein, fiber, and iron. They’re a healthy and affordable alternative to meat.
- Can I use fresh coconut instead of dry coconut powder? You can, but it will change the flavor and texture. If using fresh coconut, grate it finely and use about ½ cup.
- How can I make this curry less spicy? Reduce the amount of red chili powder or remove the green chili altogether. You can also add a touch of sugar to balance the heat.
- What is the best way to remove excess water from soya chunks? Gently squeeze them with your hands after draining. You can also spread them out on a clean kitchen towel to absorb any remaining moisture.
- Can this curry be made ahead of time? Yes! The flavors actually develop even more overnight. Just store it in the refrigerator and reheat when you’re ready to eat.


Neha Deshmukh
Neha holds a B.A. in History with a focus on Indian and world history, including ancient, medieval, and modern periods. At RecipesOfIndia.org — the world’s largest database of Indian recipes — she combines her love for food and history by exploring how India’s past has shaped its culinary traditions.


