- Preheat oven to 200°F (93°C).
- Slice cherry tomatoes in half and arrange cut-side up on a baking sheet.
- Sprinkle a pinch of kosher salt over the tomatoes.
- Bake on the middle rack for 3-4 hours, until shriveled and partially dried.
- Turn off the oven but keep the door slightly ajar; let tomatoes dry further for 2-3 hours.
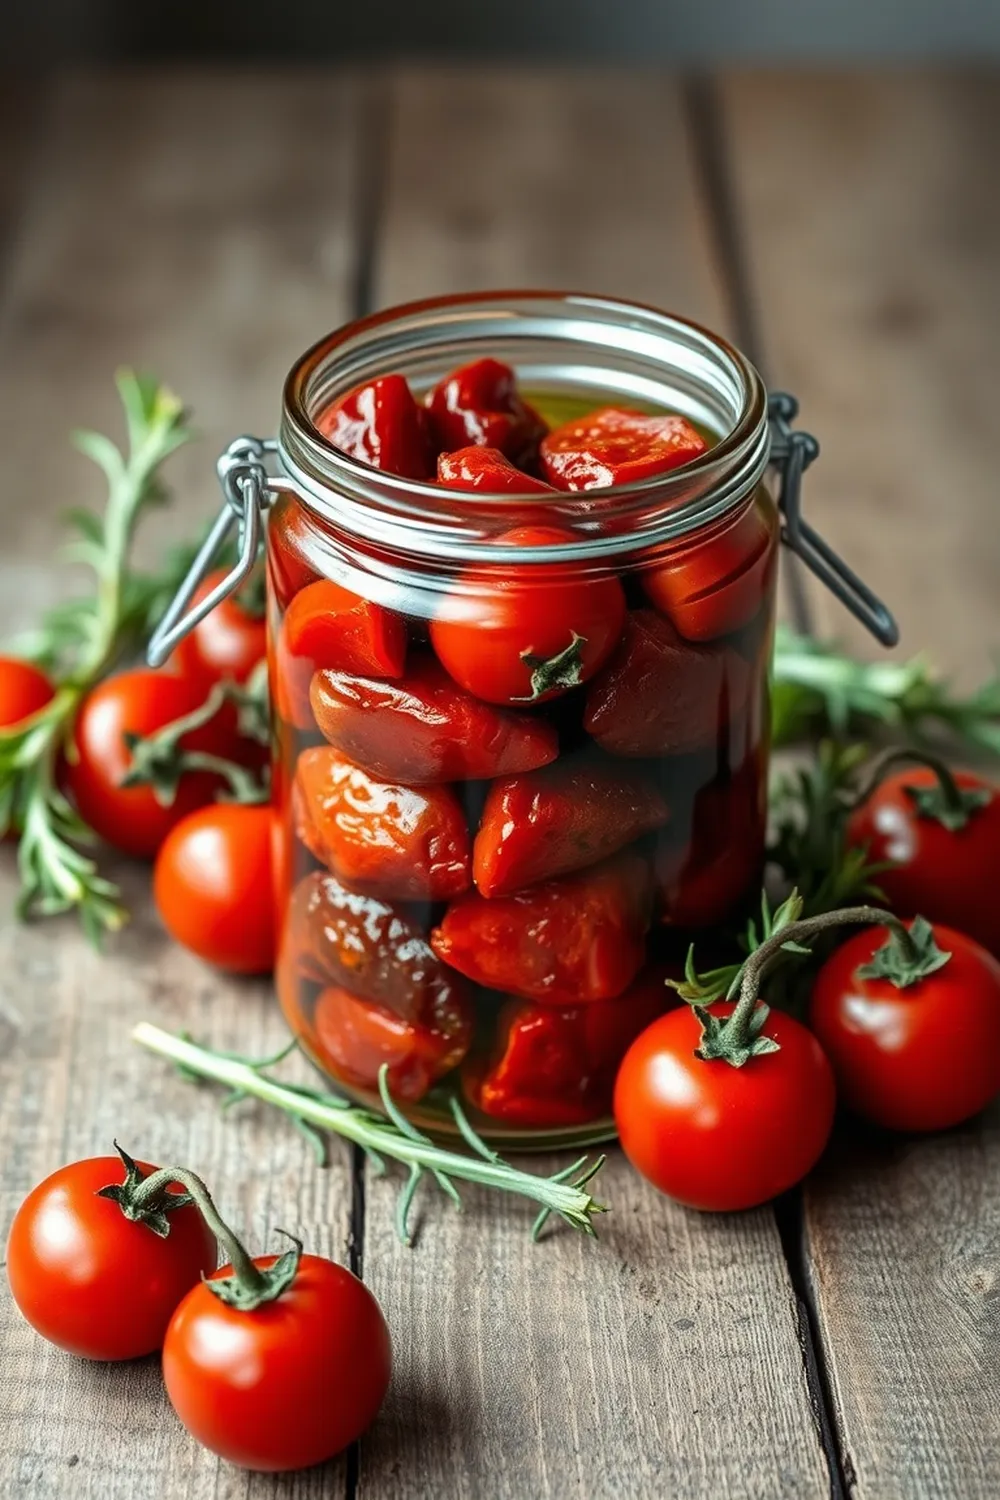
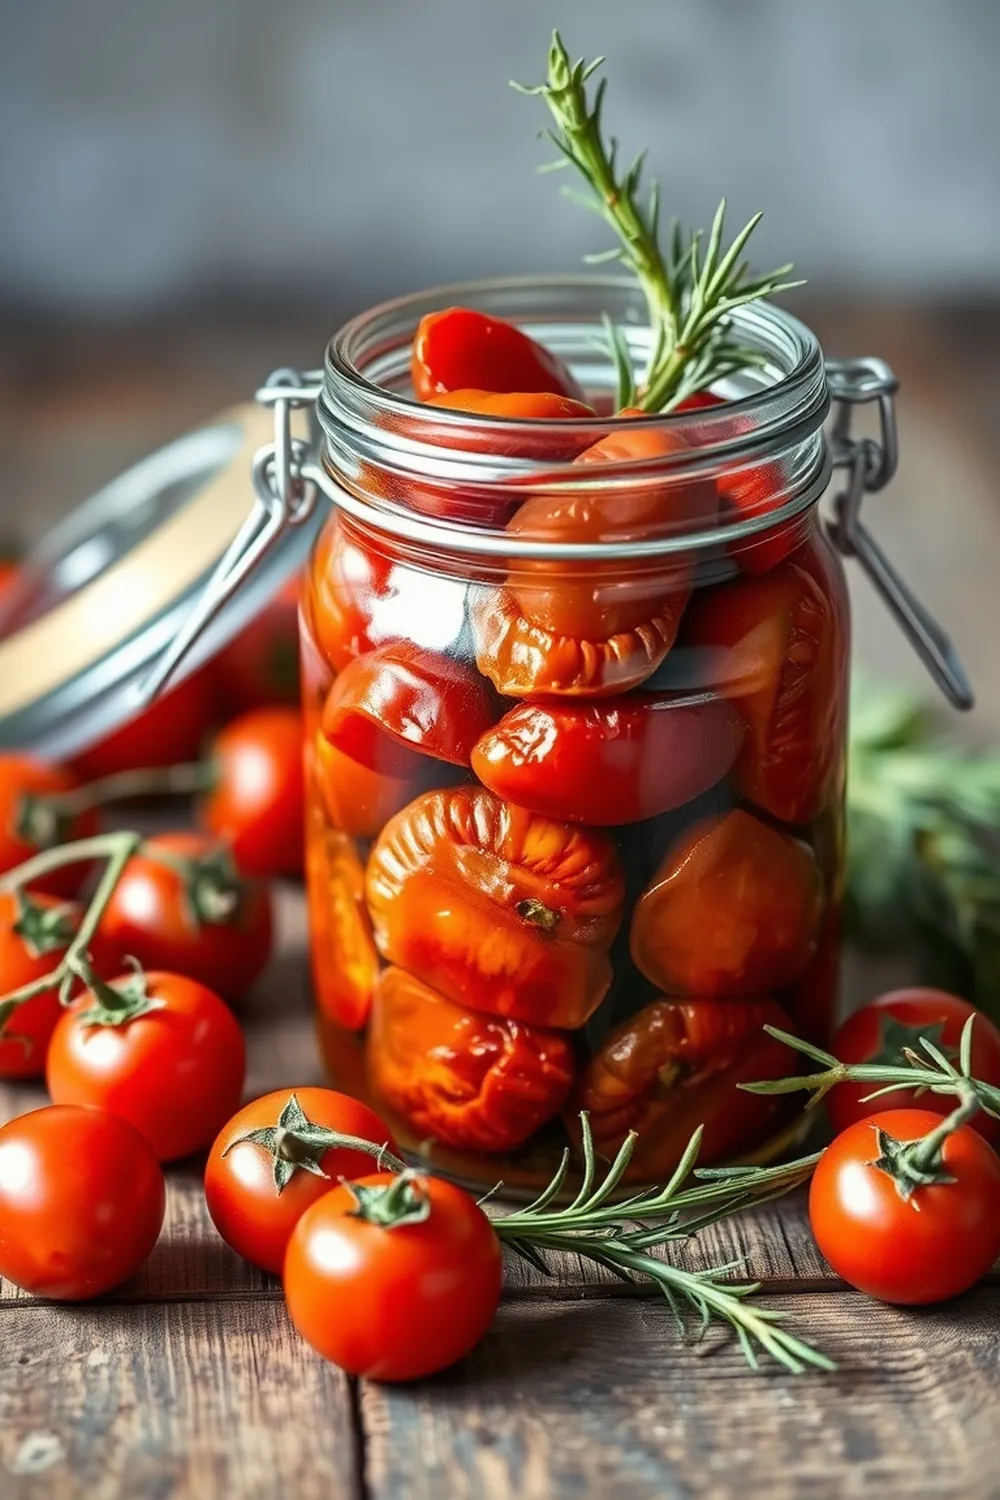
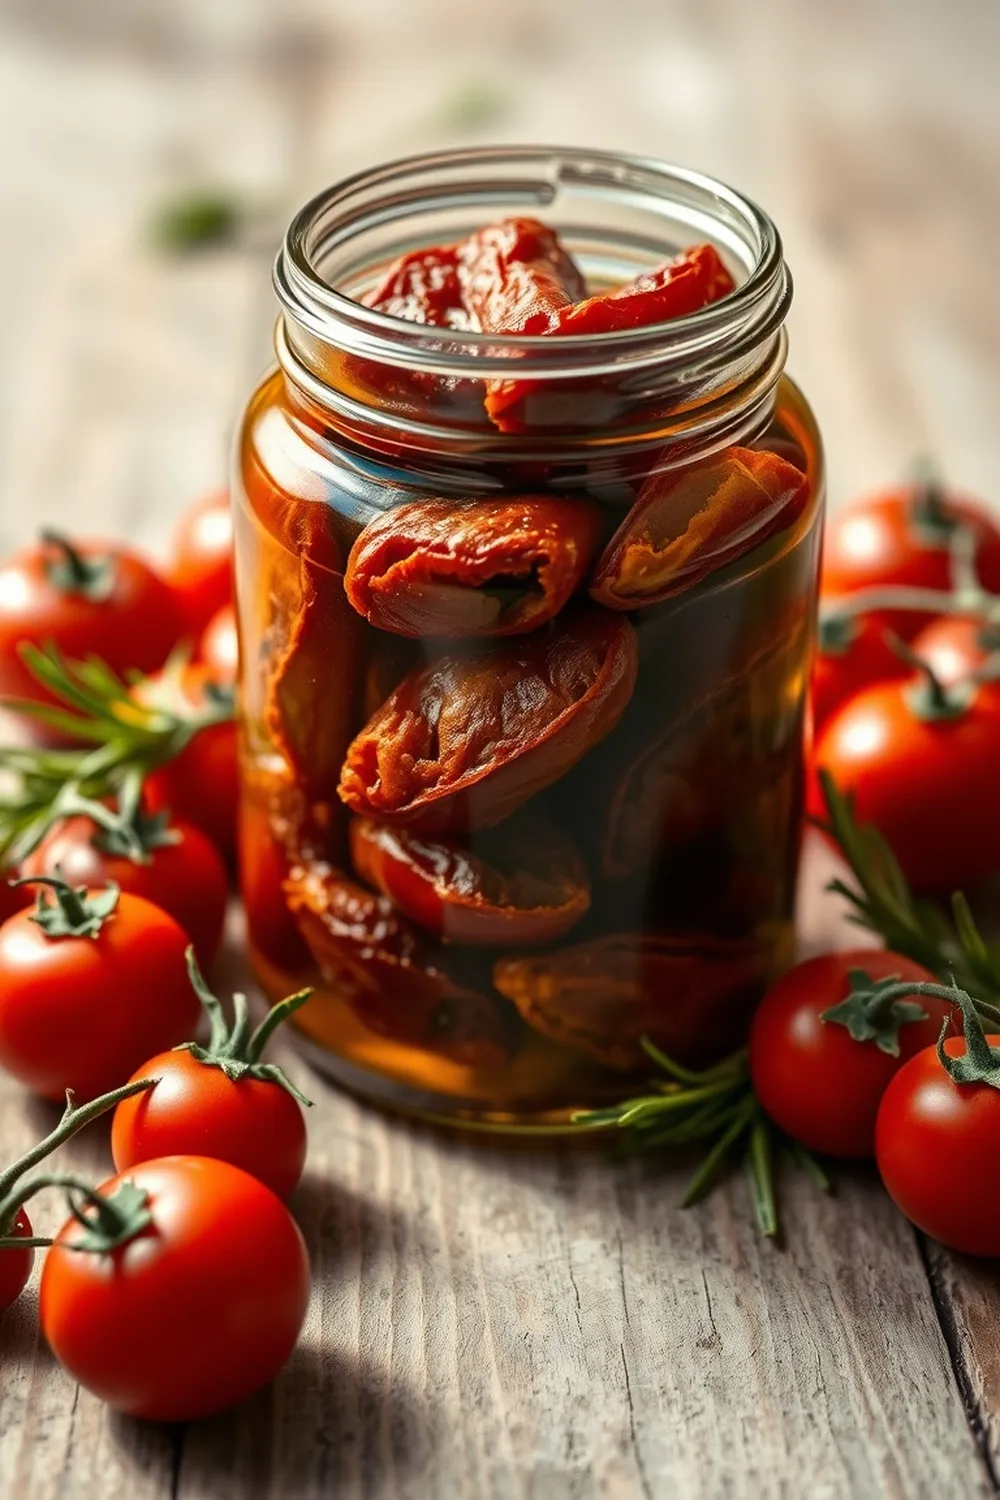
- Transfer dried tomatoes to a sterilized glass jar.
- Cover completely with olive oil, ensuring no tomatoes are exposed.
- Add bay leaves and seal the jar. Store refrigerated for up to 3 months.
- Calories:250 kcal25%
- Energy:1046 kJ22%
- Protein:2.5 g28%
- Carbohydrates:15 mg40%
- Sugar:6 mg8%
- Salt:150 g25%
- Fat:22.5 g20%
Last Updated on 2 months by Neha Deshmukh
Sun-Dried Tomato Recipe – Olive Oil & Bay Leaf Preserved Tomatoes
Hey everyone! There’s just something magical about sun-dried tomatoes, isn’t there? That intense, sweet-savory flavor… they instantly elevate any dish. I first started making my own when I realized how expensive the good quality ones were at the store, and honestly, homemade tastes SO much better. This recipe is super simple, requires minimal effort, and the results are absolutely worth it. Let’s get started!
Why You’ll Love This Recipe
Forget those jarred tomatoes swimming in preservatives! This recipe lets you control exactly what goes into your sun-dried tomatoes – just beautiful tomatoes, fragrant bay leaves, and lovely olive oil. It’s a fantastic way to preserve a summer bounty, and honestly, the aroma that fills your kitchen while they’re drying is heavenly. Plus, homemade sun-dried tomatoes are incredibly versatile. You’ll find yourself adding them to everything!
Ingredients
Here’s what you’ll need:
- 20 oz (about 567 grams) cherry tomatoes
- 1 teaspoon kosher salt
- 2 bay leaves
- Olive oil (enough to cover the tomatoes completely)
Ingredient Notes
Let’s talk ingredients for a sec, because quality really matters here!
- Cherry Tomatoes: I highly recommend using cherry tomatoes for this recipe. They have a naturally higher sugar content and less water than larger tomatoes, which means they concentrate flavor beautifully as they dry. Roma tomatoes can work in a pinch (more on that in the FAQs!), but cherry tomatoes are the star here.
- Olive Oil: Don’t skimp on the olive oil! A good quality extra virgin olive oil will impart its own delicious flavor to the tomatoes. It’s what they’ll be hanging out in for a few months, so make it a good one.
- Bay Leaves: These aren’t just for show! Bay leaves add a subtle, aromatic complexity to the tomatoes. Make sure they’re fresh – you want them fragrant, not dusty.
Step-By-Step Instructions
Alright, let’s get cooking (or rather, drying!).
- First, preheat your oven to 200°F (93°C). We’re going for a low and slow approach here.
- Slice your cherry tomatoes in half and arrange them cut-side up on a baking sheet. Don’t overcrowd the pan – give them a little space to breathe.
- Sprinkle a pinch of kosher salt over the tomatoes. This helps draw out some of the moisture.
- Bake them on the middle rack for 3-4 hours. You’ll know they’re ready when they’ve shriveled up and are partially dried, but still a little bit pliable.
- Now, here’s a little trick I learned: turn off the oven, but keep the interior light on. Let the tomatoes dry further for another 2-3 hours. This gentle drying process really concentrates the flavor.
- Carefully transfer your dried tomatoes to a sterilized glass jar. Sterilizing is important to prevent any unwanted guests from growing!
- Pour in enough olive oil to completely cover the tomatoes, making sure no little guys are peeking out. Add your bay leaves.
- Seal the jar tightly and store it in the refrigerator. They’ll be even more flavorful after a week or two!
Expert Tips
- Don’t rush the drying process. Low and slow is the key to intensely flavored sun-dried tomatoes.
- Use parchment paper. Lining your baking sheet with parchment paper makes cleanup a breeze.
- Check for doneness. The tomatoes should be shriveled but still slightly chewy. If they’re completely brittle, they’ve been dried for too long.
Variations
Want to get creative? Here are a few ideas:
- Spice Level: Add a pinch of red pepper flakes to the tomatoes before baking for a little heat. My friend, Priya, loves adding a generous pinch!
- Herb Infusions: Toss in a sprig of rosemary or thyme with the bay leaves for an extra layer of flavor.
- Drying Time Adjustments: Depending on your oven and the size of your tomatoes, you might need to adjust the drying time. Keep an eye on them!
- Using Different Oils: While olive oil is classic, you could experiment with other oils like avocado oil for a slightly different flavor profile.
Serving Suggestions
Okay, now for the fun part – eating them! Here are a few of my favorite ways to use sun-dried tomatoes:
- Toss them into pasta salads.
- Add them to omelets or frittatas.
- Spread them on crusty bread with ricotta cheese.
- Chop them up and add them to pesto.
- Use the oil they’re preserved in for drizzling over salads or roasted vegetables – it’s liquid gold!
Storage Instructions
Stored properly, your sun-dried tomatoes will last for up to 3 months in the refrigerator. Just make sure they’re completely submerged in olive oil. If you notice any cloudiness or mold, it’s best to discard them.
FAQs
Let’s answer some common questions:
- How do I know if my sun-dried tomatoes have gone bad? Look for any signs of mold, cloudiness in the oil, or an off smell. If you see any of these, toss them.
- Can I use Roma tomatoes instead of cherry tomatoes? You can, but they’ll take longer to dry and won’t have quite the same concentrated flavor. You might want to quarter them instead of halving them.
- What kind of olive oil is best for sun-drying tomatoes? Extra virgin olive oil is the way to go! It has the best flavor and health benefits.
- Can I sun-dry tomatoes without an oven? Traditionally, yes! But it takes much longer and requires consistent sunshine and low humidity. An oven is a much more reliable method.
- How can I rehydrate sun-dried tomatoes for use in recipes? Simply soak them in warm water for about 30 minutes. They’ll plump up beautifully!
Enjoy! I hope you love this recipe as much as I do. Let me know in the comments how yours turn out!
Neha Deshmukh
Neha holds a B.A. in History with a focus on Indian and world history, including ancient, medieval, and modern periods. At RecipesOfIndia.org — the world’s largest database of Indian recipes — she combines her love for food and history by exploring how India’s past has shaped its culinary traditions.