- Heat oil in a pressure cooker. Add cinnamon, cloves, and cardamom to temper.
- Sauté sliced onions until golden brown. Add ginger-garlic paste and cook until fragrant.
- Mix in chopped tomatoes and cook until softened. Add chopped vegetables and sauté for 2 minutes.
- Pour in 1 cup of water, season with salt, and pressure cook for 1-2 whistles.
- Grind coconut, green chilies, fried gram, and fennel seeds into a smooth paste.
- Once the vegetables are cooked, add the ground paste and garam masala. Simmer for 5-6 minutes.
- Adjust gravy consistency with water if needed. Check seasoning and garnish with coriander leaves.
- Serve hot with chapati or dosa.
- Calories:180 kcal25%
- Energy:753 kJ22%
- Protein:4 g28%
- Carbohydrates:24 mg40%
- Sugar:6 mg8%
- Salt:300 g25%
- Fat:8 g20%
Last Updated on 2 months by Neha Deshmukh
Vegetable Kurma Recipe – Authentic Indian Coconut Curry
Introduction
There’s just something so comforting about a warm, flavorful kurma, isn’t there? I remember the first time I tried to make this – it was for a potluck, and I was a little intimidated! But honestly, it’s become a weeknight staple in my house. This Vegetable Kurma is a beautiful blend of flavors, creamy from the coconut, and packed with goodness from all the veggies. It’s a South Indian-inspired dish that’s surprisingly easy to make, and I’m so excited to share my version with you.
Why You’ll Love This Recipe
This Vegetable Kurma is more than just a delicious meal; it’s a hug in a bowl! Here’s why you’ll fall in love:
- Flavorful & Aromatic: The combination of spices creates a truly unforgettable taste.
- Healthy & Nutritious: Loaded with vegetables, it’s a great way to get your daily dose of vitamins.
- Easy to Make: Despite the complex flavors, it’s a surprisingly simple recipe.
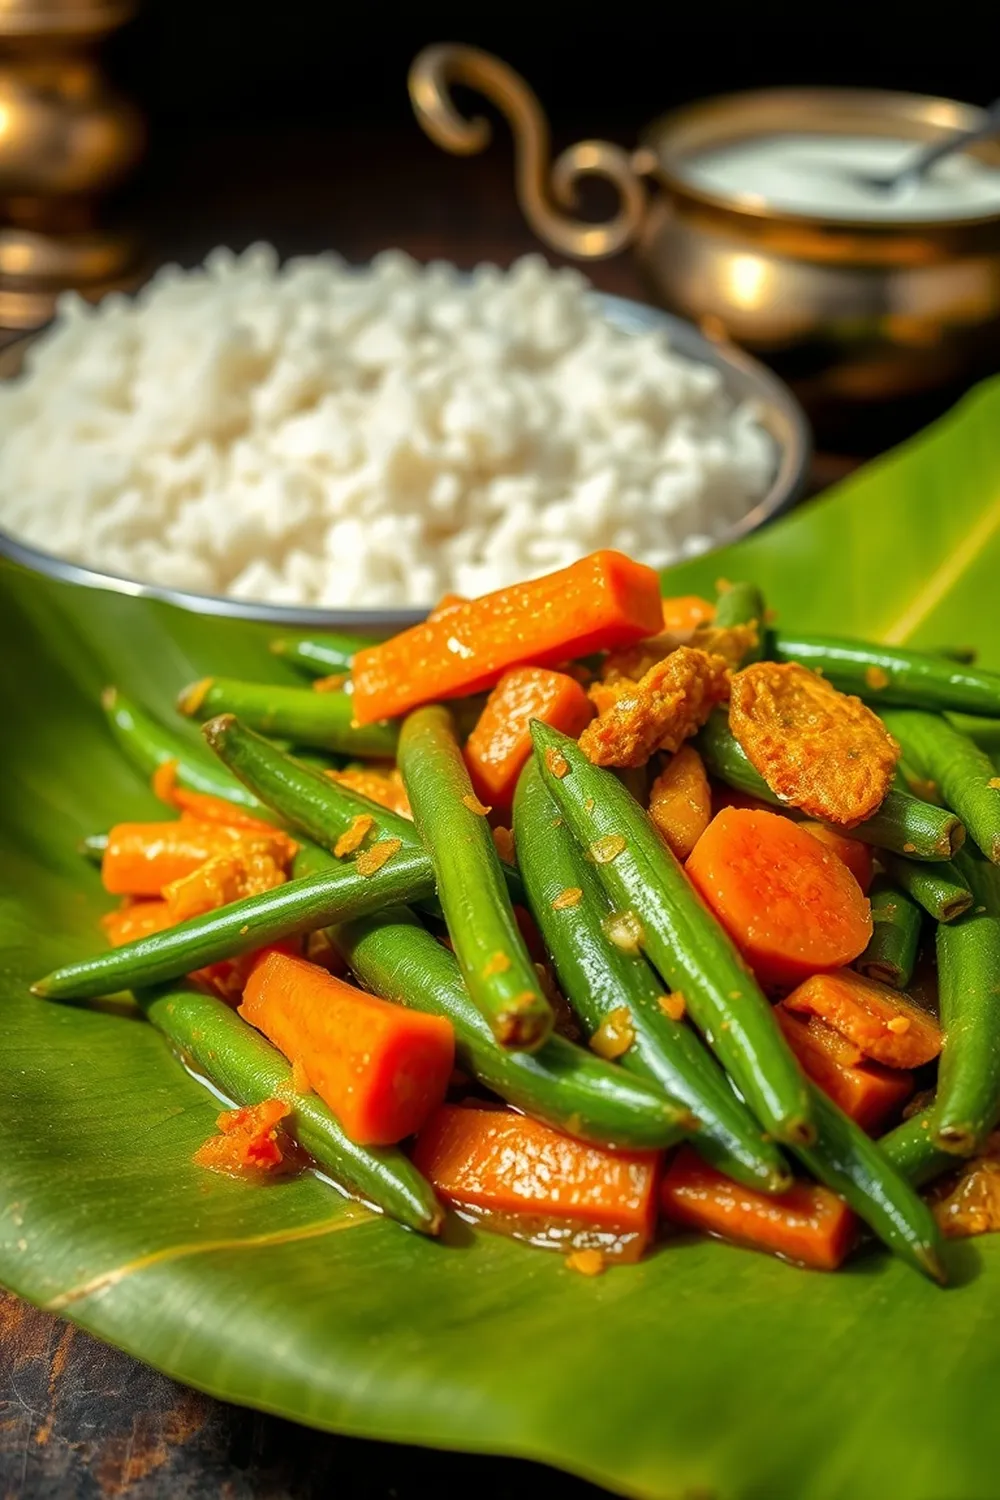
- Versatile: Perfect with rice, roti, chapati, or even dosa!
Ingredients
Here’s what you’ll need to create this delightful Vegetable Kurma:
- 1.5 cups Chopped Vegetables (Carrot, beans, potato, peas) – about 200-250g
- 2 Big onions (sliced)
- 0.5 tsp Ginger & garlic paste
- 1 no Tomato (chopped)
- 1 tsp Garam masala powder
- 0.25 tsp Turmeric powder
- 3 tbsp Grated Coconut
- 2-3 nos Green chilly
- 1 tsp Fried Gram (Pottukadalai)
- 0.5 tsp Fennel seeds
- 1 small Cinnamon stick
- 2 nos Cloves
- 1 no Cardamom
- 2 tbsp Oil
- Coriander leaves (for garnish)
- 1 cup Water (240ml)
- Salt to taste
Ingredient Notes
Let’s talk ingredients! A few things make this kurma special.
- Coconut: Freshly grated coconut is best, but unsweetened desiccated coconut works in a pinch (about 3 tablespoons). It really is the heart of this dish, giving it that signature creamy texture.
- Fennel Seeds (Saunf): Don’t skip these! They add a lovely subtle sweetness and aroma. Lightly toasting them before grinding enhances their flavor even more.
- Fried Gram (Pottukadalai): This is a key ingredient in South Indian cooking. It adds a nutty flavor and helps thicken the gravy. You can find it at Indian grocery stores.
- Vegetables: Feel free to experiment! Traditionally, this kurma uses a mix of carrots, beans, potatoes, and peas. But cauliflower, green beans, or even mushrooms would be lovely additions.
- Spice Level: Adjust the number of green chilies to your liking. I usually use 2 for a mild heat, but you can add more if you prefer it spicier.
Step-By-Step Instructions
Alright, let’s get cooking!
- Heat the oil in a pressure cooker over medium heat. Add the cinnamon stick, cloves, and cardamom. Let them sizzle for about 30 seconds – this is called tempering, and it releases all those wonderful aromas.
- Add the sliced onions and sauté until they turn golden brown. This takes patience, but it’s worth it! A good, caramelized onion base is crucial for flavor.
- Stir in the ginger-garlic paste and cook for another minute until fragrant. You should be able to really smell the garlic and ginger.
- Add the chopped tomatoes and cook until they soften. This usually takes about 5-7 minutes.
- Now, add your chopped vegetables and sauté for 2 minutes. Just a quick toss to coat them in the spices.
- Pour in 1 cup (240ml) of water, season with salt and turmeric powder, and pressure cook for 1-2 whistles. (About 5-7 minutes depending on your pressure cooker).
- While the vegetables are cooking, let’s make the coconut paste. Grind the grated coconut, green chilies, fried gram, and fennel seeds into a smooth paste using a little water if needed.
- Once the pressure has released, open the cooker and check if the vegetables are cooked through. Add the ground coconut paste and garam masala powder.
- Simmer for 5-6 minutes, stirring occasionally, until everything is well combined and the flavors have melded.
- Adjust the gravy consistency with a little water if needed. Give it a final taste and adjust the seasoning.
- Garnish with fresh coriander leaves and serve hot!
Expert Tips
- Don’t overcrowd the pressure cooker. If you’re making a large batch, cook the vegetables in batches.
- For a richer flavor, you can add a tablespoon of cashew paste along with the coconut paste.
- If you don’t have a pressure cooker, you can cook the vegetables in a pot on the stovetop. It will take longer, about 20-25 minutes.
Variations
- My Family’s Favorite: My kids love it when I add a handful of cashew nuts to the gravy for extra richness.
- Paneer Kurma: Add cubes of paneer (Indian cheese) along with the vegetables for a protein-packed meal.
- Mushroom Kurma: Swap the mixed vegetables for mushrooms for a delicious and earthy variation.
Vegan Adaptation
This recipe is naturally vegan! Just ensure your garam masala doesn’t contain any animal-derived ingredients.
Gluten-Free Adaptation
This recipe is also naturally gluten-free.
Spice Level Adjustment
- Mild: Use 1-2 green chilies.
- Medium: Use 2-3 green chilies.
- Spicy: Use 4-5 green chilies, or add a pinch of cayenne pepper.
Festival Adaptations
This Vegetable Kurma is a popular dish during festivals like Onam and Ganesh Chaturthi in South India. It’s often served as part of a traditional sadhya (feast).
Serving Suggestions
This kurma is incredibly versatile! Here are a few ideas:
- Serve with hot, fluffy rice.
- Enjoy with chapati, roti, or paratha.
- Pair with crispy dosa for a South Indian breakfast.
Storage Instructions
Leftover Vegetable Kurma can be stored in an airtight container in the refrigerator for up to 3 days. It also freezes well for up to 2 months.
FAQs
What is the difference between Kurma and Korma?
While the names are similar, there are subtle differences. Kurma generally uses fresh coconut and is more common in South India. Korma often uses yogurt or cream and is more popular in North India.
Can I use frozen vegetables in this recipe?
Yes, you can! Just add them directly to the pressure cooker along with the tomatoes. You might need to adjust the cooking time slightly.
How can I adjust the thickness of the kurma gravy?
If the gravy is too thick, add a little water. If it’s too thin, simmer for a few more minutes to allow it to reduce.
What is fried gram (pottukadalai) and where can I find it?
Fried gram, also known as pottukadalai, is roasted and split chickpeas. It adds a nutty flavor and helps thicken the gravy. You can find it at Indian grocery stores.
Can this kurma be made ahead of time?
Absolutely! You can make the kurma a day or two in advance. The flavors actually develop even more overnight. Just reheat gently before serving.


Neha Deshmukh
Neha holds a B.A. in History with a focus on Indian and world history, including ancient, medieval, and modern periods. At RecipesOfIndia.org — the world’s largest database of Indian recipes — she combines her love for food and history by exploring how India’s past has shaped its culinary traditions.