- Prepare the leaven by mixing starter, water, bread flour, and whole wheat flour. Let it ferment for 4-5 hours.
- Autolyse the dough by combining bread flour, whole wheat flour, and rye flour with water. Rest for 1 hour.
- Incorporate the leaven into the dough and let rest for 30 minutes. Add salt and mix thoroughly.
- Perform stretch and fold sessions every hour for 2-3 hours to strengthen the gluten.
- Soak craisins in orange juice for at least 1 hour, then drain before use.
- Laminate the dough by stretching it into a thin sheet. Fold in orange zest, walnuts, and drained craisins.
- Perform coil folds at 1-hour intervals to distribute the add-ins evenly.
- Shape the dough into a boule and place it seam-side up in a well-floured proofing basket.
- Cold-proof the dough in the refrigerator for 12-18 hours for flavor development.
- Preheat the Dutch oven to 475°F. Score the dough and bake covered for 25 minutes.
- Uncover and bake at 450°F for 30-35 minutes, or until deeply caramelized.
- Cool completely on a wire rack before slicing.
- Calories:217 kcal25%
- Energy:907 kJ22%
- Protein:6 g28%
- Carbohydrates:36 mg40%
- Sugar:4 mg8%
- Salt:293 g25%
- Fat:6 g20%
Last Updated on 6 months ago by Neha Deshmukh
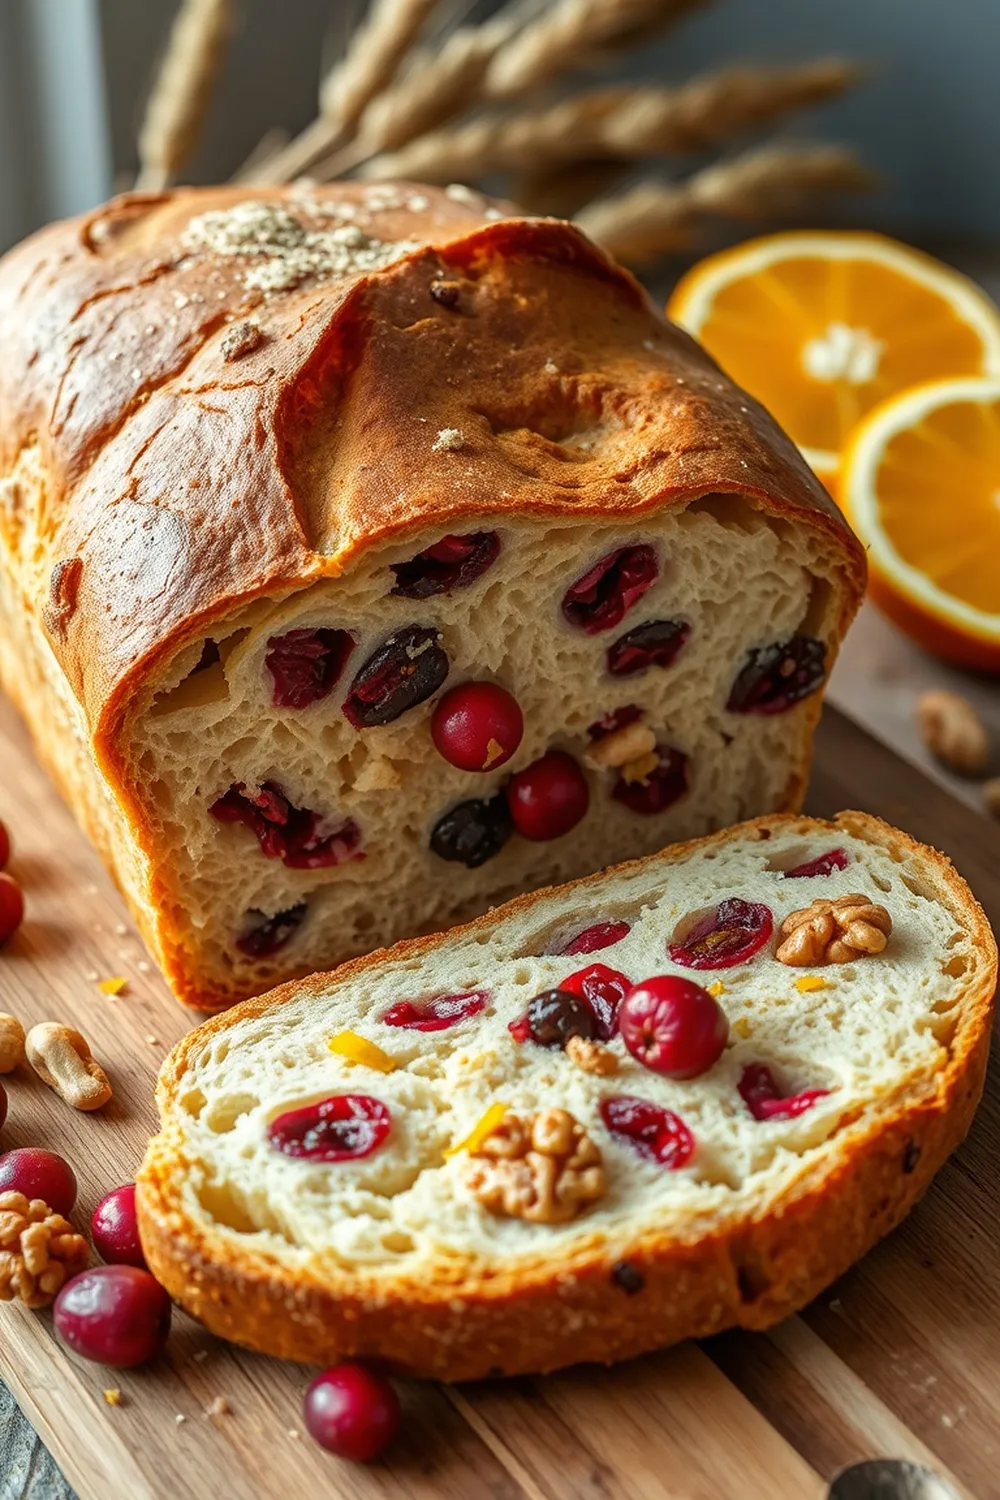
Walnut Craisin Bread Recipe – Authentic Sourdough with Orange Zest
Hey everyone! There’s just something magical about the smell of freshly baked sourdough filling the house, isn’t there? I’ve been experimenting with sourdough for years, and this Walnut Craisin Bread is a recent favorite. It’s a little bit special – the tang of sourdough, the sweetness of craisins, the crunch of walnuts, and a hint of bright orange zest… honestly, it’s a slice of happiness. I first made this for a family gathering and it disappeared fast. I’m so excited to share it with you!
Why You’ll Love This Recipe
This isn’t your average bread recipe. It’s a journey, a little bit of a project, but the reward is so worth it. Here’s why you’ll fall in love:
- Complex Flavor: The sourdough fermentation process develops incredible depth of flavor.
- Texture Perfection: A beautifully crisp crust gives way to a soft, chewy interior.
- Delicious Add-ins: Walnuts and craisins add sweetness, texture, and a delightful chewiness.
- Aromatic Delight: The orange zest brightens everything up, making it irresistible.
Ingredients
Here’s what you’ll need to create this masterpiece:
- 94g Leaven
- 20g Starter
- 30g Bread flour
- 20g Whole wheat Flour
- 50g Water
- 330g Bread flour
- 70g Whole wheat flour
- 30g Rye flour
- 90g Walnuts
- 60g Craisins
- 310g Water
- 30g Orange juice
- 1 unit Orange zest
- 9g Salt
Ingredient Notes
Let’s talk ingredients! Getting these right will make all the difference.
- Starter: A mature and active starter is key. It should be bubbly and doubled in size after feeding. If it’s sluggish, give it a couple more feedings before starting. I usually feed mine 12-24 hours before baking.
- Flour Power: I love using a combination of bread flour, whole wheat, and rye. Bread flour gives structure, whole wheat adds a nutty flavor and texture, and rye contributes to that classic sourdough tang. You can find good quality bread flour at most supermarkets or online.
- Craisin Soak: Don’t skip soaking the craisins in orange juice! It plumps them up and infuses them with a lovely citrusy flavor. About an hour is perfect.
- Water Temperature: Use lukewarm water (around 80-90°F or 27-32°C) for the dough. This helps activate the yeast.
- Salt: Don’t underestimate the importance of salt! It controls fermentation and enhances the flavor.
Step-By-Step Instructions
Alright, let’s get baking!
- Prepare the Leaven: In a small bowl, combine the starter, 30g bread flour, 20g whole wheat flour, and 50g water. Mix well and let it ferment for 4-5 hours, or until doubled and bubbly.
- Autolyse the Dough: In a large bowl, combine 330g bread flour, 70g whole wheat flour, 30g rye flour, and 310g water. Mix until just combined – don’t overmix! Cover and let it rest for 1 hour. This process, called autolyse, helps develop gluten and makes the dough easier to work with.
- Incorporate the Leaven: Add the prepared leaven to the autolysed dough. Mix well, then let it rest for 30 minutes. Now, add the salt and mix thoroughly until everything is well combined.
- Strengthen the Gluten: This is where the stretch and folds come in. Every hour for 2 hours, gently stretch a portion of the dough upwards and fold it over itself. Rotate the bowl and repeat this process several times. This builds strength and elasticity in the dough.
- Soak & Drain: While the dough is resting, soak the craisins in 30g orange juice for about an hour. Then, drain them well.
- Laminate & Add-Ins: Gently stretch the dough into a thin sheet. Sprinkle with orange zest, walnuts, and the drained craisins. Fold the dough over itself several times to distribute the add-ins evenly.
- Coil Folds: Perform coil folds at 1-hour intervals for another 1-2 hours. This helps distribute the add-ins even further and build more strength.
- Shape & Proof: Shape the dough into a boule (round loaf) and place it seam-side up in a well-floured proofing basket. Cover and cold-proof in the refrigerator for 14 hours. This slow fermentation develops incredible flavor.
- Bake It!: Preheat your Dutch oven to 475°F (246°C). Carefully remove the dough from the proofing basket and place it in the hot Dutch oven. Score the top of the dough with a sharp knife or lame. Cover and bake for 25 minutes.
- Finish Baking: Remove the lid and bake at 450°F (232°C) for another 35 minutes, or until the crust is deeply caramelized and golden brown.
- Cool Completely: Let the bread cool completely on a wire rack before slicing. This is the hardest part, I know!
Expert Tips
Want to take your sourdough game to the next level? Here are a few tips:
- Oven Spring: A hot Dutch oven is crucial for achieving a good oven spring (that beautiful rise).
- Scoring: Scoring the dough allows it to expand properly during baking. Experiment with different patterns!
- Fermentation Readiness: Look for signs of fermentation – the dough should be bubbly and slightly jiggly. A poke test can help: gently poke the dough, and if the indentation slowly springs back, it’s ready to bake.
Variations
Let’s get creative!
- Vegan Adaptation: Substitute the starter with a vegan starter and ensure all add-ins are vegan-friendly.
- Gluten-Free Adaptation: This is tricky! Sourdough relies on gluten development. You’d need a carefully balanced gluten-free flour blend (rice flour, tapioca starch, potato starch) and a binder like xanthan gum. It won’t be exactly the same, but can still be delicious.
- Spice Level: Add a teaspoon of cinnamon or cardamom to the dough for a warming spice flavor. My grandmother used to add a pinch of nutmeg – it was divine!
- Festival Adaptations: This bread is perfect for Christmas, Thanksgiving, or any special occasion. You could add dried apricots and pistachios for a festive touch.
Serving Suggestions
This bread is amazing on its own, but even better with…
- A smear of good quality butter.
- A slice of sharp cheddar cheese.
- A drizzle of honey.
- Alongside a hearty soup or stew.
Storage Instructions
- Room Temperature: Store in a paper bag at room temperature for up to 3 days.
- Freezing: Slice the bread and freeze it in an airtight container for up to 3 months.
FAQs
Got questions? I’ve got answers!
1. What kind of starter should I use for this recipe?
A mature, active wheat starter is best. It should double in size within 4-8 hours after feeding.
2. Can I substitute the rye flour with another flour?
You can, but it will slightly alter the flavor. Whole wheat flour is the closest substitute.
3. How do I know when my dough is properly proofed?
Look for bubbles, a slightly jiggly texture, and a slow spring-back when poked.
4. What if I don’t have a Dutch oven? Can I bake this bread differently?
You can bake it on a baking stone or baking sheet. Create steam by placing a pan of hot water in the oven during the first 20 minutes of baking.
5. Can I freeze this sourdough bread?
Absolutely! Slice it first for easy thawing.
6. What is autolyse and why is it important?
Autolyse is a resting period where you combine flour and water. It allows the flour to fully hydrate, developing gluten and improving the texture of the bread.
Happy baking, friends! I hope you enjoy this Walnut Craisin Sourdough as much as my family does. Let me know how it turns out in the comments below!


Neha Deshmukh
Neha holds a B.A. in History with a focus on Indian and world history, including ancient, medieval, and modern periods. At RecipesOfIndia.org — the world’s largest database of Indian recipes — she combines her love for food and history by exploring how India’s past has shaped its culinary traditions.